The blog of dlaa.me

Posts tagged "Silverlight"

Fade Into You [Code to easily animate orientation changes for Windows Phone applications now supports fade, too!]

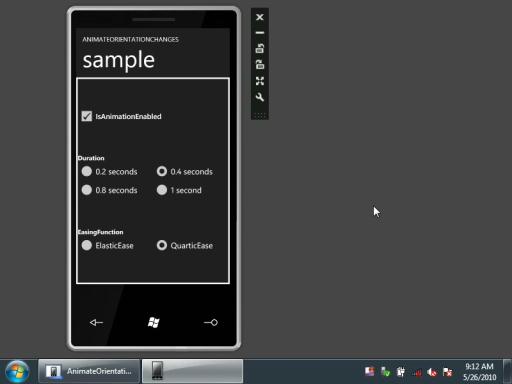
I've already written about my efforts to improve the orientation behavior of Windows Phone applications; while the default behavior of snapping to the new orientation is fast and easy, it lacks a certain amount of panache. So I wrote the AnimateOrientationChangesFrame class to animate changes between portrait and landscape layouts. It works well, and I know of a few upcoming Windows Phone applications that are using it.


Of course, the drawback to animating rotations is that the overhead for complex layouts could be enough to overwhelm the phone's resources. At which point, the animation would become choppy and the beauty of the transition would be lost...

I wanted to provide another option that would still make orientation changes interesting, but would do so more cheaply. And so I've created the FadeOrientationChangesFrame class which (surprise!) fades smoothly between the "before" and "after" orientations. Because of its simpler approach, FadeOrientationChangesFrame doesn't require any additional layout computation from the host application. What's more, its animation of the UIElement.Opacity property makes the animation eligible to run on the compositor thread (AKA the "render thread") where is the place to be when you want smooth, seamless animations!


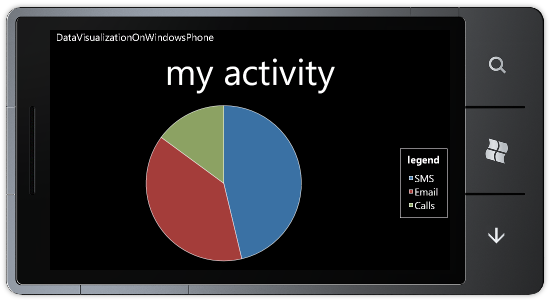
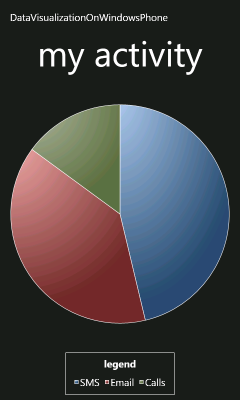
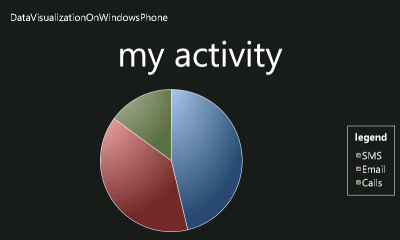
Here's what the sample application looks like part of the way through a fade from portrait to landscape:

FadeOrientationChanges sample


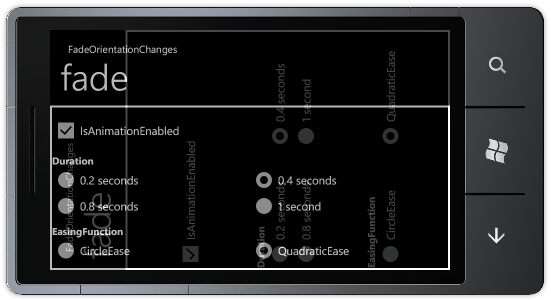
If the sample application for FadeOrientationChangesFrame looks a lot like the one for AnimateOrientationChangesFrame, that's because they're practically the same. In fact, the two *OrientationChangesFrame classes have identical APIs and are wired up in exactly the same manner. If you're using one, you can switch to the other quite trivially; if you're not using either, it's easy to start! :)


[Click here to download the DynamicOrientationChanges sample for Windows Phone 7.]


Notes:

  • Not only do both classes work well with the Windows Phone Developer Tools Beta, they also run happily on the latest internal Tools builds and on real phone hardware.
  • Because I'm now offering two classes for dynamic orientation changes, I've created a dedicated DynamicOrientationChanges assembly for them both to live in. People who wish to use either class can opt to add the relevant .cs file to their project (as before), or they can reference the DynamicOrientationChanges.dll assembly directly. For everyone's convenience, I've put a pre-compiled copy of this assembly in the root of the sample ZIP.
  • Here are the complete directions for adding rotation/fade animation to a new application:
    1. Enable support for orientation changes by making the following change to the XAML for the relevant PhoneApplicationPages (note that rotation is not enabled by default for new pages):
      SupportedOrientations="Portrait"
      SupportedOrientations="PortraitOrLandscape"
    2. Verify (by running in the emulator) the pages you expect to support rotation really do - if things aren't rotating at this point, trying to animate the rotations won't help. :)
    3. Add the AnimateOrientationChangesFrame.cs or FadeOrientationChangesFrame.cs source code file from the sample to your project/solution.

      -OR-

      Add a reference to the pre-compiled DynamicOrientationChanges.dll assembly from the sample download to your project/solution.

    4. Open App.xaml.cs and change the RootFrame initialization in the InitializePhoneApplication method (you may need to expand the Phone application initialization region at the bottom):
      RootFrame = new PhoneApplicationFrame();
      RootFrame = new Delay.AnimateOrientationChangesFrame();

      -OR-

      RootFrame = new Delay.FadeOrientationChangesFrame();
    5. Done; rotations will now be animated! To customize the animation, use the Duration, EasingFunction, and IsAnimationEnabled properties which are all present and continue to work as outlined in the original post.
  • Though the *OrientationChangesFrame classes share a decent amount of code, I have deliberately kept them separate for now so each .cs file is completely self-contained. This makes it easy for anyone to incorporate either class into their project without worrying about pulling in a bunch of dependent files.
  • Fellow Microsoft employee (and former teammate from long, long ago) Mike Calligaro ran across a bug in AnimateOrientationChangesFrame where elements started getting clipped incorrectly after a couple of orientation changes. Looking into this, I discovered that my attempt to save a few cycles by calling InvalidateArrange instead of InvalidateMeasure was somewhat misguided. I changed the implementation to call InvalidateMeasure and that simple tweak fixed the bug. Aside from this, AnimateOrientationChangesFrame is exactly the same as last time.
  • The Beta phone emulator has a bug where it frequently fails to notify applications about an orientation change. This problem has nothing to do with my code (you can reproduce it by enabling rotation for any application), but shows up regularly when playing around with the sample app in the emulator. When the orientation gets "stuck" like this, just rotate a few more times and things sort themselves out. (Fortunately, this problem does not exist on actual phone hardware or on more recent builds of the emulator!)


In today's dynamic world, there's no need to settle for boring transitions - go ahead and spice up your Windows Phone application by making use of FadeOrientationChangesFrame or AnimateOrientationChangesFrame today!

My new home page, rejuvenated [Updated collection of great Silverlight/WPF/Windows Phone Data Visualization resources!]

It's been a few months since I posted my previous collection of Silverlight/WPF Charting links. In the meantime, the April 2010 release of the Silverlight Toolkit was published with support for stacked series and significant performance improvements! And Windows Phone 7 has been steadily building momentum - it's handy that the Data Visualization assembly also works on Windows Phone!

So there's lots of good stuff - here are all the links (FYI: previously published links are gray):

Overviews (100 level)

Scenarios (200 level)

Internals (300 level)

Team Member posts (Partner level)

My posts (Ego level)

Many thanks go out to everyone who has spent time helping people learn how to use Silverlight/WPF/Windows Phone Data Visualization!

PS - If I've missed something useful, please send me a link - I'm always happy to find more great content! :)

PPS - The most recent version of this collection will always be pointed to by http://cesso.org/r/DVLinks. If you're going to create a favorite or link to this post, please use that URL so your link will always be current.

Why didn't I think of that in the first place? [Windows Phone 7 Charting example updated to include reusable, platform-consistent Style and Templates]

I've previously blogged about how to get the Data Visualization assembly from the Silverlight Toolkit/WPF Toolkit working on Windows Phone. It's quite simple with my Data Visualization Development Release 4 and the Windows Phone Developer Tools Beta because it's now as easy as adding a reference to two assemblies and then creating some charts! However, those charts start out with visuals meant for use with Silverlight running in the web browser (white background, etc.), not Silverlight running on Windows Phone (black background, etc.). One of the things I did in a previous post was to customize the appearance of the sample charts so they fit in better with the phone conventions. Because Charting has come up quite a bit with customers lately, I wanted to do a quick follow-up to help make things even easier to use!


Sample in landscape orientation


Accordingly, I've made the following improvements to the DataVisualizationOnWindowsPhone sample:

  • Created the PhoneDataVisualizationResources.xaml file. It contains a ResourceDictionary with PhoneChartStyle, PhoneChartPortraitTemplate, and PhoneChartLandscapeTemplate. These are the same basic custom customized Style and ControlTemplates from before, but now they're named according to the platform convention for resources and bundled in a single, self-contained XAML file. This makes it easy for customers to incorporate the Windows Phone look into their charting applications.
  • Modified the sample to merge the contents of PhoneDataVisualizationResources.xaml into the application-level ResourceDictionary via MergedDictionaries in App.xaml:
    <Application.Resources>
        <!-- Merge resources from PhoneDataVisualizationResources.xaml (Build Action=Page) -->
        <ResourceDictionary>
            <ResourceDictionary.MergedDictionaries>
                <ResourceDictionarySource="/DataVisualizationOnWindowsPhone;component/PhoneDataVisualizationResources.xaml"/>
            </ResourceDictionary.MergedDictionaries>
        </ResourceDictionary>
    </Application.Resources>
    With the customizations now located off in their own dedicated file, the Chart in MainPage.xaml is simple and uncluttered:
    <charting:Chart
        x:Name="myChart"
        Title="my activity"
        LegendTitle="legend"
        Style="{StaticResource PhoneChartStyle}">
        <!-- ... -->
    </charting:Chart>
  • Changed the fills for DataPoints to use a solid color instead of a gradient. The default Brush used to paint the inside of data points has a gradient effect which looks quite nice on the desktop, but that gradient exhibits noticeable color banding on the actual phone because the displays used for mobile devices are often incapable of displaying the full range of colors humans perceive. While it's possible to minimize the impact of this by dithering (here's a nice article that shows how), you don't get that for free. Because gradients aren't consistent with the "Metro" user interface guidelines anyway, I've made all the default colors solid (as seen in the image at the start of the post).
  • Switched to using standard phone resources (ex: PhoneForegroundBrush) where applicable so Charts automatically respect the current phone appearance. Specifically, this enables seamless support for the "Dark" and "Light" phone themes without any effort on the part of the developer/designer.
  • Customized the Legend Template to include a horizontal scroll bar when rendered (horizontally) in Portrait orientation. The default Legend for Landscape orientation already had a vertical scroll bar, so this change makes it possible to scroll long lists in both layouts.
  • Switched to the official Silverlight 3 System.Windows.Controls.dll assembly now that the platform supports using strongly-named assemblies.


[Click here to download the updated Windows Phone 7 Data Visualization sample application.]


Important: After downloading the ZIP file above, you should "unblock" it before extracting its contents to avoid warnings from Visual Studio: Security Warning, You should only open projects from a trustworthy source. and The "ValidateXaml" task failed unexpectedly. System.IO.FileLoadException: Could not load file or assembly .... Unblocking is a simple matter of right-clicking on the ZIP file, choosing Properties from the context menu, then clicking the "Unblock" button in the lower, right-hand corner of the resulting dialog and hitting "OK" or "Apply":

Unblock button in Properties dialog

New phone bits, same pretty charts [Upgraded my Windows Phone 7 Charting example for the Windows Phone Developer Tools Beta]

The recent release of the Windows Phone Developer Tools Beta introduces a variety of notable changes to the Windows Phone platform and I've been meaning to update my Data Visualization on Windows Phone sample so I could continue to refer people to it for educational purposes. (Just like I did when the April Tools Refresh came out.) I finally got some time and have updated the sample so it targets the Beta Tools and works "out of the box".


Sample in portrait orientation Sample in landscape orientation


[Click here to download the updated Windows Phone 7 Data Visualization sample application.]


Rather than relying on an automated project upgrade, I simply diff-ed the existing project against a new project I created width the Beta Tools and made the necessary changes myself in Notepad. It was all pretty straightforward - here are the things that stood out for me:

  • App.xaml.cs: There's a lot more initialization code by default.
  • App.xaml: There's no longer a need to bake all those phone-specific styles into every application, so the default App.xaml is nearly empty (like it should be)! Also, the new PhoneApplicationService events are hooked up by default.
  • SplashScreenImage.jpg: An appropriately-named splash screen is now created and used automatically.
  • MainPage.xaml: The platform-specific Phone* assemblies and default namespaces have shifted around a bit. SupportedOrientations is now set in XAML instead of code.
  • DataVisualizationOnWindowsPhone.csproj: The WINDOWS_PHONE symbol is now #define-ed by default, giving shared code now a standard way of detecting the Windows Phone platform. The phone assembly references are slightly different and the splash screen is included by default.
  • WMAppManifest.xml: The property PlaceHolderString on the DefaultTask element has been renamed.

While I was at it, I also tweaked the way the data source is created (by making it a class and moving it to the Resources section) so now the charts show up at design-time, too. I'm using the exact same System.Windows.Controls.DataVisualization.Toolkit.dll and System.Windows.Controls.dll assemblies as before (see notes 4 and 5 of the previous post for more context) - though there should no longer be a need to "un-sign" the Silverlight Toolkit assembly to use it on Windows Phone.


This was all pretty basic stuff and it's important to note that none of the application code was affected. Changes like this are a natural part of the platform and project templates maturing - and it's great to see improvements like the default styles moving into the platform!

Hopping outside the box [How to: Leapfrog Bindings (bridge DataContexts) in Silverlight and WPF]

The data binding infrastructure for Silverlight and WPF is extremely powerful and makes it easy to write powerful, dynamic applications without worrying about synchronizing the UI with every change to the underlying data. By leveraging this power, developers can think entirely in terms of the data model and be confident that any changes they make will be reflected by the interface automatically.

The way this works is that every element has a DataContext property, and the value of that property is inherited. DataContext can be assigned any object and acts as the default source for all Bindings applied to the element's properties. The object acting as DataContext can be as simple or complex as an application needs and is free to "shape" the data however is most convenient for the UI and Bindings. Collection-based controls like ItemsControl (and its subclasses ListBox, TreeView, etc.) automatically set the DataContext of their containers to the specific item they represent. This is what you'd expect and enables a great deal of flexibility when displaying collections. However, each element has a only one DataContext - so sometimes it's useful to "reach outside" that and bind to properties on some other object.

The good news is that there's an easy way to leapfrog the DataContext and "bridge" the two elements! The trick is to use an ElementName Binding to point to that other element - then to root the Binding's Path at that element's DataContext and "dot-down" to the property of interest. An example should make things clearer...


LeapFroggingDataContexts sample

The sample above has an application-wide DataContext model object ApplicationViewModel containing a bool property ShowHeight that's TwoWay-bound to the CheckBox control. For convenience, ShowHeight is also exposed as a Visibility value via HeightVisibility - which is much more convenient to bind the Visibility property to. There's also a Mountains property containing a collection of MountainViewModel model objects. Each mountain in the list is meant to show or hide its height according to the setting on ApplicationViewModel - but because the DataContext of the ListBoxItem containers is set to instances of MountainViewModel, they can't "see" the HeightVisibility property... The most direct option is probably to propagate this value "down" to the MountainViewModel instances by adding a property to the class for that purpose and keeping it in sync with the "real" property on ApplicationViewModel.

However, that feels like a bit of overkill for the current situation. Instead, if we just "leapfrog" the Binding in the item content, we can make use of the ApplicationViewModel directly and everything stays nice and simple!


[Click here to download the Silverlight 4 source code for the LeapFroggingDataContexts sample.]


Here's what it looks like in XAML:

<UserControl x:Class="LeapFroggingDataContexts.MainPage"
    xmlns="http://schemas.microsoft.com/winfx/2006/xaml/presentation"
    xmlns:x="http://schemas.microsoft.com/winfx/2006/xaml"
    xmlns:local="clr-namespace:LeapFroggingDataContexts">

    <UserControl.Resources>
        <local:ApplicationViewModel x:Key="ApplicationViewModel"/>
    </UserControl.Resources>

    <Grid
        x:Name="LayoutRoot"
        DataContext="{StaticResource ApplicationViewModel}"
        Width="150"
        HorizontalAlignment="Center"
        VerticalAlignment="Center">

        <Grid.RowDefinitions>
            <RowDefinition Height="Auto" />
            <RowDefinition/>
        </Grid.RowDefinitions>

        <CheckBox
            Grid.Row="0"
            Content="Show height"
            IsChecked="{Binding ShowHeight, Mode=TwoWay}"/>

        <ListBox
            Grid.Row="1"
            ItemsSource="{Binding Mountains}">
            <ListBox.ItemTemplate>
                <DataTemplate>
                    <StackPanel Orientation="Horizontal">
                        <TextBlock Text="{Binding Name}"/>
                        <TextBlock
                            Text="{Binding Height, StringFormat=' [{0:n0}m]'}"
                            Visibility="{Binding DataContext.HeightVisibility, ElementName=LayoutRoot}"/>
                    </StackPanel>
                </DataTemplate>
            </ListBox.ItemTemplate>
        </ListBox>
    </Grid>
</UserControl>

ElementName points the Binding at an element with the DataContext of interest, then the Path selects the DataContext as a starting point (an instance of the ApplicationViewModel class in this case), hooks up to that object's HeightVisibility property - and we're done!


While architectural purists might argue this technique is bad form, I've seen it come in handy for enough customer scenarios that it seems a worthwhile approach to keep in mind. Please don't abuse it - but feel free to use it! :)

Spin Spin Sugar [Updated code to easily animate orientation changes for any Windows Phone application]

A few weeks after the initial release of the Windows Phone Developer Tools in April, I blogged a sample showing how to easily animate device orientation changes for Windows Phone 7 applications. I noted at the time that the default behavior for application projects is no animation - the app immediately switches to the new orientation when the device is rotated (click here for a brief video of the default behavior). While this is clearly the simplest approach, I wanted to enable something a little fancier by smoothly animating the application's rotation from one orientation to another - just like the built-in applications do.

To show what I'm talking about, here's a video of my implementation running on the emulator:

Video of animated orientation change behavior

FYI: The buttons in the video rotate the device one quarter turn clockwise or counter-clockwise. I begin by rotating counter-clockwise once, then clockwise once back to the starting orientation, then clockwise three more times to loop all the way around. And then show off just a bit. :)

Note: I made that video back in April; the emulator looks a little different now, but the animation works just the same.


As of yesterday's release of the Windows Phone Developer Tools Beta, some of the platform changes have invalidated my original implementation. But that's okay, because I've updated the code to work with the latest release - and made a few improvements along the way! :)


[Click here to download the AnimateOrientationChanges sample for Windows Phone 7.]


Notes:

  • [Please review the "Notes" section of my previous blog post for additional information.]
  • The implementation is now based off PhoneApplicationFrame which simplifies things a bit by avoiding the need to track state across pages. Conveniently, this also makes the setup process a bit easier. What's more, I was able to get rid of the TranslateTransform based on a suggestion by Seema Ramchandani, one of the Silverlight performance experts. And I've added a bit of code to avoid unnecessary calls to InvalidateArrange which helps free up a few extra CPU cycles.
  • One of my earlier concerns was that I hadn't been able to run code on actual Windows Phone hardware, so I wasn't sure the snappy performance I saw under the emulator carried over to the device. Fortunately, I've gotten access to an actual prototype and have verified the sample application runs quite smoothly in the real world, thank you very much. :)
  • That said, my sample is pretty simple - Seema expressed concern about possible slowness for the more complex layouts real applications might use. And while I share her concerns, the options for improving the situation in such cases all seem like they'll degrade the visual quality of the rotation animation. The current implementation gives the best quality it can on any device for any layout (and automatically degrades as necessary to catch up if it falls behind); the alternatives create animations that just won't be as smooth. :( So I'm reluctant to start down that path until I know it's necessary. Please let me know what your experience is - whether good or bad - so I can make an informed decision!
  • Here are the complete directions for adding rotation animation to a new application (if you're upgrading an existing application, please undo all the previous install steps first!):
    1. Enable support for orientation changes by making the following change to the XAML for the relevant PhoneApplicationPages (note that rotation is no longer enabled by default for new pages):
      SupportedOrientations="Portrait"
      SupportedOrientations="PortraitOrLandscape"
    2. Verify (by running in the emulator) the pages you expect to support rotation really do - if things aren't rotating at this point, trying to animate the rotations won't help. :)
    3. Add the AnimateOrientationChangesFrame.cs code file from the sample to your project/solution.
    4. Open App.xaml.cs and change the RootFrame initialization in the InitializePhoneApplication method (you may need to expand the Phone application initialization region at the bottom):
      RootFrame = new PhoneApplicationFrame();
      RootFrame = new Delay.AnimateOrientationChangesFrame();
    5. Done; rotations will now be animated! To customize the animation, use the Duration, EasingFunction, and IsAnimationEnabled properties which are all still present and continue to work as outlined in the previous post.
  • The phone emulator has an annoying bug where it frequently fails to notify applications about an orientation change that just happened. This problem has nothing to do with my code (you can reproduce it by enabling rotation for any application), but shows up regularly when playing around with the sample app in the emulator. When the orientation gets "stuck" like that, just rotate a few more times and things sort themselves out. (Fortunately, this problem does not exist on actual phone hardware!)
  • The PageOrientation.PortraitDown value remains unsupported with this release because the platform still does not support it.


On the one hand, animating orientation changes is kind of a whimsical behavior to add to an application - but on the other hand, it helps to create the kind of pleasing, platform-consistent experience that users appreciate and enjoy. AnimateOrientationChangesFrame isn't going to turn a crummy application into a good one - but it just might add some polish to help turn a good application into a great one.

I've had fun creating this sample - I hope you enjoy using it!

Banana SplitButton [A WPF-specific fix for SplitButton and some code analysis improvements for the Silverlight version, too]

I've previously written that one of my ContextMenu test cases for the April '10 release of the Silverlight Toolkit was to implement a quick "split button" control for Silverlight using Button and ContextMenu. Though it wasn't my goal to build a general-purpose control for widespread use, there's been a lot of interest in SplitButton/MenuButton and I followed up with a few fixes for the Silverlight version and "official" support for WPF.


SplitButton and MenuButton


That might have been the end of the story - until Fabio Buscaroli contacted me to report an issue he was seeing with the WPF version (follow our exchange here). At first, I thought the problem was related to the DataContext not inheriting properly - and while that was true, it wasn't the whole story! When Fabio told me the tweak for DataContext I'd suggested didn't solve his RoutedCommand scenario, I had a look at a simple example he posted and realized the DataContext problem was a symptom of a larger issue: that the ContextMenu wasn't a logical child of the SplitButton. As soon as I solved that problem, it fixed Fabio's scenario and the related DataContext issue I'd discovered during my own investigation.

Aside: None of this applies to Silverlight because that platform doesn't expose the notion of a logical tree the way WPF does.


While I was working on this fix, I noticed full code analysis wasn't enabled for the SplitButton assemblies; I turned it on and addressed the handful of warnings it generated. Most of the changes won't matter to you, but one of them will: the namespace for SplitButton/MenuButton has changed. These classes now live in the Delay namespace - which is consistent with the rest of the sample code I post to my blog. Upgrading existing projects to the latest code will require a tweak of the XAML's "xmlns:" prefix and/or a tweak of the code's "using" statements. Otherwise, there have been no behavior changes to the functionality of SplitButton on Silverlight or WPF, so everything else should continue to work the same as before.


[Click here to download the complete Silverlight/WPF source code for SplitButton/MenuButton and the sample application shown above.]


It's been great to see the positive response SplitButton and MenuButton have generated. Thanks for everyone's help trying these controls out, finding issues, and reporting them!

Breaking up (lines) is (not) hard to do [Tip: Put XAML attributes and elements on multiple lines so the markup is easy to read and work with]

Tip

Put XAML attributes and elements on multiple lines so the markup is easy to read and work with

Explanation

The last few tips have dealt with DependencyProperty issues. Now it's time for something completely different: XAML. While it's nice to pretend XAML editing can all be done in a design tool like Visual Studio or Expression Blend, I've always felt that XAML should be pleasant for people to work with, too. Therefore, it's worthwhile to establish a common approach to XAML formatting. What I find works well is to put attributes and elements on separate lines with a single indent for continuations and nesting. (Aside: I make an exception for elements with a single attribute to keep simple things compact.) I also tend to order properties according to importance, starting with the most significant ones and ending with the least. I consider the x:Name of an element to be the most important, so it typically comes first. Attached properties also rank high in my book and are usually next. After that, I tend to list common properties (ex: ContentControl.Content and TextBlock.Text) first and formatting properties (FrameworkElement.HorizontalAlignment and .Margin) closer to the end. In addition to keeping lines short and easy to read, this approach is very revision control-friendly - by which I mean that edits, adds, and removes all show up unambiguously. Sometimes people forget that markup is code, too - please treat it with the same respect and discipline. :)

Good Example

<Button
    x:Name="TheButton"
    Grid.Row="0"
    Content="Click me"
    Click="TheButton_Click"
    HorizontalAlignment="Center"
    Margin="10">
    <Button.Background>
        <SolidColorBrush Color="Pink"/>
    </Button.Background>
</Button>

More information

Revisiting the Code Not Taken [Updated analysis of two ways to create a full-size Popup in Silverlight]

Earlier this year I wrote about two approaches for creating a Popup to overlay the entire Silverlight plug-in. I began by showing the technique most people start with and then demonstrated a rather surprising side-effect of that approach. Here's the relevant screen shot:

A quirk of handling the Resized event on Silverlight 3

Unless you've read the original post, the problem may not be obvious - here's what I said at the time:

But something is still wrong in the image above... If you look carefully, you can see that the browser zoom is set at 50% - yet somehow the image is sized correctly despite us not doing any work to handle the browser's zoom setting yet. How can that be? Hold on, Sherlock, there's another clue in the image: look at the size of the buttons. Yeah, those buttons are not the size they should be for the 50% zoom setting that's active (refer back to the previous image if you don't believe me). Those buttons are at the 100% size - wha??

Aside: Hey, don't feel bad, it weirded me out, too. :)

It turns out that when you attach an event handler to the Resized event, Silverlight 3 disables its support for browser zoom. The reason being that Silverlight 3 assumes the application has chosen to handle that event because it wants full control over the zoom experience (via ZoomFactor and Zoomed, perhaps). Now that's really kind of thoughtful of it and everything - but in this case it's not what we want. In fact, that behavior introduces a somewhat jarring experience because the graphics visibly snap between 50% and 100% as the Resized event handler is attached and detached.


Well, that was then and this is now: I'm pleased to report that Silverlight 4 does not have the troublesome "hooking Resized disables browser zoom" behavior! Consequently, projects targeting Silverlight 4 are free to hook the Resized event without worrying that their browser zoom behavior will be compromised. Yay!

Aside: Of course, projects targeting Silverlight 3 (or previously compiled for it) and running on Silverlight 4 will continue to see the same Silverlight 3 behavior. This is because Silverlight 4 maintains backward compatibility with previous versions to avoid "breaking the web" when a new version comes out. Specifically, applications written for version N of Silverlight are expected to run the same on version N+M - even when there have been changes to the relevant functionality after version N was released.


Now that it's possible, I've updated the sample to demonstrate the desired behavior on Silverlight 4 by making the following tweak to the Application.Current.Host.Content portions:

EventHandler rootResized = delegate
{
    child.Width = root.ActualWidth / root.ZoomFactor;
    child.Height = root.ActualHeight / root.ZoomFactor;
};

Everything else remains the same, and now the Application.Current.Host.Content approach works almost as well as the Application.Current.RootVisual approach I recommended previously (though the image still flickers when changing the browser zoom):

Correctly sizing the Popup to cover the plug-in


With both approaches nearly equivalent on Silverlight 4, you might wonder if I'd like to revise my earlier recommendation to prefer the RootVisual-based approach... Well, I would not! I still feel the RootVisual approach is simpler and easier to understand, so I'll continue to use it myself and recommend it to others. However, there's no longer a compelling reason not to use the Content-based approach, so I'm cool if that's your personal preference. :)


[Click here to download the complete source code for the original sample (a Visual Studio 2010 (Beta 2) project targeting Silverlight 3)]

[Click here to download the complete source code for the new sample (a Visual Studio 2010 project targeting Silverlight 4)]

SplitButtoning hairs [Two fixes for my Silverlight SplitButton/MenuButton implementation - and true WPF support]

One of my ContextMenu test cases for the April '10 release of the Silverlight Toolkit (click here for the full write-up) was to implement a quick "split button" control for Silverlight using Button and ContextMenu. In that post, I cautioned that my goal at the time was to do some scenario testing, not to build the best SplitButton control ever. However, what I came up with seemed to work pretty well in practice and I figured folks could probably use the code mostly as-is.

And it seems like they did - because I got two bug reports in that post's comments section! :)

SplitButton and MenuButton


Let me address them in reverse order:

The position of the ContextMenu was wrong when the browser is zoomed: True enough - though I'm going to ask for a bit of leniency here because the cause of the misalignment is actually a bug in Silverlight (which I've already reported). It seems the results of a call to element.TransformToVisual(Application.Current.RootVisual) or element.TransformToVisual(null) are not consistent for elements that are vs. are not inside a Popup control when the browser is zoomed (in or out). As a result, the SplitButton code to position the menu got inconsistent data and was unable to place the menu correctly. I've tweaked the code slightly to accommodate the underlying issue and now the menu is properly aligned at any zoom setting.

While I was at it, I figured it might be nice if the menu moved around with the SplitButton as the user resized the browser or changed the zoom while the menu was displayed. This is admittedly an edge case, but it's easy enough to handle by hooking the LayoutUpdated event while the menu is displayed (and only while it's displayed!), so I did that and now the menu sticks to the button and refuses to be shaken off. :)

The code didn't work on WPF: I had a footnote claiming my Silverlight implementation should work on WPF as well, though I hadn't tried it myself. It turns out that statement is mostly true - except for the positioning logic which bumps into an subtle API incompatibility with the TransformToVisual method. (Noticing a pattern here?) In the process of getting things working for WPF, I realized the code to position the menu could be simplified somewhat with the (WPF-only) TranslatePoint method. Therefore, the actual positioning logic is a tad different across the two platforms ("a tad" == 4 lines of code) while everything else stays the same. This time when I claim SplitButton and MenuButton work on WPF, it's because I've tried it. :)

In fact, I've added a new, WPF-specific assembly (SplitButtonWpf) and demo (SplitButtonWpfSample) to the sample code associated with this post. Which means there is a dedicated assembly containing SplitButton and MenuButton for both platforms as well as a separate sample application for each!


[Click here to download the complete Silverlight/WPF source code for SplitButton/MenuButton and the sample application shown above.]


With those changes in place (and an unrelated key handling tweak for WPF), I feel even better about the prospects of using SplitButton and MenuButton in a real application. Naturally, if something else comes up, please let me know. Otherwise, I hope you find it useful!