The blog of dlaa.me

Posts tagged "WPF"

The source code IS (still) the executable [Updated CSI, a C# interpreter (with source and tests) for .NET 4]

I published CSI, a simple C# interpreter, exactly one year ago. In that introductory post, I explained how CSI offers a nice alternative to typical CMD-based batch files by enabling the use of the full .NET framework and stand-alone C# source code files for automating simple, repetitive tasks. CSI accomplishes this by compiling source code "on the fly" and executing the resulting assembly seamlessly. What this means for users is that it's easy to represent tasks with a simple, self-documenting code file and never need to worry about compiling a binary, trying to keep it in sync with changes to the code, or even tracking project files and remembering how to build it in the first place!

Aside: The difference may not seem like much at first, but once you start thinking in terms of running .CS files instead of running .EXE files, things just seem to get simpler and more transparent! :)

And I'm happy to say that today, on the first birthday of CSI's public introduction, I'm releasing a new version!


[Click here to download CSI for .NET 4.0, 3.5, 3.0, 2.0, and 1.1 - along with the complete source code and test suite.]


Notes:

  • Today's release of CSI includes CSI40.exe, a version of CSI that uses the .NET 4 Beta 2 Framework to enable the execution of programs that take full advantage of the latest .NET Framework! Correspondingly, the -R "include common references" switch now includes the new Microsoft.CSharp.dll and System.Xaml.dll assemblies that are part of .NET 4. This new version of CSI makes it easy to take advantage of the late-binding dynamic type, the push-based IObservable interface, the handy Tuple class, or any of the other neat, new features of .NET 4.
  • CSI previously required a program's entry point be of the Main(string[] args) kind and would fail if asked to run a program using the (also valid) Main() form. This restriction has been lifted and all new flavors of CSI will successfully call into a parameter-less entry point.
  • CSI could formerly fail to execute programs requiring the single-threaded apartment model. While this probably wasn't an issue for most people because apartment models don't matter much in general, if you were working in an area where it did matter (like WPF), things were unnecessarily difficult. No longer - CSI's entry point has been decorated with the STAThread attribute, and it now runs STA programs smoothly.
  • Please note that I have not updated the .NET 1.1 version of CSI, CSI11.exe, for this release. There don't seem to be enough people running .NET 1.1 (and expecting updates!) for it to be worth creating a virtual machine and installing .NET 1.1 just to compile a new version of CSI for that platform. Therefore, the version of CSI11.exe that comes with this release is the previous version and doesn't include the changes described above.
  • The CSI.exe in the root of the release folder corresponds to the .NET 3.5 version of CSI; this is the "official" version just as it was with the previous release. The file CSI40.exe in the same folder is the .NET 4 Beta 2 version of CSI (the obvious heir apparent, but not king quite yet...). Previous versions (CSI30.exe, CSI20.exe, and CSI11.exe) can be found in the "Previous Versions" folder.
  • The -R "include common references" switch of the .NET 3.5 version of CSI no longer includes a reference to System.Data.DataSetExtensions.dll because that assembly is unlikely to be used in common CSI scenarios. If needed, a reference can be added via -r System.Data.DataSetExtensions.dll in the usual manner. (The .NET 4 version of CSI's -R doesn't reference this assembly, either, but because this is the first release of CSI40.exe, it's not a breaking change.)


For fun, here's an example of the new Main() support:

C:\T>type Main.cs
public class Test
{
  public static void Main()
  {
    System.Console.WriteLine("Hello world");
  }
}

C:\T>CSI Main.cs
Hello world


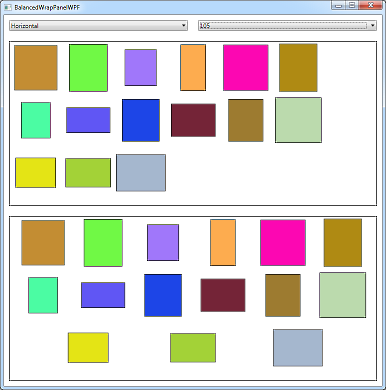
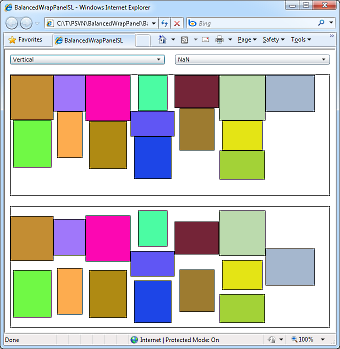
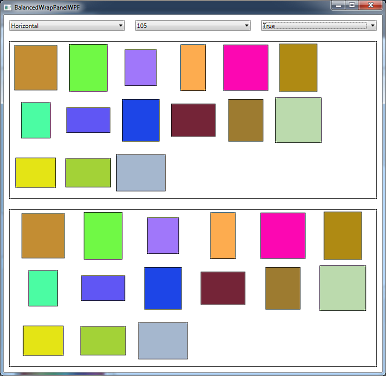
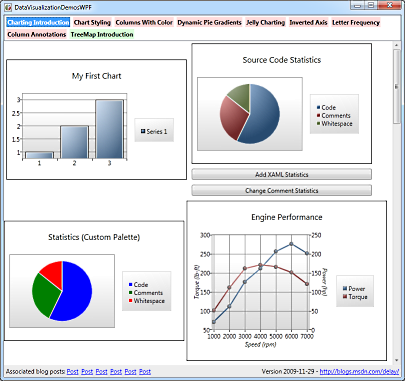
And here's an example of the new ability to run WPF code. Note that I've used the RegisterCSI.cmd script (included with the release; see here for details) to register the .CSI file type with Windows to make it even easier to run CSI-based programs. (And by the way, check out how easy it is to output the default style of a WPF control!)

C:\T>type WpfDefaultStyleBrowser.csi
using System;
using System.Windows;
using System.Windows.Controls;
using System.Windows.Markup;
using System.Xml;

class WpfDefaultStyleBrowser
{
    [STAThread]
    public static void Main()
    {
        Style style = (new FrameworkElement()).FindResource(typeof(ContentControl)) as Style;
        XmlWriterSettings settings = new XmlWriterSettings();
        settings.Indent = true;
        settings.NewLineOnAttributes = true;
        settings.OmitXmlDeclaration = true;
        XamlWriter.Save(style, XmlWriter.Create(Console.Out, settings));
    }
}

C:\T>WpfDefaultStyleBrowser.csi
<Style
  TargetType="ContentControl" xmlns="http://schemas.microsoft.com/winfx/2006/xaml/presentation">
  <Style.Resources>
    <ResourceDictionary />
  </Style.Resources>
  <Setter
    Property="Control.Template">
    <Setter.Value>
      <ControlTemplate
        TargetType="ContentControl">
        <ContentPresenter
          Content="{TemplateBinding ContentControl.Content}"
          ContentTemplate="{TemplateBinding ContentControl.ContentTemplate}"
          ContentStringFormat="{TemplateBinding ContentControl.ContentStringFormat}" />
      </ControlTemplate>
    </Setter.Value>
  </Setter>
</Style>


Finally, here's the contents of the "read me" file, with the CSI syntax, release notes, and version history:

==================================================
==  CSI: C# Interpreter                         ==
==  David Anson (http://blogs.msdn.com/delay/)  ==
==================================================


Summary
=======
CSI: C# Interpreter
     Version 2010-01-04 for .NET 3.5
     http://blogs.msdn.com/delay/

Enables the use of C# as a scripting language by executing source code files
directly. The source code IS the executable, so it is easy to make changes and
there is no need to maintain a separate EXE file.

CSI (CodeFile)+ (-d DEFINE)* (-r Reference)* (-R)? (-q)? (-c)? (-a Arguments)?
   (CodeFile)+      One or more C# source code files to execute (*.cs)
   (-d DEFINE)*     Zero or more symbols to #define
   (-r Reference)*  Zero or more assembly files to reference (*.dll)
   (-R)?            Optional 'references' switch to include common references
   (-q)?            Optional 'quiet' switch to suppress unnecessary output
   (-c)?            Optional 'colorless' switch to suppress output coloring
   (-a Arguments)?  Zero or more optional arguments for the executing program

The list of common references included by the -R switch is:
   System.dll
   System.Data.dll
   System.Drawing.dll
   System.Windows.Forms.dll
   System.Xml.dll
   PresentationCore.dll
   PresentationFramework.dll
   WindowsBase.dll
   System.Core.dll
   System.Xml.Linq.dll

CSI's return code is 2147483647 if it failed to execute the program or 0 (or
whatever value the executed program returned) if it executed successfully.

Examples:
   CSI Example.cs
   CSI Example.cs -r System.Xml.dll -a ArgA ArgB -Switch
   CSI ExampleA.cs ExampleB.cs -d DEBUG -d TESTING -R


Notes
=====
CSI was inspired by net2bat, an internal .NET 1.1 tool whose author had left
Microsoft. CSI initially added support for .NET 2.0 and has now been extended
to support .NET 3.0, 3.5, and 4.0. Separate executables are provided to
accommodate environments where the latest version of .NET is not available.


Version History
===============

Version 2010-01-04
Add .NET 4 (Beta 2) version
Minor updates

Version 2009-01-06
Initial public release

Version 2005-12-15
Initial internal release

Wrap music [A more flexible balanced WrapPanel implementation for Silverlight and WPF!]

In my last post, I told the story of a customer who asked for an easy way to make the Silverlight/WPF WrapPanel use all available space to spread its children out evenly instead of bunching them up together. The following sample shows off the default WrapPanel behavior on top - and my alternate BalancedWrapPanel behavior on the bottom:

BalancedWrapPanel, Horizontal, ItemWidth and ItemHeight set

The default WrapPanel behavior fills each horizontal (or vertical) line as much as it can before moving on to the next line, but leaves any extra space at the end of each line. BalancedWrapPanel began as a copy of the WrapPanel code (available as part of the Silverlight Toolkit) and contains a modified copy of one of the helper methods that instead distributes the unsightly chunk of extra space evenly through the entire column (or row). That was what I set out to do with BalancedWrapPanel, so I was fairly happy with the results. Unfortunately, the customer wasn't 100% satisfied...

In particular, the desire was for those items in the last line to align with the items above instead of centering like they do in my initial implementation. It's a perfectly reasonable request - and something I thought about when I first started on BalancedWrapPanel! But things are a little tricky because those orderly columns only show up when the ItemWidth and/or ItemHeight properties are set. In fact, the WrapPanel code doesn't actually have any concept of columns at all! Rather, the columns you see are a natural consequence of the algorithm laying out lots of constant-width items within constant-width bounds. So the columns are very real, but the code doesn't really know anything about them. And they don't even exist when ItemWidth/ItemHeight aren't set; despite each column of this vertically-oriented BalancedWrapPanel being vertically balanced, there are no overall rows in the horizontal direction because all the elements are different sizes:

BalancedWrapPanel, Vertical, ItemWidth and ItemHeight not set

When I was first thinking about this scenario, it seemed to me that I'd need to add some code to track the columns and then do things differently for the last line in order to keep everything aligned properly. I was afraid this additional code would overly complicate the original sample, and decided not to implement it until and unless someone asked. Besides, it's called BalancedWrapPanel, so it seemed natural that everything should be balanced! :)

But now that I had a specific request, I thought more carefully and realized that not only was it easy to align the last items, but that it was also a tad more efficient to do so! I didn't want to change the current behavior of BalancedWrapPanel (because I think that's what people expect), but I wanted to enable the new aligning behavior, too. So I added a new property to align the last items, but it only works when ItemWidth/ItemHeight are set (otherwise it has no effect because items can be all different sizes and don't line up to begin with). I considered trying to explain this technicality in the name of the new property, but everything I came up with was long and cumbersome. So the new property is simply named AlignLastItems - setting it to True changes the first example to look like this instead:

BalancedWrapPanel, Horizontal, ItemWidth and ItemHeight set, AlignLastItems set

Notice how the basic WrapPanel behavior is maintained, but the items are spread out evenly and there are no gaping holes. And there you have it - a balanced WrapPanel implementation that should work for most common scenarios. What's more, the customer is satisfied and maybe other folks will start using BalancedWrapPanel in their projects, too!


Click here to download the source code for BalancedWrapPanel and the Silverlight/WPF demo application.


PS - Please refer to my previous BalancedWrapPanel post for information about why I coded it like I did along with some other details.

PPS - As I mention above, the changes from what I'd already written were surprisingly minimal. Other than adding the AlignLastItems DependencyProperty, the only differences are highlighted below:

private void ArrangeLine(int lineStart, int lineEnd, double? directDelta, double directMaximum, double indirectOffset, double indirectGrowth)
{
    Orientation o = Orientation;
    bool isHorizontal = o == Orientation.Horizontal;
    UIElementCollection children = Children;
    double directLength = 0.0;
    double itemCount = 0.0;
    double itemLength = isHorizontal ? ItemWidth : ItemHeight;

    if (AlignLastItems && !itemLength.IsNaN())
    {
        // Length is easy to calculate in this case
        itemCount = Math.Floor(directMaximum / itemLength);
        directLength = itemCount * itemLength;
    }
    else
    {
        // Make first pass to calculate the slack space
        itemCount = lineEnd - lineStart;
        for (int index = lineStart; index < lineEnd; index++)
        {
            // Get the size of the element
            UIElement element = children[index];
            OrientedSize elementSize = new OrientedSize(o, element.DesiredSize.Width, element.DesiredSize.Height);

            // Determine if we should use the element's desired size or the
            // fixed item width or height
            double directGrowth = directDelta != null ?
                directDelta.Value :
                elementSize.Direct;

            // Update total length
            directLength += directGrowth;
        }
    }

    // Determine slack
    double directSlack = directMaximum - directLength;
    double directSlackSlice = directSlack / (itemCount + 1.0);
    double directOffset = directSlackSlice;

    // Make second pass to arrange items
    for (int index = lineStart; index < lineEnd; index++)
    {
        // Get the size of the element
        UIElement element = children[index];
        OrientedSize elementSize = new OrientedSize(o, element.DesiredSize.Width, element.DesiredSize.Height);

        // Determine if we should use the element's desired size or the
        // fixed item width or height
        double directGrowth = directDelta != null ?
            directDelta.Value :
            elementSize.Direct;

        // Arrange the element
        Rect bounds = isHorizontal ?
            new Rect(directOffset, indirectOffset, directGrowth, indirectGrowth) :
            new Rect(indirectOffset, directOffset, indirectGrowth, directGrowth);
        element.Arrange(bounds);

        // Update offset for next time
        directOffset += directGrowth + directSlackSlice;
    }
}

That's a WrapPanel and I am outta here... [A balanced WrapPanel implementation for Silverlight and WPF!]

A customer contacted me a few days ago asking whether there was an easy way to make the Silverlight/WPF WrapPanel use all available space to spread its children out evenly instead of bunching them up against each other as it usually does. Instead of trying to explain what I mean by that, please have a look at the top half of the following screen shot:

BalancedWrapPanel, Horizontal, ItemWidth and ItemHeight set

The default WrapPanel behavior fills each horizontal (or vertical) line as much as it can before moving on to the next line - but it leaves all the extra space at the end of the line. That big, vertical gap of empty space at the right of the colored boxes is a bit unsightly, so what would be nice is if WrapPanel distributed the extra space across the entire line - kind of like you see in the bottom half of the window above!

My reply to the customer was that I didn't know of a way to do this with WrapPanel as-is, but that it should be pretty straightforward to modify the code and add the balancing logic. Well, I got curious on the bus yesterday, so I went ahead and implemented BalancedWrapPanel, the control I used in the second example above.


Click here to download the source code for BalancedWrapPanel and the Silverlight/WPF demo application.


To implement this alternate behavior, I started with the WrapPanel source code that comes with the Silverlight Toolkit. For WPF 3.5 (or Silverlight 4), I needed to copy WrapPanel.cs, OrientedSize.cs, and NumericExtensions.cs. For Silverlight 3 (which doesn't have LengthConverter) I also needed to copy LengthConverter.cs and TypeConverters.cs. I renamed "WrapPanel" to "BalancedWrapPanel" everywhere, linked the copied files into a new Visual Studio solution containing sample projects for Silverlight 3 and WPF 3.5, and compiled successfully. After that, it was just a matter of tweaking the code a bit, and I was done!

I've highlighted my additions to the existing helper method below:

private void ArrangeLine(int lineStart, int lineEnd, double? directDelta, double directMaximum, double indirectOffset, double indirectGrowth
{
    Orientation o = Orientation;
    bool isHorizontal = o == Orientation.Horizontal;
    UIElementCollection children = Children;

    // Make first pass to calculate the slack space
    double directLength = 0.0;
    for (int index = lineStart; index < lineEnd; index++)
    {
        // Get the size of the element
        UIElement element = children[index];
        OrientedSize elementSize = new OrientedSize(o, element.DesiredSize.Width, element.DesiredSize.Height);

        // Determine if we should use the element's desired size or the
        // fixed item width or height
        double directGrowth = directDelta != null ?
            directDelta.Value :
            elementSize.Direct;

        // Update total length
        directLength += directGrowth;
    }

    // Determine slack
    double directSlack = directMaximum - directLength;
    double directSlackSlice = directSlack / (lineEnd - lineStart + 1.0);
    double directOffset = directSlackSlice;

    // Make second pass to arrange items
    for (int index = lineStart; index < lineEnd; index++)
    {
        // Get the size of the element
        UIElement element = children[index];
        OrientedSize elementSize = new OrientedSize(o, element.DesiredSize.Width, element.DesiredSize.Height);

        // Determine if we should use the element's desired size or the
        // fixed item width or height
        double directGrowth = directDelta != null ?
            directDelta.Value :
            elementSize.Direct;

        // Arrange the element
        Rect bounds = isHorizontal ?
            new Rect(directOffset, indirectOffset, directGrowth, indirectGrowth) :
            new Rect(indirectOffset, directOffset, indirectGrowth, directGrowth);
        element.Arrange(bounds);

        // Update offset for next time
        directOffset += directGrowth + directSlackSlice;
    }
}

That's all there is to it: a few simple changes, a wave of the magic compiler wand, and POOF! a more pleasing layout for both platforms.

Woot! :)


Notes:

  • I could have refactored the method above for a slightly more efficient solution, but decided the code would be easier to understand if I changed as little as possible and kept the edits distinct.

  • Alternatively, I could have subclassed WrapPanel and implemented my changes in ArrangeOverride. This would have had the benefit of requiring fewer files from the Silverlight Toolkit, but would have required somewhat more code on my part. I didn't see a particularly compelling argument for either option, so I chose copy+edit because it demonstrates how really easy it is to reuse code from the Silverlight Toolkit, because it's more flexible in general, and because it makes it easy to add further enhancements in the future.

  • The example screen shot above uses WrapPanel's ItemWidth and ItemHeight properties to specify that all items should take up the same space. That seemed like the most likely case for someone who wants to use the new balancing behavior. However, the changes I've made work just as well when these properties are unset (i.e., NaN). They also work well when using a vertically-oriented BalancedWrapPanel - as the following screen shot shows:

    BalancedWrapPanel, Vertical, ItemWidth and ItemHeight not set
  • If you download the source code and build for Silverlight 4, you'll get the following warning because Silverlight 4 adds support for LengthConverter:

    warning CS0436: The type 'System.Windows.LengthConverter' in '...\LengthConverter.cs' conflicts with the imported type 'System.Windows.LengthConverter' in '...\System.Windows.Controls.Toolkit.dll'.

    You can either ignore the warning or remove the files LengthConverter.cs and TypeConverters.cs from the project.

Two birds, squared! [Silverlight/WPF Data Visualization Development Release 3 and a DataVisualizationDemos update]

We shipped the November 2009 release of the Silverlight Toolkit a little over a week ago and it includes a handful of improvements to the Data Visualization assembly. It also adds support for the new Silverlight 4 Beta! And while we were busy getting the October/November Toolkits out the door, the WPF team previewed WPF 4 along with the .NET 4 and Visual Studio 2010 Beta!

Which means there are now four platforms of interest to developers: Silverlight 3, Silverlight 4, WPF 3.5, and WPF 4. And the Silverlight/WPF Data Visualization assembly supports them all!


Silverlight/WPF Data Visualization Development Release 3

As with previous Data Visualization Development Releases, I've updated to the most recent Toolkit code. And like last time, the Silverlight Toolkit shipped most recently so the code in the new Development Release is identical to what just went out with the Silverlight 3/4 Toolkits. However, people using Data Visualization on WPF 3.5 or 4 can take advantage of the latest changes by updating to the binaries included with this Development Release or by compiling the corresponding code themselves.

[Click here to download the SilverlightWpfDataVisualization solution including complete source code and pre-compiled binaries for all four platforms.]

Notes:

  • This is the first release I know of that supports four different platforms with distinct implementations on each. While the code and XAML are 99+% identical across the platforms, each has at least one customization that makes it unique. [Bonus points for identifying them all! :) ]
  • Previously, there was a single Visual Studio 2008 SilverlightWpfDataVisualization.sln file for both Silverlight 3 and WPF 3.5. Because Silverlight 4 and WPF 4 use Visual Studio 2010, there's a new SilverlightWpfDataVisualization4.sln file for those two platforms. The two solutions (and the projects within) look and act exactly the same - they're separate because they compile with different tools and because separation lets people who haven't upgraded continue to use the VS 2008 solution.
  • I always strive for code that builds with no compile or code analysis warnings, and that's still the case when compiling for Silverlight 3, WPF 3.5, and Silverlight 4 (though the last is a bit of a cheat because code analysis doesn't work there yet). But the new .NET 4 tools include some improvements, and there were three new kinds of warnings when I first compiled for WPF 4. Two of them were easily addressed with trivial changes I already made, but the third requires a bit more (potentially destabilizing) work that was not done for this release: Warning 2 CA1062 : Microsoft.Design : In externally visible method 'Foo', validate parameter 'Bar' before using it. As it happens, there was already a work item for this task because we knew we weren't checking everywhere we should. So if you see this warning when compiling the WPF 4 assembly, please don't be alarmed!
  • Whereas it used to be fine to wrap platform-specific code in #if SILVERLIGHT blocks, that doesn't work anymore because there are now cross-version changes within each platform. Therefore, I've switched to the form #if !NO_FEATURE instead. It's usually best to avoid double-negatives, but their use here is a consequence of a deliberate decision. My goal is that, by default, the code tries to use every feature it supports and if the target platform doesn't implement something, there's a compile error. At which point it's easy to identify the problem and add the relevant #define to the project file to "turn off" the unsupported feature. This seem better to me than forcing developers to know all the relevant flags and use them to "turn on" features for each platform. Just another example of the pit of success, really... :)
  • WPF 4 includes the Visual State Manager classes in the framework, so the WPF 4 Data Visualization assembly no longer has a dependency on the WPF Toolkit!


DataVisualizationDemos on WPF 4


DataVisualizationDemos Sample Project Updated

The DataVisualizationDemos application is a collection of all the Data Visualization samples I've posted to my blog. Like the Data Visualization assembly itself, the demo application runs on Silverlight 3 and 4 as well as WPF 3.5 and 4 and shares the same code and XAML across all four platforms. Not only is it a convenient way to look at a variety of sample code, it also has links back to the relevant blog posts for more detail about each sample.

Click here to download the complete source code for the cross-platform DataVisualizationDemos sample application.

Notes:

  • I've followed the same dual-solution and #if approaches that I describe above.
  • Because WPF 4 now supports easing functions, the "Gelatin Sales" example on the "Charting Introduction" tab runs on that platform - as does the entire "Jelly Charting" demo. And boy, is it smooth on WPF! :)


With the release of Silverlight/WPF Data Visualization Development Release 3, it's easy for anyone to compile and run the Data Visualization assembly on any of Microsoft's four premier development platforms. So what are you waiting for? ;)

Sharing isn't easy for anyone [Tricks for sharing the same XAML files across Silverlight and WPF]

I casually mentioned two tricks for sharing the same XAML across Silverlight and WPF in the notes of a post a couple weeks ago. I used both techniques in my DataVisualizationDemos project (which compiles for Silverlight and WPF from the same source code) and wanted to call them out for others in similar situations. The feedback I got was quite positive - until Brian Elgaard Bennett tried the subclassing trick with HierarchicalDataTemplate. While there's no reason that shouldn't work, it doesn't.

What's going on is that WPF doesn't support subclassing DataTemplate or any of its children. What's worse, nobody expects this when they bump into it! [I know a few of us have independently reported the same issue to the WPF team - it's kind of like a rite of passage. :) ] So the right people are aware of the problem, and maybe - just maybe - the new XAML parser in .NET 4 will help fix things. But that doesn't matter for WPF 3.5 development today - and because my XAML sharing trick relies on subclassing, the situation seems pretty dire.


But I'm stubborn, so I thought about the situation a little and foolishly said I had an idea that should work. Unfortunately - like most of my ideas - it didn't work the first time. Or the second time. Or the third. Or...

I think it was something like the ninety-ninth idea that finally worked.

"Genius is one percent inspiration, ninety-nine percent perspiration." - Thomas Edison

Well, I won't claim this is genius or anything, but the ratio sure seems right. :)


[Click here to download the complete source code for the SharingXamlSilverlightWpf sample.]


The way I've solved the HierarchicalDataTemplate problem is a lot like the way I went about things before. However, I've implemented it a little differently this time around, so if you want a quick-and-dirty solution and don't care about HierarchicalDataTemplate, then do it the way I did in my previous post. But if you want a more complete, more comprehensive solution, please keep reading...


First, here's the XAML we'll be sharing. There's nothing fancy, just some standard controls that are part of the core framework for WPF, and part of the SDK/Toolkit for Silverlight.

<UserControl x:Class="SharingXamlSilverlightWpf_SL.MainPage"
    xmlns="http://schemas.microsoft.com/winfx/2006/xaml/presentation"
    xmlns:x="http://schemas.microsoft.com/winfx/2006/xaml"
    xmlns:systemWindows="clr-namespace:System.Windows;assembly=PresentationFramework"
    xmlns:systemWindowsControls="clr-namespace:System.Windows.Controls;assembly=PresentationFramework">
    <StackPanel>
        <systemWindowsControls:DockPanel>
            <TextBlock Text="Inside a DockPanel"/>
        </systemWindowsControls:DockPanel>

        <systemWindowsControls:Viewbox Height="40">
            <TextBlock Text="Inside a ViewBox"/>
        </systemWindowsControls:Viewbox>

        <systemWindowsControls:TreeView>
            <systemWindowsControls:TreeViewItem
                Header="Inside a TreeView(Item)"
                ItemsSource="{Binding}"
                IsExpanded="True">
                <systemWindowsControls:TreeViewItem.ItemTemplate>
                    <systemWindows:HierarchicalDataTemplate>
                        <TextBlock Text="{Binding}"/>
                    </systemWindows:HierarchicalDataTemplate>
                </systemWindowsControls:TreeViewItem.ItemTemplate>
            </systemWindowsControls:TreeViewItem>
        </systemWindowsControls:TreeView>
    </StackPanel>
</UserControl>
Aside: In the ideal world, we wouldn't need to use an XML namespace prefix under Silverlight and therefore this problem would never come up in the first place. Unfortunately, Silverlight 3 and the Silverlight 4 Beta don't support XmlnsDefinitionAttribute, so the fact that the SDK/Toolkit assemblies already properly implement it doesn't help us.

The interesting thing to note above is that all the relevant controls (DockPanel, Viewbox, TreeView, TreeViewItem, and HierarchicalDataTemplate) have a prefix and that things look just like you'd expect them to under WPF if you went to the trouble of specifying the namespace explicitly. And, in fact, that's all there is for WPF - just be explicit with the XAML and you're done!

So what's the magic that makes this work on Silverlight? Well, it's nothing in the application project there, either - just like with WPF there are no special changes required! However, there is an extra assembly on the Silverlight side...

Before I totally spoil the surprise, here's the code for that assembly:

extern alias SWC;
extern alias SWCT;
using System.Windows.Markup;
using SystemWindows = SWC::System.Windows;
using SystemWindowsControls = SWC::System.Windows.Controls;
using SystemWindowsControlsToolkit = SWCT::System.Windows.Controls;

namespace System.Windows
{
    // Stub class for HierarchicalDataTemplate
    public class HierarchicalDataTemplate : SystemWindows.HierarchicalDataTemplate
    {
    }
}

namespace System.Windows.Controls
{
    // Stub class for DockPanel
    public class DockPanel : SystemWindowsControlsToolkit.DockPanel
    {
    }

    // Stub class for TreeView
    public class TreeView : SystemWindowsControls.TreeView
    {
    }

    // Stub class for TreeViewItem
    public class TreeViewItem : SystemWindowsControls.TreeViewItem
    {
    }

    // Stub class for Viewbox
    // Silverlight's Viewbox is sealed, so simulate it with a ContentControl wrapper
    public class Viewbox : ContentControl
    {
        public Viewbox()
        {
            Template = (ControlTemplate)XamlReader.Load(@"
                <ControlTemplate
                    xmlns=""http://schemas.microsoft.com/winfx/2006/xaml/presentation""
                    xmlns:controls=""clr-namespace:System.Windows.Controls;assembly=System.Windows.Controls.Toolkit"">
                    <controls:Viewbox>
                        <ContentPresenter/>
                    </controls:Viewbox>
                </ControlTemplate>");
        }
    }
}

Aside from some extern alias/using stuff at the top to disambiguate references, there's nothing here we didn't see last time around - in fact, the subclassing trick for HierarchicalDataTemplate looks just like it does for the other classes.

But I thought that trick didn't work for HierarchicalDataTemplate?

Right, it doesn't work on WPF - but this assembly is Silverlight-only.

Then you need a matching assembly for WPF or else the project won't compile because of the XMLNS reference.

Unless the corresponding assembly already exists on WPF.

Oh, no you didn't...

Oh, yes I did! :)


The Silverlight-only assembly is named PresentationFramework.dll, the same name as the platform assembly that contains the actual implementations of the controls for WPF. The Silverlight platform doesn't have a PresentationFramework.dll, and this latest trick takes advantage of that fact to sneak one in. Because Silverlight doesn't suffer from the same DataTemplate subclassing bug, it's perfectly okay to subclass HierarchicalDataTemplate there.

So the original subclassing trick does 95% of what we want, the control wrapping trick adds Viewbox, and the PresentationFramework trick adds HierarchicalDataTemplate - which means we're 100% covered!


Well, at least until someone contacts me to report another problem. Which would no doubt be interesting to debug and I'd certainly want to have a look.

But not right now. Adding that same-named assembly has left me feeling a little slimy and I think I need a shower before I spend more time on this. :)

Creating something from nothing - and knowing it [Developer-friendly virtual file implementation for .NET refined!]

A couple of weeks ago I wrote about VirtualFileDataObject, my developer-friendly virtual file implementation for .NET and WPF. I followed that up by adding support for asynchronous behavior to improve the user experience during long-running operations. Last week, these posts got a shout-out from blogging legend Raymond Chen, whose work provided the inspiration for the project. [Best week ever! :) ] Now it's time for one last tweak to wrap things up!


Recall that the Windows APIs for drag-and-drop and clipboard operations deal with objects that implement the IDataObject COM interface. And while the native DoDragDrop function tries to provide a mechanism for the source and target to communicate (via the pdwEffect parameter and the function's return value), there's nothing similar available for the SetClipboardData function. And once you enable asynchronous drag-and-drop, it's clear that the return value of DoDragDrop isn't going to work, either, because the call returns immediately (before the operation has completed). So it seems like there must be some other way for the source and target to share information...

Sure enough, there are some shell clipboard formats specifically for enabling communication between the source and target! For the purposes of this sample, we're interested in using two of them:

And here's another which is relevant enough that I wrote code to support it, though I'll only mention it once more here:

  • CFSTR_PASTESUCCEEDED - Indication that a paste succeeded and what kind of operation (copy/move/link) it did


Armed with that knowledge, let's tweak the sample application so one of the scenarios does a move/cut instead of a copy:

VirtualFileDataObjectDemo sample application

The first tweak to the code modifies our helper function to accept a DragDropEffects parameter so the caller can indicate its copy/move preference with the new PreferredDropEffect property in the clipboard scenario:

private static void DoDragDropOrClipboardSetDataObject(MouseButton button, DependencyObject dragSource,
    VirtualFileDataObject virtualFileDataObject, DragDropEffects allowedEffects)
{
    try
    {
        if (button == MouseButton.Left)
        {
            // Left button is used to start a drag/drop operation
            VirtualFileDataObject.DoDragDrop(dragSource, virtualFileDataObject, allowedEffects);
        }
        else if (button == MouseButton.Right)
        {
            // Right button is used to copy to the clipboard
            // Communicate the preferred behavior to the destination
            virtualFileDataObject.PreferredDropEffect = allowedEffects;
            Clipboard.SetDataObject(virtualFileDataObject);
        }
    }
    catch (COMException)
    {
        // Failure; no way to recover
    }
}

Then we can tweak the VirtualFileDataObject constructor to pass a custom "end" action that uses the new PerformedDropEffect property to find out what action took place. If the target performed a move (or a cut with the clipboard), then we'll hide the corresponding "button" to reflect that fact:

private void VirtualFile_MouseButtonDown(object sender, MouseButtonEventArgs e)
{
    var virtualFileDataObject = new VirtualFileDataObject(
        null,
        (vfdo) =>
        {
            if (DragDropEffects.Move == vfdo.PerformedDropEffect)
            {
                // Hide the element that was moved (or cut)
                // BeginInvoke ensures UI operations happen on the right thread
                Dispatcher.BeginInvoke((Action)(() => VirtualFile.Visibility = Visibility.Hidden));
            }
        });

    // Provide a virtual file (generated on demand) containing the letters 'a'-'z'
    ...

    DoDragDropOrClipboardSetDataObject(e.ChangedButton, TextUrl, virtualFileDataObject, DragDropEffects.Move);
}

Please note that the begin/end actions are now of type Action<VirtualFileDataObject>. The new parameter is always a reference to the active VirtualFileDataObject instance and is provided to make it easy to use anonymous methods like you see above.

Aside: Otherwise you'd need to capture the VirtualFileDataObject instance so you could pass it to the action being provided to that same instance's constructor! (Catch-22 much?) While there may be a clever way to do this without making the begin/end actions properties of the class (which I didn't want to do because that wouldn't ensure they're invariant), passing the VirtualFileDataObject in this manner is both easy and obvious.
Further aside: As a consequence of the changes to support these new properties, VirtualFileDataObject now implements the IDataObject::SetData method for HGLOBAL-style data. So if there's some other CFSTR_ property that's relevant to your scenario, you can query it off the VirtualFileDataObject instance in much the same manner!


[Click here to download the complete code for VirtualFileDataObject and the sample application.]


And that's pretty much all there is to it! With the addition of PreferredDropEffect and PerformedDropEffect (and PasteSucceeded, though it's not demonstrated above), VirtualFileDataObject makes it easy for your application to provide a seamless virtual file drag/drop experience with all the sophisticated nuances users expect from a polished Windows application.

Enjoy!

Creating something from nothing, asynchronously [Developer-friendly virtual file implementation for .NET improved!]

Last week I posted the code for VirtualFileDataObject, an easy-to-use implementation of virtual files for .NET and WPF. This code implements the standard IDataObject COM interface for drag-and-drop and clipboard operations and is specifically targeted at scenarios where an application wants to allow the user to drag an element to a folder and create a file (or files) dynamically on the drop/paste. The standard .NET APIs for drag-and-drop don't support this scenario, so VirtualFileDataObject ended up being a custom implementation of the System.Runtime.InteropServices.ComTypes.IDataObject interface. Fortunately, the specifics aren't too difficult, and a series of posts by Raymond Chen paved the way (in native code).

VirtualFileDataObjectDemo sample application


If you read my previous post, you may recall there was an issue with the last scenario of the sample: the application became unresponsive while data for the virtual file was downloading from the web. While this unresponsiveness won't be a noticeable for scenarios involving local data, scenarios that create large files or hit the network are at risk. Well, it's time to find a solution!

And we don't have to look far: the answer is found in the MSDN documentation for Transferring Shell Objects with Drag-and-Drop and the Clipboard under the heading Using IAsyncOperation. As you might expect, we're not the first to notice this behavior; the IAsyncOperation interface exists to solve this very problem. So it seems like things ought to be easy - let's just define the interface, implement its five methods (none of which are very complicated), and watch as the sample application stays responsive during the time-consuming download...

FAIL.


Okay, so that didn't work out quite how we wanted it to. Maybe we defined the interface incorrectly? Maybe we implemented it incorrectly? Or maybe Windows just doesn't support this scenario??

No, no, and no. We've done everything right - it's the platform that has betrayed us. :( Specifically, the DragDrop.DoDragDrop method does something sneaky under the covers: it wraps our respectable System.Runtime.InteropServices.ComTypes.IDataObject instance in a System.Windows.DataObject wrapper. Because this wrapper object doesn't implement or forward IAsyncOperation, it's as if the interface doesn't exist!

Aside: I have the fortune of working with some of the people who wrote this code in the first place, and I asked why this extra level of indirection was necessary. The answer is that it probably isn't - or at least nobody remembers why it's there or why it couldn't be removed now. So the good news is they'll be looking at changing this behavior in a future release of WPF. The bad news is that the change probably won't happen in time for the upcoming WPF 4 release.

Be that as it may, it looks like we're going to need to call the COM DoDragDrop function directly. Fortunately, there's not much that happens between WPF's DragDrop.DoDragDrop and COM's DoDragDrop, so there's not much we have to duplicate. That said, we do need to define the IDropSource interface and write a custom DropSource implementation of its two methods. The nice thing is that both methods are pretty simple and straightforward, so our custom implementation can be private. (And for simplicity's sake, we're not going to bother raising DragDrop's (Preview)GiveFeedbackEvent or (Preview)QueryContinueDragEvent events.)

Because we've been careful to define the VirtualFileDataObject.DoDragDrop replacement method with the same signature as the DoDragDrop method it's replacing, updating the sample to use it is trivial. So run the sample again, and - BAM - no more unresponsive window during the transfer! (For real, this time.) You can switch to the window, resize it, drag it, etc. all during the creation of the virtual file.


But now we've got a bit of a dilemma: if things are happening asynchronously, how can we tell when they're done? The answer lies with the StartOperation and EndOperation methods of the IAsyncOperation interface. Per the interface contact, these methods are called at the beginning/end of the asynchronous operation. So if we just add another constructor to the VirtualFileDataObject class, we can wire things up in the obvious manner:

 /// <summary>
 /// Initializes a new instance of the VirtualFileDataObject class.
 /// </summary>
 /// <param name="startAction">Optional action to run at the start of the data transfer.</param>
 /// <param name="endAction">Optional action to run at the end of the data transfer.</param>
 public VirtualFileDataObject(Action startAction, Action endAction)

Well, almost... The catch is that while VirtualFileDataObject now supports asynchronous mode, there's no guarantee that the drop target will use it. Additionally, the developer may have specifically set the VirtualFileDataObject.IsAsynchronous property to false to disable asynchronous mode. And when you're in synchronous mode, there aren't any handy begin/end notifications to rely on...

So I've added support to VirtualFileDataObject for calling the begin/end actions in synchronous mode based on some semi-educated guesses. In my testing, the notifications during synchronous mode behave as identically as possible to those in asynchronous mode. Granted, in some scenarios startAction may run a little earlier in synchronous mode than it would have for asynchronous mode - but as far as the typical developer is concerned, VirtualFileDataObject offers the same handy behavior for both modes!


Let's celebrate by updating the sample to show a simple busy indicator during the download:

VirtualFileDataObjectDemo sample application

Code-wise, once we've updated the call to DoDragDrop:

VirtualFileDataObject.DoDragDrop(dragSource, virtualFileDataObject, DragDropEffects.Copy);

Everything else stays the same except for the constructor:

var virtualFileDataObject = new VirtualFileDataObject(
    // BeginInvoke ensures UI operations happen on the right thread
    () => Dispatcher.BeginInvoke((Action)(() => BusyScreen.Visibility = Visibility.Visible)),
    () => Dispatcher.BeginInvoke((Action)(() => BusyScreen.Visibility = Visibility.Collapsed)));

The BusyScreen variable above corresponds to a new element in the sample application that provides the simple "Busy..." UI shown above. In real life, we'd probably use MVVM and a bool IsBusy property on our data model to trigger this, but for a sample application, toggling Visibility works fine. Because all the hard work is done by the VirtualFileDataObject class [you're welcome! :) ], the application remains unencumbered by complex logic for anything related to the management of virtual files.

Which is the way it should be!


[Click here to download the complete code for VirtualFileDataObject and the sample application.]


PS - I have one more post planned on this topic demonstrating something I haven't touched on yet to help applications coordinate better with the shell. Stay tuned...

My new home page, revised [Updated collection of great Silverlight/WPF Data Visualization resources!]

In the time since sharing my last collection of Silverlight/WPF Charting links, there have been some great new articles I'd like to highlight. And in case you haven't heard, we published the October 09 release of the Silverlight Toolkit last week, so please consider upgrading if you haven't already!

Here are the latest links (FYI: previously published links are gray):

Overviews (100 level)

Scenarios (200 level)

Internals (300 level)

Team Member posts (Partner level)

My posts (Ego level)

Many, many thanks to everyone who's spent time helping others learn how to use Silverlight/WPF Data Visualization!

PS - If I've missed any good resources, please leave a comment with a link - I'm always happy to find more good stuff! :)

PPS - The most recent version of this collection will always be pointed to by http://cesso.org/r/DVLinks. If you're going to link to this post, please use that URL so you'll always be up to date.

Creating something from nothing [Developer-friendly virtual file implementation for .NET!]

Have you ever used one of those programs that lets you drag a UI widget, drop it in a folder, and - poof - a file that didn't exist magically appears? Me, too - it's cool! But how does it work? Are they really deferring the work of creating that file until it's needed and then creating the file during the drag-and-drop operation? Yes they are - and now you can, too!

If I have seen a little further it is by standing on the shoulders of Giants.- Sir Isaac Newton

Everything you ever needed to know about drag-and-drop in Windows can probably be found in the MSDN documentation for Transferring Shell Objects with Drag-and-Drop and the Clipboard. That documentation is a great resource for specific questions, but because it covers so many topics, it's not necessarily the best way to get an overview. For that, we turn to Raymond Chen's blog - specifically, a series he did called "What a drag" in March of last year. Raymond's example uses native code exclusively, but don't let that scare you away - his presentation and explanations are always engaging! Please take a moment to read (or at least skim) the following articles, or else the rest of this post might not make much sense:

Okay, so we know what we want to do and now we know how it's supposed to work! The first thing to consider is whether the WPF platform supports the virtual file scenario. And unfortunately, it doesn't seem to. :( Specifically, the DataObject class is where we'd expect to find such support, but the closest it has is SetFileDropList. And while that sounds promising, it's really just a list of strings with paths to existing files. Recall that the DragDrop.DoDragDrop method is synchronous (i.e., does not return until the drag-and-drop operation is complete), and the obvious consequence is that creating a virtual file on the fly isn't practical with this API. Specifically, the bits already need to exist on disk by the time the user starts the drag operation - but you don't know what data they're going to drag until they start! It's a classic Catch-22...

The natural next step is to consider whether subclassing DataObject would help - but it's sealed, so that's a pretty quick dead end.

Move on to consider whether the System.Windows.IDataObject interface used by DataObject would be useful. But it seems not; it's pretty much the same API as DataObject which we've already dismissed.

So that leaves us looking at the System.Runtime.InteropServices.ComTypes.IDataObject interface which is a simple managed representation of the actual IDataObject COM interface that the shell uses directly. Clearly, anything is possible at this point, so if we can just channel our inner Raymond, we ought to be in business!


The good news is that I've already done this for you. I've even written a simple WPF application to show how everything fits together:

VirtualFileDataObjectDemo sample application


[Click here to download the complete code for VirtualFileDataObject and the sample application.]


What I've done is write a custom IDataObject class called VirtualFileDataObject that does all the hard work for you. All you need to do is provide the relevant data, and your users will be dragging-and-dropping virtual files in no time. And what's really neat is that writing the code to support drag-and-drop automatically gives complete support for the clipboard because the Clipboard.SetDataObject method uses the same IDataObject interface!

Let's look at the sample scenarios to understand how VirtualFileDataObject is used:


Text only

var virtualFileDataObject = new VirtualFileDataObject();

// Provide simple text (in the form of a NULL-terminated ANSI string)
virtualFileDataObject.SetData(
    (short)(DataFormats.GetDataFormat(DataFormats.Text).Id),
    Encoding.Default.GetBytes("This is some sample text\0"));

DoDragDropOrClipboardSetDataObject(e.ChangedButton, Text, virtualFileDataObject);

This is the simplest possible scenario - just to show off that simple things stay simple with VirtualFileDataObject. Here's the signature for the SetData method used above:

/// <summary>
/// Provides data for the specified data format (HGLOBAL).
/// </summary>
/// <param name="dataFormat">Data format.</param>
/// <param name="data">Sequence of data.</param>
public void SetData(short dataFormat, IEnumerable<byte> data)

Note that it operates in "HGLOBAL mode" where all the data is provided at the time of the call. Note also that it doesn't know anything about what the data is, so it's up to the caller to make sure it's in the right format. Specifically, the right format for DataFormats.Text is a NULL-terminated ANSI string, so that's what the sample passes in.

Aside: The DoDragDropOrClipboardSetDataObject method used above is a simple helper method for the test application - it calls DragDrop.DoDragDrop or Clipboard.SetDataObject depending on what the user did. It's not very exciting, so I won't be showing it (or the VirtualFileDataObject constructor) in the following examples.


Text and URL

// Provide simple text and a URL in priority order
// (both in the form of a NULL-terminated ANSI string)
virtualFileDataObject.SetData(
    (short)(DataFormats.GetDataFormat(CFSTR_INETURLA).Id),
    Encoding.Default.GetBytes("http://blogs.msdn.com/delay/\0"));
virtualFileDataObject.SetData(
    (short)(DataFormats.GetDataFormat(DataFormats.Text).Id),
    Encoding.Default.GetBytes("http://blogs.msdn.com/delay/\0"));

Another simple example based on Raymond's discussion of drag-and-drop into Internet Explorer. For our purposes, this example demonstrates that you can set multiple data formats and that formats other than those exposed by WPF's DataFormats enumeration are easy to deal with. Per the guidelines, supported formats are provided in order by priority, with higher priority formats coming first.


Virtual file

// Provide a virtual file (generated on demand) containing the letters 'a'-'z'
virtualFileDataObject.SetData(new VirtualFileDataObject.FileDescriptor[]
{
    new VirtualFileDataObject.FileDescriptor
    {
        Name = "Alphabet.txt",
        Length = 26,
        ChangeTimeUtc = DateTime.Now.AddDays(-1),
        StreamContents = stream =>
            {
                var contents = Enumerable.Range('a', 26).Select(i => (byte)i).ToArray();
                stream.Write(contents, 0, contents.Length);
            }
    },
});

At last, something juicy! This example creates a virtual file named Alphabet.txt that's 26 bytes long and appears to have been written exactly one day ago. The contents of this file aren't generated until they're actually required by the drop target, so there's no wasted effort if the user doesn't start the drag, aborts it, or whatever. When the file's contents are eventually needed, VirtualFileDataObject calls the user-provided Action (not necessarily a lambda expression, though I've used one here for conciseness) and passes it a write-only Stream instance for writing the data. The user code writes to this stream as much or as little as necessary, then returns control to VirtualFileDataObject in order to complete the operation.

The file that gets created when you drop/paste this item into a folder looks just like you'd expect. And because VirtualFileDataObject supports the length and change time fields, Windows has all the information it needs to help the user resolve possible conflicts:

Windows conflict dialog

Here's the relevant SetData method (note that you can provide an arbitrary number of FileDescriptor instances, so you can create as many virtual files as you want):

/// <summary>
/// Provides data for the specified data format (FILEGROUPDESCRIPTOR/FILEDESCRIPTOR)
/// </summary>
/// <param name="fileDescriptors">Collection of virtual files.</param>
public void SetData(IEnumerable<FileDescriptor> fileDescriptors)

It makes use of another SetData method that's handy for dealing with "ISTREAM mode":

/// <summary>
/// Provides data for the specified data format and index (ISTREAM).
/// </summary>
/// <param name="dataFormat">Data format.</param>
/// <param name="index">Index of data.</param>
/// <param name="streamData">Action generating the data.</param>
/// <remarks>
/// Uses Stream instead of IEnumerable(T) because Stream is more likely
/// to be natural for the expected scenarios.
/// </remarks>
public void SetData(short dataFormat, int index, Action<Stream> streamData)

And accepts data in the following form:

/// <summary>
/// Class representing a virtual file for use by drag/drop or the clipboard.
/// </summary>
public class FileDescriptor
{
    /// <summary>
    /// Gets or sets the name of the file.
    /// </summary>
    public string Name { get; set; }

    /// <summary>
    /// Gets or sets the (optional) length of the file.
    /// </summary>
    public UInt64? Length { get; set; }

    /// <summary>
    /// Gets or sets the (optional) change time of the file.
    /// </summary>
    public DateTime? ChangeTimeUtc { get; set; }

    /// <summary>
    /// Gets or sets an Action that returns the contents of the file.
    /// </summary>
    public Action<Stream> StreamContents { get; set; }
}


Text, URL, and a virtual file!

// Provide a virtual file (downloaded on demand), its URL, and descriptive text
virtualFileDataObject.SetData(new VirtualFileDataObject.FileDescriptor[]
{
    new VirtualFileDataObject.FileDescriptor
    {
        Name = "DelaysBlog.xml",
        StreamContents = stream =>
            {
                using(var webClient = new WebClient())
                {
                    var data = webClient.DownloadData("http://blogs.msdn.com/delay/rss.xml");
                    stream.Write(data, 0, data.Length);
                }
            }
    },
});
virtualFileDataObject.SetData(
    (short)(DataFormats.GetDataFormat(CFSTR_INETURLA).Id),
    Encoding.Default.GetBytes("http://blogs.msdn.com/delay/rss.xml\0"));
virtualFileDataObject.SetData(
    (short)(DataFormats.GetDataFormat(DataFormats.Text).Id),
    Encoding.Default.GetBytes("[The RSS feed for Delay's Blog]\0"));

Finally, here's a sample that pulls everything together in a nice, fancy package with a bow on top. The text is an informative snippet, the URL is a link to an RSS feed, and the virtual file is the dynamically downloaded content of that RSS feed! Way cool - it's like there's this big file sitting around that the user can drop anywhere they want - except that it only really exists on the web and it's always up to date whenever you drop it somewhere!

As you can see, the VirtualFileDataObject class makes the whole scenario really easy and approachable - even if you're not an expert on shell interoperability. It's pretty snazzy, I'd say. :)


There's just one small problem...

If you tried the drag-and-drop version of the last sample above on a machine with a slow network connection, you probably noticed that the sample application became unresponsive as soon as you dropped the virtual file and didn't recover until the download completed. This is a natural consequence of the DoDragDrop method being synchronous and getting called from the UI thread (like it should be). In most scenarios, you probably won't notice this problem because generating the file's data is practically instantaneous. But when there's a delay, unresponsiveness is a possibility. The good news is that there's an official technique for solving this problem. The bad news is that it doesn't work for WPF apps. The good news is that I can show you how to make it work anyway.

But that's a topic for another blog post - one that I'll write in a week or so... :)


Updated 2017-04-20: The sample behavior is slightly different on Windows 10. The cause was hard to track down, but feedback and investigation have determined that this code and sample work correctly as-is on Windows 10 (just like on previous versions of Windows). What's different is how Windows 10 renders the mouse pointer during a drag of a virtual file when only DragDropEffects.Move is specified. Although previous versions of Windows would show the "move" icon whether or not the Shift key was down to force a "move" operation, Windows 10 shows the "no smoking" icon by default and only shows the "move" icon when Shift is held down. The lack of fallback from "copy" to "move" on Windows 10 makes it seem like the virtual file drag part of the sample is broken, though it works fine when the modifier key is used. The workaround is to use the modifier key or pass DragDropEffects.Copy.

Two birds, one stone [Silverlight/WPF Data Visualization Development Release 2 and DataVisualizationDemos update]

The October 2009 release of the Silverlight Toolkit came out on Monday and the Data Visualization assembly includes some nice updates. I discussed the details of the new release then and promised to revise my samples to run on the new bits. While I anticipated doing things separately, it turned out to be easier to do everything at once. Here goes! :)


Silverlight/WPF Data Visualization Development Release 2

In the grand tradition of Data Visualization Development Releases, I've updated things to match the most recently released Toolkit code. In this case, that's the Silverlight Toolkit, so the code in the new Development Release is identical to what just went out with the Silverlight Toolkit. That means there's a bunch of new code for WPF here! People using Data Visualization on WPF can take advantage of the latest changes by updating to the binaries included with this Development Release or by compiling the corresponding code themselves. The release notes detail all the changes; there's nothing to call out here.

[Click here to download the SilverlightWpfDataVisualization solution including complete source code and pre-compiled binaries for both platforms.]


DataVisualizationDemos Sample Project Updated

The DataVisualizationDemos application is a collection of all the Data Visualization samples I've posted to my blog. Like the Data Visualization assembly itself, the demo application runs on Silverlight and WPF and shares the same code and XAML across both platforms. Not only is it a convenient way to look at a variety of sample code, it also has links back to the relevant blog posts for more detail about each sample.

Click here to download the complete source code for the cross-platform DataVisualizationDemos sample application.


Notes:

  • New to this release of the DataVisualizationDemos is my simple Column annotations sample.
  • I've added out-of-browser support to the Silverlight version of DataVisualizationDemos so users can easily install it and/or run it outside the browser.
  • Both flavors of DataVisualizationDemos now take advantage of custom icons for a little bit of added flair: DataVisualizationDemos icon
  • Because this version of the Data Visualization assembly contains a breaking change, the DataVisualizationDemos project can no longer use the assembly that shipped with the WPF Toolkit (or else both platforms wouldn't be able to share the same samples). Therefore, DataVisualizationDemos uses the WPF assembly from Data Visualization Development Release 2.
  • Which means TreeMap (added after the WPF Toolkit release) can now be part of the WPF version of DataVisualizationDemos!
  • If you're doing cross-platform development, sometimes you'll come across a control that lives in two different places. When that happens, it's hard to share the same XAML for both platforms - unless you know a trick! My usual technique for this is to declare my own same-named subclass in code (which automatically resolves to the right platform-specific class thanks to the namespace):

    public class DockPanel : System.Windows.Controls.DockPanel
    {
    }
    

    And then use my "custom" control (after adding the corresponding XML namespace declaration):

    <local:DockPanel ... />

    That works swell most of the time - except for when the class is sealed like Viewbox is on Silverlight... So I came up with a slight tweak of this strategy that solves the problem:

    #if SILVERLIGHT
        // Silverlight's Viewbox is sealed; simulate it with a ContentControl wrapper
        public class Viewbox : ContentControl
        {
            public Viewbox()
            {
                Template = (ControlTemplate)XamlReader.Load(@"
                    <ControlTemplate
                        xmlns=""http://schemas.microsoft.com/winfx/2006/xaml/presentation""
                        xmlns:controls=""clr-namespace:System.Windows.Controls;assembly=System.Windows.Controls.Toolkit"">
                        <controls:Viewbox>
                            <ContentPresenter/>
                        </controls:Viewbox>
                    </ControlTemplate>");
            }
        }
    #else
        public class Viewbox : System.Windows.Controls.Viewbox
        {
        }
    #endif
    

    And then just use it the same as above:

    <local:Viewbox ... />


The latest Data Visualization release has some nice improvements - I hope these two updates help people understand the new functionality and make it even easier to upgrade!