The blog of dlaa.me

"Your feedback is important to us; please stay on the line..." [Improving Windows Phone 7 application performance is even easier with these LowProfileImageLoader and DeferredLoadListBox updates]

A few months ago I began a similar post about LowProfileImageLoader/DeferredLoadListBox updates by saying:

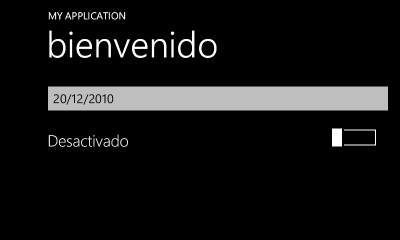
Windows Phone 7 applications run on hardware that's considerably less powerful than what drives typical desktop and laptop machines. Therefore, tuning phone applications for optimum performance is an important task - and a challenging one! To help other developers, I previously coded and blogged about two classes: LowProfileImageLoader (pushes much of the cost of loading images off the UI thread) and DeferredLoadListBox (improves the scrolling experience for long lists). These two classes can be used individually or together and have become a regular part of the recommendations for developers experiencing performance issues.


In the time since, I've continued to hear from people who are benefitting from LowProfileImageLoader and DeferredLoadListBox - and the code has even been incorporated into the WP7Contrib project! Along the way, I've also collected some great feedback, so I recently dedicated time to make a few improvements:

PhonePerformance List Scrolling sample
  • The most significant change is that I've removed the use of the UIElement.TransformToVisual platform-level method from DeferredLoadListBox because it has proven to be unreliable on Windows Phone 7 by throwing exceptions unexpectedly. Because this is not the first time I've had to fix crashes due to random ArgumentExceptions ("The parameter is incorrect."), I recommend not using the TransformToVisual method in Windows Phone 7 applications until/unless the underlying problem is fixed. In the meantime, it has been my experience that the LayoutInformation.GetLayoutSlot method can often be used as a substitute with just a little bit of extra effort.

    I'd like to thank Tore Lervik, Baldelli Gabriele, and Holger Schmeken for reporting this problem.

    Aside: Another time I had to remove TransformToVisual was for the Silverlight for Windows Phone Toolkit's ContextMenu control. (This fix was part of the November 2010 release).
  • I've previously explained why DeferredLoadListBox requires every container to have a height (note: each height can be different!). However, there are some scenarios where the Windows Phone 7 platform will report ActualHeight to be 0 for a container even though its height has been explicitly and correctly set (ex: via ItemContainerStyle). (Note: This seems to occur most often during scrolling.) Fortunately, I found an easy workaround that appears to resolve this problem in cases where the platform is misbehaving: a call to the UpdateLayout API is sufficient to correct the value of ActualHeight.

    I'd like to thank Rich Griffin and Michael James for reporting this problem.

  • LowProfileImageLoader originally used a Queue to implement "first in, first out" (FIFO) behavior of the image downloads it performs. This is a "fair" implementation and is ideal for slowly scrolling up/down a list that uses LowProfileImageLoader and DeferredLoadListBox together. However, for the scenario of quickly scrolling such a list in a single direction, FIFO behavior means the images you see on the screen will be among the last to load. The "obvious" fix is to switch from a Queue to a Stack which gives "last in, first out (LIFO) behavior instead. But while that's better for the second scenario, it's worse for the first one - and it leads to a weird visual effect in apps like my ImageLoading sample (part of the download) because the "wall" of images loads bottom-to-top instead of "top-to-bottom" as people expect.

    Clearly, there's no perfect answer here, so the solution is to do well on average! The classic way of amortizing unpredictable cost is to introduce randomness (ex: the QuickSort algorithm) - so instead of processing FIFO or LIFO, LowProfileImageLoader now works through its queue of pending work in random order. As a result, both the fast and the slow scrolling scenarios show images quickly and the application appears more responsive overall!

    Aside: The way I've implemented randomization is a slight variation of the solution to a classic programming puzzle: How do you sort a deck of N cards in linear time and constant space? If you haven't seen this one before, take a minute to think about it before following this link to a description of the Fisher-Yates/Knuth shuffle.
  • Though I initially meant for LowProfileImageLoader and DeferredLoadListBox to be used together, there's no reason LowProfileImageLoader can't be used on its own. In fact, I previously ensured that it works fine when used with the default ListBox/VirtualizingStackPanel combination. However, when the user is scrolling such a list very quickly, the default container recycling behavior means there will be multiple data bindings applied to a particular container in rapid succession. Every one of these will enqueue a request for LowProfileImageLoader to download the corresponding image - but only the most recent one matters. Any previous requests are "stale" and although it's safe to satisfy them, it's also unnecessary. Therefore, I've made a change with this update to detect stale requests and discard them before making an expensive web request on their behalf. This difference doesn't matter in non-virtualizing scenarios, but for virtualizing scenarios the amount of unnecessary work it saves can quickly add up!

  • Another consequence of using LowProfileImageLoader in the presence of container recycling is that re-used Image elements kept their old content until new content had been downloaded. This could lead to temporarily misleading UI where images show up alongside content they aren't associated with. It happens because LowProfileImageLoader didn't previously "null-out" the Source property when a new request was made. I've modified the code so it does now - and the virtualizing experience is nicer because of it.

  • When implementing the worker thread logic for LowProfileImageLoader, I intended for it to process WorkItemQuantum number of items each time through the loop until the queue of requests was exhausted. I wrote the following code:

    for (var i = 0; (i < pendingRequests.Count) && (i < WorkItemQuantum); i++)

    I'd like to thank Ashish Gupta for pointing out a bug here; what I meant was:

    for (var i = 0; (0 < pendingRequests.Count) && (i < WorkItemQuantum); i++)

    Coding errors in loops can cause serious problems if they result in an attempt to process too many or too few items. I got lucky here because there's no functional bug due to the original typo - the only downside is that performance might be a little worse because it takes a couple of extra passes through the loop to complete once the count drops below WorkItemQuantum. Fortunately, the value of WorkItemQuantum is only 5, so the real-world impact of this is minimal. However, the whole point of this code is to help improve performance, so I've fixed the oversight. :)

  • And finally, because I recently became a NuGet publishing "expert", I've created a package for the PhonePerformance assembly to make it easy to reference for all the NuGet fans out there. It contains the same binary you'd download below, but it contains only the assembly (and its XML IntelliSense file) - the three sample projects are available only with the ZIP download. This split seems like a reasonable compromise to me: reference from the NuGet gallery if you know what you're doing and just need to add the binary to your project - or - read the relevant blog posts and download the samples if you're getting started.


[Click here to download the compiled PhonePerformance assembly, sample applications, and full source code for everything.]

-OR-

[Click here to visit the NuGet gallery page for a package containing the PhonePerformance assembly.]


Windows Phone 7 developers must pay attention to performance because otherwise it's easy to end up with a slow, badly-behaved application. The PhonePerformance assembly focuses on two common scenarios (image loading and list scrolling) and attempts to improve upon the default experience by making it easy to avoid known problem areas. As with any performance technique, results can vary greatly depending on the specifics of each scenario, so it's important to take measurements and test everything on real phone hardware.

Many developers have told me they had success with the PhonePerformance assembly - I hope you do, too! :)

Candy-eating lemming [Delay.Web.Helpers (and its easy-to-use Amazon S3 blob/bucket API) is now available via NuGet!]

NuGet is all the rage right now, and it seemed like a good time to familiarize myself with it. Conveniently, it just so happened that I had something perfectly suited: my Delay.Web.Helpers assembly which offers ASP.NET web helper-style access to Amazon Simple Storage Service (S3) blobs and buckets. (For context, here's the introductory post for Delay.Web.Helpers and here's a follow-up discussing the addition of container support.)

I'm pleased to say I've just published the following two packages to the public NuGet repository:


Delay.Web.Helpers.SampleWebSite folder in Solution Explorer All you need to install to get going is the Delay.Web.Helpers package - that'll get you the binaries and full IntelliSense, too! If you also want some samples to check out, please install the Delay.Web.Helpers.SampleWebSite package.

Because I don't like packages that add random files to my projects, I've configured the Delay.Web.Helpers.SampleWebSite package to install all its sample code under a same-named folder where it won't get mixed up with anyone's existing content. [You're welcome. :) ] I've tweaked the sample to run cleanly in this configuration, so all you need to do is right-click the Delay.Web.Helpers.SampleWebSite folder in Visual Studio's Solution Explorer and choose View in Browser to see it in action.

The sample application lets you browse a previously-configured Amazon S3 account, add, view, and remove buckets, and add, view, and remove files within those buckets. It's not the most fully-featured S3 browser ever, but it does a pretty good job showing off the complete AmazonS3Storage API.

Update at 1:50pm: The sample uses CSHTML (Razor) web pages, so you'll want to add it to a project that supports that file type. From Visual Studio, choose File, New, Web Site..., "ASP.NET Web Site (Razor)". If the resulting web site doesn't run by default due to a missing SQL dependency (i.e., before you add the samples), just comment-out the call to WebSecurity.InitializeDatabaseConnection in _AppStart.cshtml. And if the Razor web site type isn't available at all, please install ASP.NET MVC3 from here.


Notes:

  • The Delay.Web.Helpers assembly included in the NuGet package is exactly the same DLL I previously released on my blog. If you're already using it successfully, there's no need to switch over to the NuGet version.

  • As I add more features in the future, I'll continue releasing bits via my blog and will also update these NuGet packages. So please pick the delivery mechanism you like best (ZIP or NuGet) and feel free to ignore the other one. :)

  • Creating your own NuGet package is quite simple and straightforward. The resources I used were the NuGet CodePlex site and the NuGet Gallery. The former has a link to download the NuGet.exe tool you'll need as well as some good documentation on the process of creating a package. The latter is where you go to upload your package - at which point it's automatically visible to the NuGet plug-in for Visual Studio, the ASP.NET MVC3 application admin interface, etc..


Creating useful libraries and sharing them with others is a great way to contribute back to the community - but only if you can get the bits into the hands of people who want them! NuGet offers a lightweight packaging mechanism that's so simple, anyone can get started with a minimum investment of time or energy. The NuGet gallery has broad developer reach, is easily searchable, and is managed by someone else - so all you need to worry about is writing a good library!

Less overhead means more development time - thanks, NuGet! :)

Night of the Living WM_DEADCHAR [How to: Avoid problems with international keyboard layouts when hosting a WinForms TextBox in a WPF application]

There was a minor refresh for the Microsoft Web Platform last week; you can find a list of fixes and instructions for upgrading in this forum post. The most interesting change for the WPF community is probably the fix for a WebMatrix problem brought to my attention by @radicalbyte and @jabroersen where Ctrl+C, Ctrl+X, and Ctrl+V would suddenly stop working when an international keyboard layout was in use. Specifically, once one of the prefix keys (ex: apostrophe, tilde, etc.) was used to type an international character in the editor, WebMatrix's copy/cut/paste shortcuts would stop working until the application was restarted. As it happens, the Ribbon buttons for copy/cut/paste continued to work correctly - but the loss of keyboard shortcuts was pretty annoying. :(

Fortunately, the problem was fixed! This is the story of how...


To begin with, it's helpful to reproduce the problem on your own machine. To do that, you'll need to have one of the international keyboard layouts for Windows installed. If you spend a lot of time outside the United States, you probably already do, but if you're an uncultured American like me, you'll need to add one manually. Fortunately, there's a Microsoft Support article that covers this very topic: How to use the United States-International keyboard layout in Windows 7, in Windows Vista, and in Windows XP! Not only does it outline the steps to enable an international keyboard layout, it also explains how to use it to type some of the international characters it is meant to support.

Aside: Adding a new keyboard layout is simple and unobtrusive. The directions in the support article explain what to do, though I'd suggest skipping the part about changing the "Default input language": if you stop at adding the new layout, then your default experience will remain the same and you'll be able to selectively opt-in to the new layout on a per-application basis.

With the appropriate keyboard layout installed, the other thing you need to reproduce the problem scenario is a simple, standalone sample application, so...

[Click here to download the InternationalKeyboardBugWithWpfWinForms sample application.]


Compiling and running the sample produces a .NET 4 WPF application with three boxes for text. The first is a standard WPF TextBox and it works just like you'd expect. The second is a standard Windows Forms TextBox (wrapped in a WindowsFormsHost control) and it demonstrates the problem at hand. The third is a trivial subclass of that standard Windows Forms TextBox that includes a simple tweak to avoid the problem and behave as you'd expect. Here's how it looks with an international keyboard layout selected:

InternationalKeyboardBugWithWpfWinForms sample

Although the sample application doesn't reproduce the original problem exactly, it demonstrates a related issue caused by the same underlying behavior. To see the problem in the sample application, do the following:

  1. Make the InternationalKeyboardBugWithWpfWinForms window active.
  2. Switch to the United States-International keyboard layout (or the corresponding international keyboard layout for your country).
  3. Press Ctrl+O and observe the simple message box that confirms the system-provided ApplicationCommands.Open command was received.
  4. Type one of the accented characters into the WinForms TextBox (the middle one).
  5. Press Ctrl+O again and notice that the message box is no longer displayed (and the Tab key has stopped working).


As you can see, the InternationalTextBox subclass avoids the problem its WinForms TextBox base class exposes. But how? Well, rather simply:

/// <summary>
/// Trivial subclass of the Windows Forms TextBox to work around problems
/// that occur when hosted (by WindowsFormsHost) in a WPF application.
/// </summary>
public class InternationalTextBox : System.Windows.Forms.TextBox
{
    /// <summary>
    /// WM_DEADCHAR message value.
    /// </summary>
    private const int WM_DEADCHAR = 0x103;

    /// <summary>
    /// Preprocesses keyboard or input messages within the message loop
    /// before they are dispatched.
    /// </summary>
    /// <param name="msg">Message to pre-process.</param>
    /// <returns>True if the message was processed.</returns>
    public override bool PreProcessMessage(ref Message msg)
    {
        if (WM_DEADCHAR == msg.Msg)
        {
            // Mark message as handled; do not pass it on
            return true;
        }

        // Call base class implementation
        return base.PreProcessMessage(ref msg);
    }
}

The underlying problem occurs when the WM_DEADCHAR message is received and processed by both WPF and WinForms, so the InternationalTextBox subclass shown above prevents that by intercepting the message in PreProcessMessage, marking it handled (so nothing else will process it), and skipping further processing. Because the underlying input-handling logic that actually maps WM_DEADCHAR+X to an accented character still runs, input of accented characters isn't affected - but because WPF doesn't get stuck in its WM_DEADCHAR mode, keyboard accelerators like Ctrl+O continue to be processed correctly!

Aside: The change above is not exactly what went into WebMatrix... However, this change appears to work just as well and is a bit simpler, so I've chosen to show it here. The actual change is similar, but instead of returning true, maps the WM_DEADCHAR message to a WM_CHAR message (ex: msg.MSG = WM_CHAR;) and allows the normal base class processing to handle it. I'm not sure the difference matters in most scenarios, but it's what appeared to be necessary at the time, it's what the QA team signed off on, and it's what the WPF team reviewed. :) I'm optimistic the simplified version I show here will work well everywhere, but if you find somewhere it doesn't, please try the WM_CHAR translation instead. (And let me know how it works out for you!)


Hosting Windows Forms controls in a WPF application isn't the most common thing to do, but sometimes it's necessary (or convenient!), so it's good to ensure everything works well together. If your application exposes any TextBox-like WinForms classes, you might want to double-check that things work well with an international keyboard layout. And if they don't, a simple change like the one I show here may be all it takes to resolve the problem! :)

PS - I mention above that the WPF team had a look at this workaround for us. They did more than that - they fixed the problem for the next release of WPF/WinForms so the workaround will no longer be necessary! Then QA checked to make sure an application with the workaround wouldn't suddenly break when run on a version of .NET/WPF/WinForms with the actual fix - and it doesn't! So apply the workaround today if you need it - or wait for the next release of the framework to get it for free. Either way, you're covered. :)

sudo localize --crossplatform [Free PseudoLocalizer class makes it easy to identify localization issues in WPF, Silverlight, and Windows Phone 7 applications!]

Two posts ago, I explained the benefits of pseudo-localization and showed an easy way to implement it for WPF - then said I'd outline how to do the same for Silverlight and Windows Phone 7. In my previous post, I went off on the seeming diversion of implementing a PNG encoder for Silverlight. With this post, I'll fulfill my original promise and unify the previous two posts! As you'll see, the basic principles of my approach to WPF localization translate fairly directly to Silverlight - though some limitations in the latter platform make achieving the same result more difficult. Even though more code and manual intervention are required for Silverlight and Windows Phone 7, the benefits are the same and pseudo-localization remains a great way to identify potential problems early in the development cycle.

For completeness I'll show examples and techniques for all platforms below...


Normal WPF application PseudoLocalizer in a WPF application

Please see the original post for an explanation of the changes shown above.


Adding pseudo-localization of RESX resources to a WPF application

  1. Add the PseudoLocalizer.cs file from the sample download to the project.

  2. Add PSEUDOLOCALIZER_ENABLED to the (semi-colon-delimited) list of conditional compilation symbols for the project (via the Project menu, Properties item, Build tab in Visual Studio).

  3. Add the following code somewhere it will be run soon after the application starts (for example, add a constructor for the App class in App.xaml.cs):

    #if PSEUDOLOCALIZER_ENABLED
        Delay.PseudoLocalizer.Enable(typeof(ProjectName.Properties.Resources));
    #endif
  4. If necessary: Add a project reference to System.Drawing (via Project menu, Add Reference, .NET tab) if building the project now results in the error "The type or namespace name 'Drawing' does not exist in the namespace 'System' (are you missing an assembly reference?)".

  5. If necessary: Right-click Resources.resx and choose Run Custom Tool if running the application under the debugger (F5) throws the exception "No matching constructor found on type 'ProjectName.Properties.Resources'. You can use the Arguments or FactoryMethod directives to construct this type.".


Adding pseudo-localization of RESX resources to a Silverlight or Windows Phone 7 application

  1. Add the PseudoLocalizer.cs and PngEncoder.cs files from the sample download to the project.

  2. Add PSEUDOLOCALIZER_ENABLED to the (semi-colon-delimited) list of conditional compilation symbols for the project (via the Project menu, Properties item, Build tab in Visual Studio).

  3. Make the following update to the auto-generated resource wrapper class by editing Resources.Designer.cs directly (the highlighted portion is the primary change):

    #if PSEUDOLOCALIZER_ENABLED
        global::System.Resources.ResourceManager temp =
            new Delay.PseudoLocalizerResourceManager("PseudoLocalizerSL.Resources", typeof(Resources).Assembly);
    #else
        global::System.Resources.ResourceManager temp =
            new global::System.Resources.ResourceManager("PseudoLocalizerSL.Resources", typeof(Resources).Assembly);
    #endif

    In case it's not clear, this change simply duplicates the existing line of code that creates an instance of ResourceManager, modifies it to create an instance of Delay.PseudoLocalizerResourceManager instead, and wraps the two versions in an appropriate #if/#else/#endif so pseudo-localization can be completely controlled by whether or not PSEUDOLOCALIZER_ENABLED is #defined.

    Important: This change will be silently overwritten the next time (and every time!) you make a change to Resources.resx with the Visual Studio designer. Please see my notes below for more information on this Silverlight-/Windows Phone-specific gotcha.


PseudoLocalizer in a Silverlight application


Adding a pseudo-localizable string (all platforms)

  1. Double-click Resources.resx to open the resource editor.

  2. Add the string by name and value.

  3. Reference it from code/XAML.

  4. Silverlight/Windows Phone 7: Re-apply the Delay.PseudoLocalizerResourceManager change to Resources.Designer.cs which was silently undone when the new resource was added.


Adding a pseudo-localizable image (WPF only)

  1. Double-click Resources.resx to open the resource editor.

  2. Click the "expand" arrow for Add Resource and choose Add Existing File....

  3. Open the desired image file.

  4. Reference it from code/XAML (possibly via BitmapToImageSourceConverter.cs from the sample ZIP).


Adding a pseudo-localizable image (all platforms)

  1. Rename the image file from Picture.jpg to Picture.jpg-bin.

  2. Double-click Resources.resx to open the resource editor.

  3. Click the "expand" arrow for Add Resource and choose Add Existing File....

  4. Open the desired image file.

  5. Reference it from code/XAML (probably via ByteArrayToImageSourceConverter.cs from the sample ZIP).

  6. Silverlight/Windows Phone 7: Re-apply the Delay.PseudoLocalizerResourceManager change to Resources.Designer.cs which was silently undone when the new resource was added.

  7. Optionally: Restore the image's original file name in the Resources folder of the project and manually update its file name in Resources.resx using a text editor like Notepad. (I've done this for the sample project; it makes things a little clearer and it's easier to edit the image resource without having to rename it each time.)


PseudoLocalizer in a Windows Phone 7 application


There you have it - simple text and image pseudo-localization for WPF, Silverlight, and Windows Phone 7 applications is within your grasp! :) The basic concept is straightforward, though limitations make it a bit more challenging for Silverlight-based platforms. Nevertheless, the time you're likely to save by running PseudoLocalizer early (and often) should far outweigh any inconvenience along the way. By finding (and fixing) localization issues early, your application will be more friendly to customers - no matter what language they speak!


[Click here to download the complete source code for PseudoLocalizer, various helper classes, and the WPF, Silverlight, and Windows Phone 7 sample applications shown above.]


Notes

  • For a brief overview of using RESX resources in a WPF, Silverlight, or Windows Phone 7 application, please see the "Notes" section of my original PseudoLocalizer post. You'll want to be sure the basic stuff is all hooked up and working correctly before adding PseudoLocalizer into the mix.

  • The act of using RESX-style resources in a Silverlight application is more difficult than it is in a WPF application (independent of pseudo-localization). WPF allows you to directly reference the generated resources class directly from XAML:

    <Window.Resources>
        <properties:Resources x:Key="Resources" xmlns:properties="clr-namespace:PseudoLocalizerWPF.Properties"/>
    </Window.Resources>
    ...
    <TextBlock Text="{Binding Path=Message, Source={StaticResource Resources}}"/>

    However, that approach doesn't work on Silverlight (or Windows Phone 7) because the generated constructor is internal and Silverlight's XAML parser refuses to create instances of such classes. Therefore, most people create a wrapper class (as Tim Heuer explains here):

    /// <summary>
    /// Class that wraps the generated Resources class (for Resources.resx) in order to provide access from XAML on Silverlight.
    /// </summary>
    public class ResourcesWrapper
    {
        private Resources _resources = new Resources();
        public Resources Resources
        {
            get { return _resources; }
        }
    }

    And reference that instead:

    <UserControl.Resources>
        <local:ResourcesWrapper x:Key="Resources" xmlns:local="clr-namespace:PseudoLocalizerSL"/>
    </UserControl.Resources>
    ...
    <TextBlock Text="{Binding Path=Resources.Message, Source={StaticResource Resources}}"/>

    Obviously, the extra level of indirection adds overhead to every place resources are used in XAML - but that's a small price to pay for dodging the platform issue. :)

  • WPF supports private reflection and PseudoLocalizer takes advantage of that to enable a simple, seamless, "set it and forget it" hook-up (via the call to Enable above). Unfortunately, private reflection isn't allowed on Silverlight, so the same trick doesn't work there. I considered a variety of different ways around this, and ultimately settled on editing the generated wrapper class code because it applies exactly the same customization as on WPF. And while it's pretty annoying to have this tweak silently overwritten every time the RESX file is edited, it's simple enough to re-apply and it's easy to spot when reviewing changes before check-in.

  • I explained what's wrong with the default behavior of adding an image to a RESX file in my PngEncoder post:

    [...] the technique I used for [WPF] (reading the System.Drawing.Bitmap instance from the resources class and manipulating its pixels before handing it off to the application) won't work on Silverlight. You see, the System.Drawing namespace/assembly doesn't exist for Silverlight! So although the RESX designer in Visual Studio will happily let you add an image to a Silverlight RESX file, actually doing so results in an immediate compile error [...].

    Fortunately, the renaming trick I use above works well for Silverlight and Windows Phone - and WPF, too. So if you're looking to standardize on a single technique, this is the one. :)

    Even if you're devoted to WPF and don't care about Silverlight, you should still consider the byte[] approach: although System.Drawing.Bitmap is easier to deal with, it's not the right format. (Recall from the original PseudoLocalizer post that I wrote an IValueConverter to convert from it to System.Windows.Media.ImageSource.) Instead of loading images as System.Drawing.Bitmap and converting them with BitmapToImageSourceConverter, why not load them as byte[] and convert them with ByteArrayToImageSourceConverter.cs - and save a few CPU cycles by not bouncing through an unnecessary format?

  • In addition to the renaming technique for accessing RESX images from Silverlight, there's a similar approach (courtesy of Justin Van Patten) that renames to .wav instead and exposes the resource as a System.IO.Stream. For the purposes of pseudo-localization, the two renaming approaches should be basically equivalent - which led me to go as far as hooking everything up and writing StreamToImageSourceConverter.cs before I realized why the Stream approach isn't viable...

    What it comes down to is an unfortunate API definition - the thing that's exposed by the wrapper class isn't a Stream, it's an UnmanagedMemoryStream! And while that would be perfectly fine as an implementation detail, it's not: the type of the auto-generated property is UnmanagedMemoryStream and the type returned by ResourceManager.GetStream is also UnmanagedMemoryStream. But UnmanagedMemoryStream can't be created by user code in Silverlight (and requires unsafe code in WPF), so this breaks PseudoLocalizer's approach of decoding/pseudo-localizing/re-encoding the image because it means the altered bytes can't be wrapped back up in a UnmanagedMemoryStream to maintain the necessary pass-through behavior!

    If only the corresponding RESX interfaces had used the Stream type (a base class of UnmanagedMemoryStream), it would have been possible to wrap the altered image in a MemoryStream and return that - a technique supported by all three platforms. Without digging into this too much more, it seems to me that the Stream type could have been used with no loss of generality - though perhaps there's a subtlety I'm missing.

    Aside: As a general API design guideline, always seek to expose the most general type that makes sense for a particular scenario. That does not mean everything should expose the Object type and cast everywhere - but it does mean that (for example) APIs exposing a stream should use the Stream type and thus automatically work with MemoryStream, UnmanagedMemoryStream, NetworkStream, etc.. Only when an API needs something from a specific subclass should it use the more specific subclass.

    Be that as it may, I didn't see a nice way of wrapping images in a UnmanagedMemoryStream, and therefore recommend using the byte[] approach instead!

What it lacks in efficiency, it makes up for in efficiency! [Silverlight-ready PNG encoder implementation shows one way to use .NET IEnumerables effectively]

At the end of my previous post about easily pseudo-localizing WPF applications, I said this post would show how to apply those concepts to a Silverlight application. Unfortunately, I seem to have made an off-by-one error: while this post is related to that topic, it is not the post I advertised. But it seems interesting in its own right, so I hope you enjoy it. :)

Okay, so what does a PNG (Portable Network Graphics) image encoder have to do with pseudo-localizing on the Silverlight platform? Almost nothing - except for the fact that I went above and beyond with my last post and showed how to pseudo-localize not just text, but images as well. It turns out the technique I used for that (reading the System.Drawing.Image instance from the resources class and manipulating its pixels before handing it off to the application) won't work on Silverlight. You see, the System.Drawing namespace/assembly doesn't exist for Silverlight! So although the RESX designer in Visual Studio will happily let you add an image to a Silverlight RESX file, actually doing so results in an immediate compile error: The type or namespace name 'Drawing' does not exist in the namespace 'System' (are you missing an assembly reference?)...


But all is not lost - there are other ways of adding an image to a RESX file! True, the process is a little wonky and cumbersome, but at least it works. However, the resulting resource is exposed as either a byte[] or a Stream instance - both of which are basically just a sequence of bytes. And because there's no SetPixel method for byte arrays, this is a classic "Houston, we have a problem" [sic; deliberately misquoting] moment for my original approach of pseudo-localizing the image by manipulating its pixels... Hum, what's a girl to do?

Well, those bytes do correspond to an encoded image, so it ought to be possible to decode the image - at which point we could wrap it in a WriteableBitmap and do the pixel manipulation via its Pixels property. After that, we could re-encode the altered pixels back to an image file (remember that the resource data is expected to be the encoded bytes of an image) and things should work as seamlessly as they did for the original scenario. And they actually do! Well, on WPF, at least...


PngEncoder sample image

Sample PNG file encoded by PngEncoder


Not on Silverlight, though. Silverlight will get you all the way to the last step, but that's the end of the line: the platform doesn't expose a way to do the re-encoding. :( As you might guess, this is hardly the first time this issue has come up - a quick web search turns up plenty of examples of people wanting to encode images under Silverlight. The typical recommendation is to find (or write) your own image encoder, and so there are a number of examples of Silverlight-compatible image encoders to be found!

So why did I write my own??

Well, because none of the examples I found was quite what I wanted. The most obvious candidate just flat out didn't work; it crashed on every input I gave it. The runner-up (deliberately) took shortcuts for speed and didn't produce valid output. The third option was released under a license I'm not able to work with. And the fourth was part of a much larger image encoding library I didn't feel like pulling apart. Besides, I release full source code on my blog, and I don't want to be in the business of distributing other peoples' code with my samples. A lot of times it's just easier and safer to code something myself - and I've had a lot of great learning experiences as a result! :)


When choosing an image format for re-encoding on the fly, Silverlight makes the decision fairly easy because it supports only two image formats: JPEG and PNG. Because JPEG is a lossy format, it's pretty much a non-starter (we don't want to degrade image quality) and therefore lossless PNG is the obvious choice. Conveniently, the PNG image format is fairly simple - especially if you're willing to punt on (losslessly) compressing the image! All you need to encode a PNG file is a format prefix (8 bytes), a header chunk (5 bytes), an image chunk with the properly encoded pixels, and an end chunk (0 bytes). There's a decent amount of bookkeeping to be done along the way (scanline filtering, compression block creation, two different hash algorithms, etc.), but it's all fairly straightforward. And the PNG specification is well-written and fairly easy to follow - what more could you ask for?

Aside: Giving up on compression may seem like a big deal, but I don't think it is for the scenario at hand. While small file size is important for making the best use of long-term storage, the pseudo-localization scenario creates its PNG file on the fly, loads it, and immediately discards it. The encoded image simply isn't around for very long and so its large size shouldn't matter.

Okay, so PNG encoding isn't rocket science - but I still feel that if I'm going to reinvent the wheel, then at least I should try to contribute something new or interesting to the mix! :)


What I've done here is to use IEnumerable everywhere:

namespace Delay
{
    /// <summary>
    /// Class that encodes a sequence of pixels to a sequence of bytes representing a PNG file (uncompressed).
    /// </summary>
    /// <remarks>
    /// Reference: http://www.w3.org/TR/PNG/.
    /// </remarks>
    static class PngEncoder
    {
        /// <summary>
        /// Encodes the specified pixels to a sequence of bytes representing a PNG file.
        /// </summary>
        /// <param name="width">Width of the image.</param>
        /// <param name="height">Height of the image.</param>
        /// <param name="pixels">Pixels of the image in ARGB format.</param>
        /// <returns>Sequence of bytes representing a PNG file.</returns>
        public static IEnumerable<byte> Encode(int width, int height, IEnumerable<int> pixels) { /* ... */ }
    }
}

And IEnumerable isn't just for the public API, it's used throughout the code, too! This is the meaning behind the title of this post: giving up on compression is inefficient from a storage space perspective, but operating exclusively on enumerations is very efficient from a memory consumption and a computational efficiency perspective! Because of that, this class can encode a 20-megabyte PNG file without allocating any more memory than it takes to encode a 1-byte PNG file. What's more, no work is done before it needs to be: if you're streaming a PNG file across a slow transport, the file will be read and encoded only as quickly as the receiver consumes the bytes - and if encoding is aborted mid-way for some reason, no unnecessary effort has been wasted!

This efficiency is possible thanks to the way IEnumerable works and the convenience of C#'s yield return which makes it easy to write code that returns an IEnumerable without explicitly implementing IEnumerator. As a result, the code for PngEncoder is clear and linear with no hint (or visible complexity) of the allocation savings or deferred processing that occur under the covers. Instead, everything communicates in terms of byte sequences - translating one sequence to another inline as necessary. For example, every horizontal line of an encoded PNG image is prefixed with a byte indicating which filtering algorithm was used. These filter bytes aren't part of the original pixels that are passed into the Encode call, so they need to be added. What's cool is that it's easy to write a method to do so - and because it takes an IEnumerable input parameter and returns an IEnumerable result, such a method can be trivially "injected" into any data flow!


One particularly handy realization of this technique is demonstrated by a class I called WrappedEnumerable - here's what it looks like to the developer:

/// <summary>
/// Class that wraps an IEnumerable(T) or IEnumerator(T) in order to do something with each byte as it is enumerated.
/// </summary>
/// <typeparam name="T">Type of element being enumerated.</typeparam>
abstract class WrappedEnumerable<T> : IEnumerable<T>, IEnumerator<T>
{
    /// <summary>
    /// Method called to initialize for a new (or reset) enumeration.
    /// </summary>
    protected virtual void Initialize() { }

    /// <summary>
    /// Method called for each byte output by the underlying enumerator.
    /// </summary>
    /// <param name="value">Next value.</param>
    protected abstract void OnValueEnumerated(T value);
}

WrappedEnumerable is useful for PngEncoder because the encoding process makes use of two different hash algorithms: CRC-32 and Adler-32. Long-time readers of this blog know I'm no stranger to hash functions - in fact, I've previously shared code to implement CRC-32 based on the very same PNG specification! But as much as I love .NET's HashAlgorithm, using it here seemed like it might be overkill. HashAlgorithm is ideal for processing large chunks of data at a time, but the sequence-oriented nature of PngEncoder deals with a single byte at a time. So what I did was to create WrappedEnumerable subclasses Crc32WrappedEnumerable and Adler32WrappedEnumerable which override the two methods above to calculate their hash values as the bytes flow through the system! These are both simple classes and work quite well for "injecting" hash math into a data flow. The PNG format puts stores its hash values after the corresponding data, so by the time that value is needed, the relevant data has already flowed through the WrappedEnumerable and the final hash is ready to be retrieved.


However, the same cannot be said of the length fields in the PNG specification... Lengths are stored before the corresponding data, and that poses a distinct problem when you're trying to avoid looking ahead: without knowing what data is coming, it's hard to know how much there is! But I'm able to cheat here: because PngEncoder doesn't compress, it turns out that all the internal lengths can be calculated from the original width and height values passed to the call to Encode! So while this is a bit algorithmically impure, it completely sidesteps the length issue and avoids the need to buffer up arbitrarily long sequences of data just to know how long they are.

Aside: After spending so much time celebrating the IEnumerable way of life, this is probably a good time to highlight one of its subtle risks: multiple enumeration due to deferred execution. Multiple enumeration is something that comes up a lot in the context of LINQ - an IEnumerable<byte> is not the same thing as a byte[]. Whereas it's perfectly reasonable to pass a byte[] off to two different functions to deal with, doing the same thing with an IEnumerable<byte> usually results in that sequence being created and enumerated twice! Depending on where the sequence comes from, this can range from inefficient (a duplication of effort) to catastrophic (it may not be possible to generate the sequence a second time). The topic of multiple enumeration is rich enough to merit its own blog post (here's one and here's another and here's another), and I won't go into it further here. But be on the look-out, because it can be tricky!
Further aside: To help avoid this problem in PngEncoder, I created the TrackingEnumerable and TrackingEnumerator classes in the sample project. These are simple IEnumerable/IEnumerator implementations except that they output a string with Debug.WriteLine whenever a new enumeration is begun. For the purposes of PngEncoder, seeing any more than one of these outputs represents a bug!


In an attempt to ensure that my PngEncoder implementation behaves well and produces valid PNG files, I've written a small collection of automated tests (included with the download). Most of them are concerned with parameter validation and correct behavior with regard to the IEnumerable idiosyncrasies I mentioned earlier, but the one called "RandomImages" is all about output verification. That test creates 25 PNG files of random size and contents, encodes them with PngEncoder, then decodes them with two different decoder implementations (System.Drawing.Bitmap and System.Windows.Media.Imaging.PngBitmapDecoder) and verifies the output is identical to the input. I've also verified that PngEncoder's PNG files can be opened in a variety of different image viewing/editing applications. (Interesting tidbit: Internet Explorer seems to be the strictest about requiring valid PNG files!) While none of this is a guarantee that all images will encode successfully, I'm optimistic typical scenarios will work well for people. :)


[Click here to download the source code for the complete PngEncoder.cs implementation, a simple test application, and the automated test suite.]


At the end of the day, the big question is whether my focus (obsession?) with an IEnumerable-centric implementation was justified. From a practical point of view, you could argue this either way - I happen to think things worked out pretty elegantly, but others might argue the code would be clearer with explicit allocations. I'll claim the memory/computational benefits I describe here are pretty compelling (especially in resource-constrained scenarios like Windows Phone), but others could reasonably argue that naïve consumers of PngEncoder are likely to write their code in a way that negates those benefits (ex: by calling ToArray).

However, I'm not going to spend a lot of time second-guessing myself; I think it was a great experience. :) The following sums up my thoughts on the matter pretty nicely:

The road of life twists and turns and no two directions are ever the same. Yet our lessons come from the journey, not the destination. - Don Williams, Jr.

sudo localize & make me-a-sandwich [Free PseudoLocalizer class makes it easy for anyone to identify potential localization issues in .NET applications]

I've previously written about the benefits of localization and shown how to localize Windows Phone 7 applications. The techniques I describe in that post constitute a good workflow that's just as suitable for WPF and Silverlight desktop applications! But even with good processes in place, the way localization is done in the real world has some challenges...

You see, localization can be expensive: hiring people to translate an entire application, re-testing it in the newly supported locale, fixing resulting bugs, etc.. So teams often wait till near the end of the release cycle - after the UI has stabilized - to start localizing the application. This is a perfectly reasonable approach, but there are invariably a few surprises - usually some variation of "What do you mean that string is hard-coded in English and can't be translated??". It sure would be nice if teams could do some kind of low-cost localization in order to identify - and fix - oversights like this long before they turn into problems...

Yep - that process is known as pseudo-localization. What pseudo-localization does is create alternate versions of resource strings by using different characters that look similar enough to the original English characters that text is still readable - but obviously "localized". (This is one of those "a picture is worth a thousand words" moments, so please check out the Wikipedia article or bear with me for just a moment...) Additionally, because some languages tend to have longer phrases than English (German, I'm looking at you!), there's often an additional aspect of string lengthening to simulate that and help detect wrapping, clipping, and the like.

Aside: It's important to remember that the character "translations" are chosen exclusively on the basis of how similar they look to the original character and not on the basis of linguistic correctness, cultural influence, or anything like that!


Here's the sample application I created for this post running in its normal English mode. (It's not very sophisticated, but it's good enough for our purposes.) Can you tell if all the strings are properly localizable? Are there any other localization concerns here?

Normal application


Pseudo-localization isn't a new concept and there are a variety of tools out there that do a fine job of it. However, none of the ones I found during a quick search appeared to be free, simple to use, and unencumbered by restrictions (i.e., licensing, distribution, etc.). So I thought it would be fun to write my own and share it with the community as open source under the very permissive Ms-PL license. :)

The class I've created is called PseudoLocalizer and it automatically pseudo-localizes standard .NET RESX-based resources. Using RESX-based resources is the recommend approach for building localizable Silverlight and Windows Phone 7 applications, the recommended approach for building localizable Windows Forms applications, and also a perfectly fine approach for building localizable WPF applications.

Aside: The recommended technique for localizing WPF applications is actually something else, but I have some issues with that approach and won't be discussing it here.


I've said it's easy to use PseudoLocalizer: all it takes are three special steps:

  1. Add the (self-contained) PseudoLocalizer.cs file from the sample download to your project.

  2. Add the following code somewhere it will be run once and run early (ex: the application's constructor):

    #if PSEUDOLOCALIZER_ENABLED
        Delay.PseudoLocalizer.Enable(typeof(ProjectName.Properties.Resources));
    #endif
  3. Add PSEUDOLOCALIZER_ENABLED to the list of conditional compilation symbols for your project (via the Project menu, Properties item, Build tab in Visual Studio).

Done! Not only will all localizable strings be automatically pseudo-localized, but images will, too! How does one pseudo-localize an image?? Well, I considered a variety of techniques, but settled on simply inverting the colors to create a negative image. This has the nice benefit of keeping the image dimensions the same (which is sometimes important) as well as preserving any directional aspects it might have (i.e., an image of an arrow pointing left has the same meaning after being "localized").

Aside: I've never seen image pseudo-localization before, but it seems like the obvious next step. Although many images don't need to be localized (ex: a gradient background), some images have text in them or make assumptions that aren't true in all locales (ex: thumbs up means "good"). So it seems pretty handy to know which images aren't localizable! :)


Okay, let's see how well you did on the localization quiz! Here's the sample application with PseudoLocalizer enabled:

Pseudo-localized application

Hum... While it's clear most of the text was correctly localizable (and therefore automatically pseudo-localized), it appears the lazy developer (uh, wait, that's me...) forgot to put one of the strings in the RESX file: "Goodbye" is hardcoded to English in the XAML. :( Fortunately, the image is localizable, so it can be changed if necessary. Unfortunately, the fixed-width application window seems to be a little too narrow for longer translations (like German) and is clipping two of the pseudo-localized strings! Nuts, I'm afraid this application may need a bit more work before we can feel good about our ability to ship versions for other languages...


[Click here to download the complete source code the PseudoLocalizer and the WPF sample application shown above.]


Notes:

  • What I've described in this post works only on WPF; Silverlight has a couple of limitations that prevent what I've done from working exactly as-is. My next blog post will discuss how to overcome those limitations and use PseudoLocalizer on Silverlight, too!

  • The way PseudoLocalizer works so seamlessly is by examining the type of the generated resource class and using (private) reflection to swap in a custom ResourceManager class for the default one. This PseudoLocalizerResourceManager works the same as the default one for loading resources - then it post-processes strings and bitmaps to provide its pseudo-localization effects. Private reflection (i.e., examining and/or modifying the internal data of an object) is generally a bad practice - but I tend to believe it's acceptable here because the target class is simple, its (generated) code is part of the project, and PseudoLocalizer is only ever going to be used as a development tool (i.e., never in a released application).

  • For readers who want a brief overview of how to use RESX-resources in WPF, here you go:

    1. Set the Access Modifier to "Public" in the RESX designer so the auto-generated resource property accessors will be accessible to the WPF data-binding system.

    2. Create an instance of the auto-generated RESX class (typically named "Resources") as a WPF-accessible resource:

      <Window.Resources>
          <properties:Resources x:Key="Resources" xmlns:properties="clr-namespace:PseudoLocalizerWPF.Properties"/>
      </Window.Resources>
    3. Create a Binding that references the relevant properties of that resource wherever you want to use them:

      <TextBlock Text="{Binding Path=AlphabetLower, Source={StaticResource Resources}}"/>
  • Because RESX files expose images as instances of System.Drawing.Image and WPF deals with System.Windows.Media.ImageSource, I wrote a simple IValueConverter to convert from the former to the latter. (And it's part of the source code download.) Using BitmapToImageSourceConverter follows the usual pattern for value converters:

    1. Create an instance as a resource:

      <delay:BitmapToImageSourceConverter x:Key="BitmapToImageSourceConverter" xmlns:delay="clr-namespace:Delay"/>
    2. Use that resource in the relevant Binding:

      <Image Source="{Binding Path=Image, Source={StaticResource Resources}, Converter={StaticResource BitmapToImageSourceConverter}}"/>


Because the cost of fixing defects increases (dramatically) as a product gets closer to shipping, it's important to find and fix issues as early as possible. Localization can be a tricky thing to get all the kinks worked out of, so it's helpful to have good tools around to ensure a team is following good practices. With its low cost, simple implementation and friction-free usage model, I'm hopeful PseudoLocalizer will become another good tool to help people localize successfully!

"Might as well face it, you're addicted to blob..." [BlobStoreApi update adds container management, fragmented response handling, other improvements, and enhanced Amazon S3 support by Delay.Web.Helpers!]

As part of my previous post announcing the Delay.Web.Helpers assembly for ASP.NET and introducing the AmazonS3Storage class to enable easy Amazon Simple Storage Service (S3) blob access from MVC/Razor/WebMatrix web pages, I made some changes to the BlobStoreApi.cs file it built on top of. BlobStoreApi.cs was originally released as part of my BlobStore sample for Silverlight and BlobStoreOnWindowsPhone sample for Windows Phone 7; I'd made a note to update those two samples with the latest version of the code, but intended to blog about a few other things first...


Fragmented response handling

BlobStoreOnWindowsPhone sample

That's when I was contacted by Steve Marx of the Azure team to see if I could help out Erik Petersen of the Windows Phone team who was suddenly seeing a problem when using BlobStoreApi: calls to GetBlobInfos were returning only some of the blobs instead of the complete list. Fortunately, Steve knew what was wrong without even looking - he'd blogged about the underlying cause over a year ago! Although Windows Azure can return up to 5,000 blobs in response to a query, it may decide (at any time) to return fewer (possibly as few as 0!) and instead include a token for getting the rest of the results from a subsequent call. This behavior is deterministic according to where the data is stored in the Azure cloud, but from the point of view of a developer it's probably safest to assume it's random. :)

So something had changed for Erik's container and now he was getting partial results because my BlobStoreApi code didn't know what to do with the "fragmented response" it had started getting. Although I'd like to blame the documentation for not making it clear that even very small responses could be broken up, I really should have supported fragmented responses anyway so users would be able to work with more than 5,000 blobs. Mea culpa...

I definitely wanted to add BlobStoreApi support for fragmented Azure responses, but what about S3? Did my code have the same problem there? According to the documentation: yes! Although I don't see mention of the same "random" fragmentation behavior Azure has, S3 enumerations are limited to 1,000 blobs at a time, so that code needs the same update in order to support customer scenarios with lots of blobs. Fortunately, the mechanism both services use to implement fragmentation is quite similar and I was able to add most of the new code to the common RestBlobStoreClient base class and then refine it with service-specific tweaks in the sub-classes AzureBlobStoreClient and S3BlobStoreClient.

Fortunately, the extra work to support fragmented responses is all handled internally and is therefore invisible to the developer. As such, it requires no changes to existing applications beyond updating to the new BlobStoreApi.cs file and recompiling!


Container support

While dealing with fragmented responses was fun and a definite improvement, it's not the kind of thing most people appreciate. People don't usually get excited over fixes, but they will get weak-kneed for new features - so I decided to add container/bucket management, too! Specifically, it's now possible to use BlobStoreApi to list, create, and delete Azure containers and S3 buckets using the following asynchronous methods:

public abstract void GetContainers(Action<IEnumerable<string>> getContainersCompleted, Action<Exception> getContainersFailed);
public abstract void CreateContainer(string containerName, Action createContainerCompleted, Action<Exception> createContainerFailed);
public abstract void DeleteContainer(string containerName, Action deleteContainerCompleted, Action<Exception> deleteContainerFailed);

To be clear, each instance of AzureBlobStoreClient and S3BlobStoreClient is still associated with a specific container (the one that was passed to its constructor) and its blob manipulation methods act only on that container - but now it's able to manipulate other containers, too.

Aside: In an alternate universe, I might have made the new container methods static because they don't have a notion of a "current" container the same way the blob methods do. However, what I want more than that is to be able to leverage the existing infrastructure I already have in place for creating requests, authorizing them, handling responses, etc. - all of which take advantage of instance methods on RestBlobStoreClient that AzureBlobStoreClient and S3BlobStoreClient override as necessary. In this world, it's not possible to have static methods that are also virtual, so I sacrificed the desire for the former in order to achieve the efficiencies of the latter. Maybe one day I'll refactor things so it's possible to have the best of both worlds - but for now I recommend specifying a null container name when creating instances of AzureBlobStoreClient and S3BlobStoreClient when you want to ensure they're used only for container-specific operations (and not for blobs, too).


Other improvements

Delay.Web.Helpers AmazonS3Storage sample

With containers getting a fair amount of love this release, it seemed appropriate to add a containerName parameter to the AzureBlobStoreClient constructor so it would look the same as S3BlobStoreClient's constructor. This minor breaking change means it's now necessary to specify a container name when creating instances of AzureBlobStoreClient. If you want to preserve the behavior of existing code (and don't want to have to remember that "$root" is the magic root container name for Azure (and previous default)), you can pass AzureBlobStoreClient.RootContainerName for the container name.

In the process of doing some testing of the BlobStoreApi code, I realized I hadn't previously exposed a way for an application to find out about asynchronous method failures. While it's probably true that part of the reason someone uses Azure or S3 is so they don't need to worry about failures, things can always go wrong and sometimes you really need to know when they do. So in addition to each asynchronous method taking a parameter for the Action to run upon successful completion, they now also take an Action<Exception> parameter which they'll call (instead) when a failure occurs. This new parameter is necessary, so please provide a meaningful handler instead of passing null and assuming things will always succeed. :)

I've also added a set of new #defines to allow BlobStoreApi users to easily remove unwanted functionality. Because they're either self-explanatory or simple, I'm not going to go into more detail here (please have a look at the code if you're interested): BLOBSTOREAPI_PUBLIC, BLOBSTOREAPI_NO_URIS, BLOBSTOREAPI_NO_AZUREBLOBSTORECLIENT, BLOBSTOREAPI_NO_S3BLOBSTORECLIENT, and BLOBSTOREAPI_NO_ISOLATEDSTORAGEBLOBSTORECLIENT.

Aside: Actually, BLOBSTOREAPI_PUBLIC deserves a brief note: with this release of the BlobStoreApi, the classes it implements are no longer public by default (they're expected to be consumed, not exposed). This represents a minor breaking change, but the trivial fix is to #define BLOBSTOREAPI_PUBLIC which restores things to being public as they were before. That said, it might be worth taking this opportunity to make the corresponding changes (if any) to your application - but that's entirely up to you and your schedule.

The last thing worth mentioning is that I've tweaked BlobStoreApi to handle mixed-case blob/container names properly. Formerly, passing in upper-case characters for a blob name could result in failures for both Azure and S3; with this change in place, that scenario should work correctly.


BlobStore with silly sample data


New BlobStore and BlobStoreOnWindowsPhone samples

I've updated the combined BlobStore/BlobStoreOnWindowsPhone download to include the latest version of BlobStoreApi with all the changes outlined above. Although there are no new features in either sample, they both benefit from fragmented container support and demonstrate how to use the updated API methods properly.

[Click here to download the complete BlobStore source code and sample applications for both Silverlight 4 and Windows Phone 7.]


New Delay.Web.Helpers release and updated sample

The Delay.Web.Helpers download includes the latest version of BlobStoreApi (so it handles fragmented containers) and includes new support for container management in the form of the following methods on the AmazonS3Storage class:

/// <summary>
/// Lists the blob containers for an account.
/// </summary>
/// <returns>List of container names.</returns>
public static IList<string> ListBlobContainers() { ... }

/// <summary>
/// Creates a blob container.
/// </summary>
/// <param name="containerName">Container name.</param>
public static void CreateBlobContainer(string containerName) { ... }

/// <summary>
/// Deletes an empty blob container.
/// </summary>
/// <param name="containerName">Container name.</param>
public static void DeleteBlobContainer(string containerName) { ... }

As I discuss in the introductory post for Delay.Web.Helpers, I'm deliberately matching the existing WindowsAzureStorage API with my implementation of AmazonS3Storage, so these new methods look and function exactly the same for both web services. As part of this release, I've also updated the Delay.Web.Helpers sample page to show off the new container support as well as added some more automated tests to verify it.

[Click here to download the Delay.Web.Helpers assembly, its complete source code, all automated tests, and the sample web site.]


Summary

While I hadn't thought to get back to blobs quite so soon, finding out about the fragmented response issue kind of forced my hand. But all's well that ends well - I'm glad to have added container supported to Delay.Web.Helpers because that means it now has complete blob-related feature parity with the WindowsAzureStorage web helper and that seems like a Good Thing. What's more, I got confirmation that the Windows Azure Managed Library does not support Silverlight, so my BlobStoreApi is serving duty as an unofficial substitute for now. [Which is cool! And a little scary... :) ]

Whether you're using Silverlight on the desktop, writing a Windows Phone 7 application, or developing a web site with ASP.NET using MVC, Razor, or WebMatrix, I hope today's update helps your application offer just a little more goodness to your users!

There's a blob on your web page - but don't wipe it off [New Delay.Web.Helpers assembly brings easy Amazon S3 blob access to ASP.NET web sites!]

Microsoft released a bunch of new functionality for its web platform earlier today - and all of them are free! The goodies include new tools like WebMatrix, ASP.NET MVC3 and the Razor syntax, and IIS Express - as well updates to existing tools like the Web Platform Installer and Web Deploy. These updates work together to enable a variety of new scenarios for the web development community while simultaneously making development simpler and more powerful. I encourage everyone to check it out!


Web Helpers...

One of the things I find particularly appealing is the idea of "web helpers": chunks of code that can be easily added to a project to make common tasks easier - or enable new ones! Helpers can do all kinds of things, including integrating with bit.ly, Facebook, PayPal, Twitter, and so-on. For an example of cool they are, here's how easy it is to add an interactive Twitter profile section to any ASP.NET web page [and it's even easier if you don't customize the colors :) ]:

@Twitter.Profile(
    "DavidAns",
    height:150,
    numberOfTweets:20,
    scrollBar:true,
    backgroundShellColor:"#8ec1da",
    tweetsBackgroundColor:"#ffffff",
    tweetsColor:"#444444",
    tweetsLinksColor:"#1985b5")

Which renders as:

Twitter profile search

You can see other examples of useful web helpers (including charting, cryptography, Xbox gamer cards, ReCaptcha, and more) in the ASP.NET social networking tutorial.


Aside: While web helper assemblies like System.Web.Helpers and Microsoft.Web.Helpers are obviously easy to use from ASP.NET Razor and ASP.NET MVC, what's neat (and not immediately obvious) is that they don't need to be tied to those technologies. At the end of the day, helper assemblies are normal .NET assemblies and some of their functionality can be used equally well in non-web scenarios!


The inspiration...

One of the web helpers that caught my eye when I was looking around is the Windows Azure Storage Helper which makes it easy to incorporate Windows Azure blob and table access into ASP.NET applications. If you happened to be reading this blog a few months ago, you might remember that I already have some experience working with Windows Azure and Amazon S3 blobs in the form of my BlobStore Silverlight application and BlobStoreOnWindowsPhone Windows Phone 7 sample.

When I wrote BlobStore for Silverlight, I didn't see any pre-existing libraries I could make use of (the Windows Azure Managed Library didn't (and maybe still doesn't?) work on Silverlight and there were some licensing concerns with the S3 libraries I came across), so I implemented my own support for what I needed: list/get/set/delete support for blobs on Windows Azure and Amazon Simple Storage Service (S3). But now that we're talking about ASP.NET, web helpers run on the server and the Windows Azure Storage Helper is able to leverage the Windows Azure Managed Library for all the heavy lifting so it can expose things in a clean, web helper-suitable way (via the WindowsAzureStorage static class and its associated methods).

That's good stuff and the WindowsAzureStorage helper seems quite comprehensive - but what about customers who are already using Amazon S3 and can't (or won't) switch to Windows Azure? Well, that's where I come in. :) I'd thought it would be neat to create my own web helper assembly, and this seemed like the perfect opportunity - so I've created the Delay.Web.Helpers web helper assembly by leveraging the work I'd already done for BlobStore. This enables basic list/get/set/delete functionality for S3 blobs without a much additional effort and seems like a great way to help out more customers!


The API...

Most people don't like having many different ways to do the same thing, so I decided early on that the fundamental API for AmazonS3Storage would be the same as that already exposed by WindowsAzureStorage. That led directly to the following API (the two "secret key" properties have been renamed to match Amazon's terminology, but they're used exactly the same):

namespace Delay.Web.Helpers
{
    public static class AmazonS3Storage
    {
        public static string AccessKeyId { get; set; }
        public static string SecretAccessKey { get; set; }

        public static IList<string> ListBlobs(string bucketName);
        public static void UploadBinaryToBlob(string blobAddress, byte[] content);
        public static void UploadBinaryToBlob(string blobAddress, Stream stream);
        public static void UploadBinaryToBlob(string blobAddress, string fileName);
        public static void UploadTextToBlob(string blobAddress, string content);
        public static byte[] DownloadBlobAsByteArray(string blobAddress);
        public static void DownloadBlobAsStream(string blobAddress, Stream stream);
        public static void DownloadBlobToFile(string blobAddress, string fileName);
        public static string DownloadBlobAsText(string blobAddress);
        public static void DeleteBlob(string blobAddress);
    }
}

And because I wanted to be sure AmazonS3Storage could really be dropped into an application that already used WindowsAzureStorage, I did exactly that: I downloaded the WindowsAzureStorage sample application, performed a find-and-replace on the class name, updated the names of the two "secret key" properties, removed some unsupported functionality, and then verified that the sample ran and worked correctly. (It did!)


The enhancements...

While I think the WindowsAzureStorage APIs works well for listing and reading existing blobs, it's not immediately clear what a blobAddress string is made up of or how to create one, so I might get a little confused in scenarios that create blobs from scratch... It so happens that the blobAddress structure is ContainerName/BlobName (which I preserve in AmazonS3Storage), but that feels like an implementation detail developers focusing on the upload scenario shouldn't need to know. Therefore, I've also exposed the following set of methods with separate bucketName and blobName parameters (and otherwise the same signatures):

public static void UploadBinaryToBlob(string bucketName, string blobName, byte[] content);
public static void UploadBinaryToBlob(string bucketName, string blobName, Stream stream);
public static void UploadBinaryToBlob(string bucketName, string blobName, string fileName);
public static void UploadTextToBlob(string bucketName, string blobName, string content);
public static byte[] DownloadBlobAsByteArray(string bucketName, string blobName);
public static void DownloadBlobAsStream(string bucketName, string blobName, Stream stream);
public static void DownloadBlobToFile(string bucketName, string blobName, string fileName);
public static string DownloadBlobAsText(string bucketName, string blobName);
public static void DeleteBlob(string bucketName, string blobName);

I'm optimistic this provides a somewhat easier model for developers to work with, but I encourage folks to use whatever they think is best! :)

Aside: I hadn't previously needed create/list/delete functionality for buckets, so the corresponding methods are not part of today's release. However, I expect them to be rather easy to add and will likely do so at a future date.


The testing...

To try to ensure I hadn't made any really dumb mistakes, I wrote a complete automated test suite for the new AmazonS3Storage class. With the exception of verifying each ArgumentNullException for null parameters, the test suite achieves complete coverage of the new code and runs as a standard Visual Studio test project (i.e., here's an example of using web helpers "off the web").


The sample...

As much fun as testing is, a sample is often the best way to demonstrate how an API is used in practice - so I also put together a (very) quick Razor-based web site to provide simple list/get/set/delete access to an arbitrary Amazon S3 account/bucket:

Delay.Web.Helpers AmazonS3Storage sample


The example...

Using the Delay.Web.Helpers web helper is as easy as you'd expect; here's the piece of code that lists the bucket's contents (which is only as long as it is because it handles invalid credentials and empty buckets):

@if (configured) {
    <p class="Emphasized">
        Contents of bucket <strong>@bucket</strong>:
    </p>
    var blobs = AmazonS3Storage.ListBlobs(@bucket);
    if (blobs.Any()) {
        foreach (var blobAddress in blobs) {
            <p>
                <a href="@Href("DownloadBlob", new { BlobAddress = blobAddress})">@blobAddress.Split('/').Last()</a>
                -
                <a href="@Href("DeleteBlob", new { BlobAddress = blobAddress})" class="Subdued">[Delete]</a>
            </p>
        }
    } else {
        <em>[Empty]</em>
    }
} else {
    <p>
        <strong>[Please provide valid Amazon S3 account credentials in order to use this sample.]</strong>
    </p>
}

The one "gotcha" that's easy to forget (and that causes compile errors when you do!) is the using statement that goes at the top of the .cshtml file and tells Razor where to find the implementation of the AmazonS3Storage class:

@using Delay.Web.Helpers


The download...

[Click here to download the Delay.Web.Helpers assembly, its complete source code, all automated tests, and the sample web site.]

To use the Delay.Web.Helpers assembly in your own projects, simply download the ZIP file above, unblock it (click here for directions on "unblocking" a file), extract its contents to disk, and reference Delay.Web.Helpers.dll - or copy the Delay.Web.Helpers.dll and Delay.Web.Helpers.xml files to wherever they're needed (typically the Bin directory of a web site).

Aside: Technically, the Delay.Web.Helpers.xml file is optional - its sole purpose is to provide enhanced IntelliSense (specifically: method and parameter descriptions) in tools like Visual Studio. If you don't care about that, feel free to omit this file!

To play around with the included sample web site, just open the folder Delay.Web.Helpers\SourceCode\SampleWebSite in WebMatrix or Visual Studio (as a web site) and run it.

To have a look at the source code for the Delay.Web.Helpers assembly, tweak it, run the automated tests, or open the sample web site (a slightly different way), just open Delay.Web.Helpers\SourceCode\Delay.Web.Helpers.sln in Visual Studio.


The summary...

Being able to repurpose code is a great thing! In this case, all it took to convert my existing BlobStoreApi into an ASP.NET Razor/MVC-friendly web helper was writing a few thin wrapper methods. With a foundation like that, all it takes is some testing to catch mistakes, a quick sample to show it all off, and all of a sudden you've got yourself the makings of a snazzy blog post - and a new web helper! :)

SayIt, don't spray it! [Free program (and source code) makes it easy to use text-to-speech from your own programs and scripts]

Over the holiday break, I was asked to create a program to "speak" (via text-to-speech) simple sentences that were provided on the command-line. None of the available offerings were "just right" for the customer's scenario, so I was asked if I knew of any other options... Although I hadn't used it before, I figured the .NET System.Speech assembly/classes would make solving this task pretty easy, so I decided to give it a quick try.

And about three minutes later, I was done [ :) ]:

using System.Speech.Synthesis;

class Program
{
    static void Main(string[] args)
    {
        (new SpeechSynthesizer()).Speak(string.Join(" ", args));
    }
}


Because that was so easy, it felt like cheating; I decided to add support for a few more features to round out the offering and turn the whole thing into a free tool and blog post. The program I've written is called SayIt and is a window-less .NET 4 application to speak arbitrary text from the command line (or from a file) while allowing the user to make simple customizations (such as gender and volume).

Here's the "documentation" that shows up when SayIt is run without any parameters:

Use the command line to tell SayIt what to say and how to say it.

SayIt.exe
    [--Gender Male|Female|Neutral]
    [--Volume Silent|ExtraSoft|Soft|Medium|Loud|ExtraLoud|Default]
    [--Rate ExtraSlow|Slow|Medium|Fast|ExtraFast]
    [--Text <Text.txt>]
    [--SSML <SSML.xml>]
    [<Text to say>]

Examples:
    SayIt.exe Hello world
    SayIt.exe --Gender Female --Text C:\My\File.txt

Version 2011-01-04
http://blogs.msdn.com/b/delay/


For fun, I created the following icon (if you don't recognize it, here's a hint):

SayIt icon


When you run SayIt with the proper parameters (combine them in any order!), SayIt uses the Windows text-to-speech engine to speak the text using the default output device. It does this without creating or showing a window, so other programs can make use of SayIt without distracting the user. Alternatively, SayIt can be called from batch files to provide status updates for custom scripts and the like. Simple text can be passed directly on the command line, while more complicated (or lengthy) text can be passed in a file (via the --Text option).

Here are a few ideas to get you started:

SayIt Build completed
SayIt Processing file 12 of 25
SayIt You've got mail!
SayIt I'm sorry, Dave. I'm afraid I can't do that.
SayIt Barbra Streisand


Aside from the simple gender, volume, and rate customizations that can be done on the command-line, the most likely tweak is fine-tuning the pronunciation of a particular word or words. (Though most sentences are quite understandable by default, some words come out a little garbled!) Fortunately, there's a W3C standard for customizing pronunciation and SayIt supports that standard (via the --SSML parameter): Speech Synthesis Markup Language.

SSML is a simple, XML-based syntax for controlling the behavior of text-to-speech applications like SayIt. I won't go into the gory details here (the SSML specification has everything you need), but I will highlight the phoneme element in the form of a simple sample that's part of the small SayIt test suite:

<!-- IPA pronunciations based on http://en.wiktionary.org/wiki/tomato -->
<speak version='1.0' xmlns='http://www.w3.org/2001/10/synthesis' xml:lang='en-US'>
  You say <phoneme alphabet="ipa" ph="təˈmaɪto">tomato</phoneme>.
  I say <phoneme alphabet="ipa" ph="təˈmeɪto">tomato</phoneme>.
</speak>


Although technology hasn't come quite as far as Arthur C. Clarke envisioned in 2001: A Space Odyssey, it's still pretty amazing what the common household computer is capable of. Speech - and other forms of "natural input" - can be a great way to personalize the computing experience and the ease with which SayIt can be incorporated into existing programs and scripts should make it a natural fit for many scenarios. Instead of using an inefficient polling approach to find out when your tasks finish, let the computer tell you - literally! :)


[Click here to download the .NET 4 SayIt application, complete source code, and simple tests.]


Notes:

  • The default English install of Windows 7 comes with only one "voice", Microsoft Anna, which is female. Therefore, even if you specifically request a male voice (via --Gender Male or SSML), you'll probably still hear Anna. This is not a bug in SayIt. :)
  • SayIt exposes the same volume settings that the System.Speech assembly does (via the PromptVolume enumeration), but you probably won't be able to increase the speech volume because the default setting is "ExtraLoud". This is not a bug in SayIt, either.
  • The speech engine is pretty good about spelling out acronyms like you'd want, but if you ever need to force the issue, just prefix the relevant word/acronym with the '-' character:
    SayIt Register your car at the -DOT.

"And she'd say, 'Can you see ... what I'm saying?'" [How to: Localize a Windows Phone 7 application that uses the Windows Phone Toolkit into different languages]

While it might be convenient if everybody spoke the same language (or communicated via telepathy), that's not the world we live in. :) Therefore, building applications that can be easily translated to other languages is an important consideration. Fortunately, it's easy - and it's covered in the MSDN article How to: Build a Localized Application for Windows Phone. But what's not covered is how to localize the controls in the Silverlight for Windows Phone Toolkit. As you might expect, it's fairly similar, but I've had a few people ask about this explicitly and I decided to do a quick post on the topic. As long as I was at it, I figured I'd show the entire process from start to finish just to make things a little easier...


Prepare the emulator/phone

In order to monitor our progress as the sample application gets localized, it's helpful to work in a non-default language which makes it easy to identify the un-localized parts. I run an English operating system, so I'll use Spanish for this example:

  1. Open the Settings application

  2. Choose region & language

  3. Open the Display language picker

  4. Change to "Español"

  5. Tap the link to restart the emulator/phone:

    Settings


Create a new application

We'll start with a brand new application using the default template provided by the Visual Studio 2010 development tools:

  1. From the File menu, choose New, then Project...

  2. Go to the "Silverlight for Windows Phone" section and create a "Windows Phone Application" with the name of your choice

  3. From the Project menu, choose Add New Item...

  4. Select "Resources File" and name it AppResources.resx

  5. Add an entry for Name="Title" and Value="welcome"

  6. Open MainPage.xaml.cs and add the following to the end of the constructor to set the text of the existing PageTitle element:

    PageTitle.Text = AppResources.Title;
  7. Run the application to see the custom title in English:

    New application


Localize the application

Now let's localize the sample application so it uses the proper language for the user's settings. In the steps below, we'll add support for Spanish (via the "es" language code), but adding other languages is a simple matter of repeating these steps using the other language's code and translations. It's a little bit of effort, but it's all quite simple:

  1. In the Solution Explorer window, select AppResources.resx by clicking on it

  2. Press Ctrl+C, then Ctrl+V to create a copy of AppResources.resx

  3. Select Copy of AppResources.resx and press F2 to rename it to AppResources.es.resx

  4. Staying in the Solution Explorer window, right-click the project root node and choose Unload Project

  5. Right-click the project node again and choose Edit [ProjectName].csproj

  6. Change the existing SupportedCultures element to be:

    <SupportedCultures>es</SupportedCultures>
  7. Back in the Solution Explorer window, right-click the project node and choose Reload Project

  8. Open AppResources.es.resx and change "welcome" to "bienvenido"

  9. Run the application and verify the custom title now shows up in Spanish (no code changes necessary!):

    Localized application


Add the Windows Phone Toolkit project

Now we'll modify the sample application to reference the Windows Phone Toolkit. (You can read more about the Windows Phone Toolkit in my introductory post.) Rather than adding a binary reference to the Toolkit, we'll add a project reference and build the Toolkit code as part of the sample application (for reasons that will become clear soon):

  1. Go to http://silverlight.codeplex.com/ and download the "Silverlight for Windows Phone Toolkit Source & Sample" ZIP file

  2. Unblock the ZIP file (see the notes at the end of this post for instructions)

  3. Right-click the ZIP file and choose Extract All... to extract all files to the directory of your choice

  4. From the File menu in Visual Studio, choose Add, then Existing Project...

  5. Choose the Microsoft.Phone.Controls.Toolkit.csproj file found in the same-named directory of the extracted content

  6. Click on the application project node in Solution Explorer to make it active again

  7. From the Project menu, choose Add Reference...

  8. Switch to the Projects tab and pick the Microsoft.Phone.Controls.Toolkit project

  9. Press F6 and verify the solution builds both projects successfully:

    ------ Build started: Project: Microsoft.Phone.Controls.Toolkit, Configuration: Debug Any CPU ------
    ...
    ------ Build started: Project: LocalizedPhoneApplicationWithToolkit, Configuration: Debug Any CPU ------
    ...
    ========== Build: 2 succeeded or up-to-date, 0 failed, 0 skipped ==========


Add some Windows Phone Toolkit controls

Now it's time to add two of those handy-dandy Windows Phone Toolkit controls (both covered in the aforementioned blog post): DatePicker and ToggleSwitch. We'll follow the usual steps for referencing third-party controls which should be pretty familiar to everyone:

  1. Open MainPage.xaml and switch to XAML view

  2. Add the following to the top of the file along with the other xmlns definitions:

    xmlns:toolkit="clr-namespace:Microsoft.Phone.Controls;assembly=Microsoft.Phone.Controls.Toolkit"
  3. Paste the following inside the empty "ContentPanel" Grid:

    <StackPanel>
        <toolkit:DatePicker/>
        <toolkit:ToggleSwitch/>
    </StackPanel>
  4. Optional: Follow the steps in the notes of my Windows Phone Toolkit introduction to add the DatePicker Application Bar icons to the project

  5. Run the application to see the text of the Toolkit controls in English:

    Toolkit ToggleSwitch Toolkit DatePicker

    Note: The day and month names are already in Spanish because they come from the operating system which knows to use the current language for dates. The Spanish-correct day/month/year formatting (vs. the United States default of month/day/year) is automatically provided by the DatePicker control.


Localize the Windows Phone Toolkit controls

Finally, we'll localize the Toolkit controls using the same process we did for the sample application itself:

  1. In Solution Explorer, expand the "Properties" folder for the Toolkit and click Resources.resx

  2. Press Ctrl+C, then Ctrl+V to create a copy of Resources.resx

  3. Select Copy of Resources.resx and press F2 to rename it to Resources.es.resx

  4. Open Resources.es.resx and change "CHOOSE DATE" to "ELIGE UNA FECHA", "cancel" to "cancelar", "done" to "listo", "Off" to "Desactivado", and "On" to "Activado"

  5. Run the application and verify the Toolkit control text is also in Spanish now:

    Localized Toolkit ToggleSwitch Localized Toolkit DatePicker

    Note: If you get the error Unable to copy file "obj\Debug\Microsoft.Phone.Controls.Toolkit.dll" to "..\Bin\Debug\Microsoft.Phone.Controls.Toolkit.dll". The process cannot access the file '..\Bin\Debug\Microsoft.Phone.Controls.Toolkit.dll' because it is being used by another process. when compiling, close all documents in Visual Studio via Window/Close All Documents, then restart Visual Studio itself.


At the end of the day, translating an application isn't just a nice thing to do, it's good business! We operate in a global marketplace and that means localized products can have a big advantage over their single-language-only competitors. While good localization can't save a bad application from itself, it can make a good application stand out. So please think about localization in your next marketplace application - your customers will appreciate it!

Gracias. :)


Notes:

  • People sometimes ask why the Windows Phone Toolkit (or the Silverlight Toolkit, for that matter) isn't already localized to the same set of languages the host platform supports. While I personally think it should be, doing so would take time and money and those two things can be in rather short supply at times. :) While I hope to see Toolkit localization become official some day, the good news for now is that things have been implemented such that they're easily localizable.

  • I've taken the quick/easy route of assigning the localized text resource directly to PageTitle.Text in the application's constructor, but that is not the recommended technique. Instead, what's generally preferred is what's described in the second half of the "Replacing hard-coded strings with strings in a resource file" section of the MSDN documentation: use a property Binding in XAML to reference the localized resources via a custom object as a StaticResource. It's a little unintuitive at first, but a very reasonable solution in practice. :)

  • After downloading the ZIP file for the Windows Phone Toolkit source code, you should "unblock" it before extracting its contents to avoid warnings from Visual Studio like Security Warning, You should only open projects from a trustworthy source. and The "ValidateXaml" task failed unexpectedly. System.IO.FileLoadException: Could not load file or assembly .... Unblocking is a simple matter of right-clicking on the ZIP file, choosing Properties from the context menu, clicking the Unblock button in the lower, right-hand corner of the resulting dialog, and hitting OK or Apply:

    Unblock button in Properties dialog