The blog of dlaa.me

You've got questions; I've got dumb looks [PDC10's Channel 9 Live Windows Phone 7 Q&A session available online and offline]

A few weeks ago, Microsoft held its annual Professional Developer's Conference (PDC10) and I had the privilege of being a (small!) part of it. This year's content spanned a variety of topics, including Windows Azure, HTML 5, Windows Phone 7, and more! The Channel 9 folks were there in force with two full days of live interviews - including a session on Windows Phone 7 Questions & Answers. Under the expert direction of Dan Fernandez, team members Jeff Wilcox, Peter Torr, and myself spent about 30 minutes talking about building Windows Phone 7 applications and answering questions from the (virtual) audience. It was a lot of fun, and I'd like to think it might even be educational! :)


Channel 9 Windows Phone 7 Question and Answer session


Here are the viewing options:


While you're at it, please check out some of the other PDC10 content online - there's a ton of good stuff and it's all free to enjoy!

The taming of the phone [New SetterValueBindingHelper sample demonstrates its usefulness on Windows Phone 7 (and Silverlight 4)]

If you've done much work with Bindings in Silverlight, you're probably aware that Silverlight doesn't support applying Bindings using a Style's Setter the same way its big brother WPF does. This limitation isn't a big deal at first because people don't tend to need that until they're more familiar with the platform and have started using MVVM and taking advantage of the ItemContainerStyle property. But once you're working with scenarios where it's relevant, being able to specify Bindings in a Setter can be extremely useful because it replaces a bunch of code/subclassing with a single line of XAML!

SetterValueBindingHelperDemo sample on Silverlight


Fortunately, it's possible to implement this feature outside the Silverlight framework! (Or at least to implement enough of it to cover nearly all the relevant scenarios.) I originally wrote SetterValueBindingHelper for Silverlight 3 as part of an application building exercise. Later on, I updated SetterValueBindingHelper to accommodate implementation changes in the Silverlight 4 platform - and was able to do so in a way that continued to work on Silverlight 3. So because Windows Phone 7 is based on Silverlight 3, I had a strong suspicion SetterValueBindingHelper would work there, too. But it wasn't until a couple of days ago that I had a chance to validate my theory - and now that I have, here's an updated version of the Silverlight sample for Windows Phone:

SetterValueBindingHelperDemo sample on Windows Phone 7


Other than converting the Silverlight sample's TreeView to a ListBox (because the former doesn't exist for Windows Phone), the sample works just the same on Windows Phone as on Silverlight. The code for SetterValueBindingHelper is nearly identical as well - the only difference being that the code to walk an application's assemblies for resolving attached property types can't be used because Windows Phone doesn't support the AssemblyPart.Load method. (But because this particular feature isn't used very often, its absence probably won't even be noticed.)

As a quick reminder, here's what a typical use looks like:

<ListBox.ItemContainerStyle>
    <Style TargetType="ListBoxItem">
        <!-- WPF syntax:
            <Setter Property="Foreground" Value="{Binding Color}"/> -->
        <Setter Property="delay:SetterValueBindingHelper.PropertyBinding">
            <Setter.Value>
                <delay:SetterValueBindingHelper
                    Property="Foreground"
                    Binding="{Binding Color}"/>
            </Setter.Value>
        </Setter>
    </Style>
</ListBox.ItemContainerStyle>
Aside: SetterValueBindingHelper supports more advanced scenarios, too - please refer to the previous post (or the original post) for information and examples.


[Click here to download the code for SetterValueBindingHelper along with sample applications for Silverlight 4 and Windows Phone 7.]


I've gotten a lot of great feedback from developers who have made use of SetterValueBindingHelper in their applications. I've found it quite helpful in my own projects, and I'm glad many of you have, too! With today's announcement, I hope another "generation" is able to use SetterValueBindingHelper to benefit from the many advantages of the Silverlight platform's rich data-binding support. :)

ListPicker? I hardly even know 'er! [A detailed overview of the Windows Phone Toolkit's ListPicker control]

In yesterday's post, I announced the second release of the Silverlight for Windows Phone Toolkit and gave an overview of the four new controls it includes. (For a discussion of the controls in the original Windows Phone Toolkit, please see my announcement for that release.) In today's post, I want to focus on one of the new controls, ListPicker, and discuss it in detail.


The sample application associated with the official Windows Phone Toolkit download offers a great overview of the Windows Phone Toolkit controls, but (deliberately) doesn't get into specific detail on any of them. This post is all about details, so I've written a dedicated sample application which is the source of all the XAML snippets and screenshots below:

[Click here to download the complete source code for the ListPickerSamples application.]


Background

From my previous post:

ListPicker is the Windows Phone 7 equivalent of the ComboBox control: give it a list of items and it will show the selected one and also allowing the user to pick from a list if they want to change it. The core applications on Windows Phone 7 implement two kinds of list selection: an in-place expander for picking among five or fewer items, and a full-screen popup for picking among more. The Toolkit's ListPicker control combines both experiences into one handy package by automatically selecting the right UX based on the number of items in its list! It is a standard ItemsControl subclass with all the common elements of a Selector, so the API will be familiar to just about everyone. In fact, you can take most existing ListBoxes and convert them to ListPickers just by changing the control name in XAML!

That's the gist: ListPicker is the control of choice for selecting values in Windows Phone 7 applications. To be more explicit, it is most appropriate in "Settings"-like scenarios where the user is offered a variety of different options and it makes sense to display only the current value (with an option to show everything once the user decides to make a change). Conversely, ListPicker is not appropriate for displaying long lists of data that the user is going to scan and scroll; scenarios like the "People" or "Marketplace" applications are better served by a ListBox or the Windows Phone Toolkit's new LongListSelector.


Typical Use

The most common scenario for ListPicker looks something like this:

<StackPanel>
    <toolkit:ListPicker
        Header="Rating"
        ItemsSource="{Binding Ratings}"
        SelectedIndex="1"
        SelectionChanged="RatingSelectionChanged"/>
    <TextBlock
        x:Name="RatingSelection"
        CacheMode="BitmapCache"/>
    ...
</StackPanel>

Which gets displayed like this (in normal and expanded forms):

Typical example (normal) Typical example (expanded)

As you'd expect for an ItemsControl subclass, the ItemsSource property is used to provide the list of items (see also: the Items property). And as you'd expect for a Selector-like control, the SelectionChanged event is used to signal changes and the SelectedIndex property is used to get or set the selection (see also: SelectedItem). Everything so far looks just like ListBox - the only difference is the Header property which can optionally be used to provide a simple, platform-consistent label for the ListPicker that offers additional context about the control's purpose (see also: HeaderTemplate).

Aside: The built-in ListBox control will throw an exception if you set SelectedIndex as in the example above because it tries to apply the selection before the Binding has provided the list of items. ListPicker specifically handles this common scenario so you don't have to jump through hoops to make it work. :)


Custom Templates

Displaying strings is all well and good, but sometimes it's nice to display richer content:

Custom template (normal) Custom template (expanded)

The first thing to do is set the ItemTemplate property as you would for ItemsControl or ListBox - that applies the specified DataTemplate to each item and formats it attractively in the usual manner. That works great, but what about ListPicker's Full mode that's used when the list has too many items? By default, the same ItemTemplate automatically applies there, too, so you may not need to do anything more! However, the Full mode UI uses the entire screen, so it's pretty common to want to specifically customize the appearance of the items for that mode. Therefore, the FullModeItemTemplate property lets you provide a different DataTemplate to be used in the Full mode scenario. Another relevant property for such cases is FullModeHeader which sets the content that's shown at the top of the full-screen "popup".

<toolkit:ListPicker
    Header="Spectrum"
    FullModeHeader="CHOOSE COLOR"
    ItemsSource="{Binding Rainbow}"
    ItemTemplate="{StaticResource RainbowTemplate}"
    FullModeItemTemplate="{StaticResource LargeRainbowTemplate}"/>


Threshold Overrides

By default, lists with five or fewer items expand in-place while lists with more items switch to a full-screen selection interface. This behavior matches the platform guidelines, but sometimes it might make sense to nudge the threshold one way or another (for very large or very small items, perhaps). You might even want to force a ListPicker to always use Expanded or Full mode...

Threshold (full) Threshold (expanded)

For these scenarios, there's the ItemCountThreshold property: it specifies the maximum number of items that will be displayed in Expanded mode. In addition to nudging it up or down a bit for custom scenarios, it can also be set to 0 to "always use Full mode" or a very large number to "always use Expanded mode". Granted, an application that forces Expanded mode for a list of 1000 items probably won't be easy to use - but the freedom is there to allow developers and designers to dial-in exactly the kind of experience they want.

<toolkit:ListPicker
    Header="Rating"
    FullModeHeader="CHOOSE RATING"
    ItemsSource="{Binding Ratings}"
    ItemCountThreshold="0"/>
<toolkit:ListPicker
    Header="Spectrum"
    ItemsSource="{Binding Rainbow}"
    ItemTemplate="{StaticResource RainbowTemplate}"
    ItemCountThreshold="100"/>


Two-Way Binding

Two-way binding

As you'd expect, ListPicker can be used with TwoWay Bindings as well. This is particularly convenient for the SelectedIndex/SelectedItem properties where it's common to want to set the initial value based on a data model (see also: MVVM) and/or when you want the model to update directly when selection changes. The corresponding XAML looks just how you'd expect:

<toolkit:ListPicker
    Header="Network"
    ItemsSource="{Binding Networks}"
    SelectedItem="{Binding CurrentNetwork, Mode=TwoWay}"/>
<StackPanel
    Orientation="Horizontal"
    Margin="{StaticResource PhoneMargin}"
    CacheMode="BitmapCache">
    <TextBlock Text="Current Network: "/>
    <TextBlock Text="{Binding CurrentNetwork}"/>
</StackPanel>


Tips and Tricks

At this point, I hope everyone knows how ListPicker works and has a good feel for when/where/why/how to use it. That being the case, there are a few additional things I'd like to draw attention to:

  1. The ListPicker philosophy is that "there is always an active selection", so it makes sure to select an item when it initializes or when the list changes. This automatic selection (of the first item in most cases) causes the SelectionChanged event to fire - and that causes the application's associated event handler to run (assuming one has been registered). In practice, this "initialization-time" event catches some people by surprise - but it's the intended behavior (and folks tend to agree it's correct once they understand why it happens). Now that you know about it, maybe your development experience will be a bit easier. :)

    Aside: If you want to ignore this event in code, it should be easy to detect because its SelectionChangedEventArgs.RemovedItems collection will be empty (have 0 items). And the only time that happens is when ListPicker is transitioning from an empty list to a non-empty one (e.g., on startup).
  2. ListPicker's transitions between Normal and Expanded mode are effectively animations of the control's Height. Because Height changes cause a layout pass, they don't take place on the composition thread and therefore are more susceptible to performance issues. An easy way to mitigate this in the typical "list of items in a StackPanel" scenario is to add CacheMode=BitmapCache to the elements that appear below the ListPicker (i.e., those that are pushed down by the animation). Please refer back to the first XAML snippet for an example - this tweak allows the Silverlight layout system to animate such controls as bitmaps and that helps the animation run a bit more smoothly.

    Aside: If you don't want to apply BitmapCache to every control individually, an alternate approach is to wrap the affected controls in another StackPanel and set the CacheMode property on the StackPanel instead. Please see the last XAML snippet above for an example of this.
  3. If you have a long list of controls in a StackPanel inside a ScrollViewer and there's a ListPicker near the bottom using Expanded mode, that expansion does not automatically scroll the screen to keep the ListPicker completely in view. On WPF, the fix would be a simple matter of calling FrameworkElement.BringIntoView. However, Silverlight doesn't have that API and there doesn't seem to be a good general purpose way for ListPicker to find the right parent to scroll. (Although walking up the visual tree to find the first ScrollViewer is probably right in most cases, it's not a sure thing; ListPicker errs on the side of caution and doesn't try to make guesses.) In practice, the underlying issue doesn't come up very often - when it has, my suggestion has been to use the ItemCountThreshold property to force the relevant ListPicker to use Full mode (which doesn't expand, so it doesn't alter the parent's layout, so it doesn't have this problem).


Summary

ListPicker is a relatively straightforward control that should be familiar to anyone who's used the standard ListBox. But while its API may be unremarkable, its user experience is all Windows Phone 7 goodness! :)

I hope you enjoy it!

Mo controls, mo controls, mo controls... [Announcing the second release of the Silverlight for Windows Phone Toolkit!]

I'm happy to report that we've just published the Silverlight for Windows Phone Toolkit November 2010 release! This is the second iteration of the Windows Phone Toolkit and effectively doubles the number of controls we've created to help developers and designers build more compelling, more platform-consistent user experiences with ease. The first Windows Phone Toolkit release has been a big hit and we've seen a lot of developers using it (in both binary and source forms) to build their Windows Phone 7 applications. But while we tried to address the most pressing needs with that release, there were still a couple of prominent controls missing...

With today's update, we've tried to provide more of the fundamental controls customers have been asking for - as well as API documentation and fixes for some of the bugs people reported with the first release. Recall that the Windows Phone Toolkit is published on CodePlex under the Ms-PL open-source license so anyone who wants can look at the source code to learn how we've done things - or customize any control to suit their specific scenario. As always, if you have suggestions for things we should add or change, please search the CodePlex issue tracker and vote for the issue (or create a new one if the idea is unique). We use your input to help prioritize our efforts and ensure we're delivering the right things for the community!


What's New?


ListPicker

ListPicker sample ListPicker popup sample
<toolkit:ListPicker Header="background">
    <sys:String>dark</sys:String>
    <sys:String>light</sys:String>
    <sys:String>dazzle</sys:String>
</toolkit:ListPicker>

ListPicker is the Windows Phone 7 equivalent of the ComboBox control: give it a list of items and it will show the selected one and also allow the user to pick from a list if they want to change it. The core applications on Windows Phone 7 implement two kinds of list selection: an in-place expander for picking among five or fewer items, and a full-screen popup for picking among more. The Toolkit's ListPicker control combines both experiences into one handy package by automatically selecting the right UX based on the number of items in its list! It is a standard ItemsControl subclass with all the common elements of a Selector, so the API will be familiar to just about everyone. In fact, you can take most existing ListBoxes and convert them to ListPickers just by changing the control name in XAML!


LongListSelector

LongListSelector movies sample LongListSelector people sample LongListSelector jump-list sample
<toolkit:LongListSelector
    ItemsSource="{StaticResource movies}"
    ListHeaderTemplate="{StaticResource movieListHeader}"
    GroupHeaderTemplate="{StaticResource movieGroupHeader}"
    GroupFooterTemplate="{StaticResource movieGroupFooter}"
    GroupItemTemplate="{StaticResource groupItemHeader}"
    ItemTemplate="{StaticResource movieItemTemplate}">
</toolkit:LongListSelector>

While ListPicker is about simple selection scenarios, LongListSelector is about advanced ones! Think of it as ListBox++--, it has everything you expect from ListBox plus a bunch of advanced capabilities and great on-device performance minus the levels of abstraction and generality that tend to slow ListBox down. LongListSelector supports full data and UI virtualization, flat lists, grouped lists (with headers!), and also implements the "jump list" header navigation UI that makes the "People" app so efficient! The theory behind LongListSelector is that it should be easy to fix a poorly-performing ListBox scenario by swapping in a LongListSelector instead: it handles all the tricky parts for you, so there's less to worry about and it "just works". Unless you've spent a lot of time fine-tuning your application's list behavior, you should see improved performance by switching to LongListSelector!


TransitionFrame (and Transitions)

TransitionFrame sample
RootFrame = new TransitionFrame();
<toolkit:TransitionService.NavigationInTransition>
    <toolkit:NavigationInTransition>
        <toolkit:NavigationInTransition.Backward>
            <toolkit:TurnstileTransition Mode="BackwardIn"/>
        </toolkit:NavigationInTransition.Backward>
        <toolkit:NavigationInTransition.Forward>
            <toolkit:TurnstileTransition Mode="ForwardIn"/>
        </toolkit:NavigationInTransition.Forward>
    </toolkit:NavigationInTransition>
</toolkit:TransitionService.NavigationInTransition>
<toolkit:TransitionService.NavigationOutTransition>
    <toolkit:NavigationOutTransition>
        <toolkit:NavigationOutTransition.Backward>
            <toolkit:TurnstileTransition Mode="BackwardOut"/>
        </toolkit:NavigationOutTransition.Backward>
        <toolkit:NavigationOutTransition.Forward>
            <toolkit:TurnstileTransition Mode="ForwardOut"/>
        </toolkit:NavigationOutTransition.Forward>
    </toolkit:NavigationOutTransition>
</toolkit:TransitionService.NavigationOutTransition>

The Windows Phone UI Guidelines encourage smooth, attractive page-to-page animations like the core applications show, but there has been little platform support for creating similar experiences in your own applications - until now! :) The new transition classes in the Windows Phone Toolkit aims to make it easy for application developers to add attractive, platform-consistent transitions to their applications. All that's necessary to enable transitions for an application's pages is tweak App.xaml.cs (shown above) and add a bit of XAML to each page to specify its transitions (also shown above). Everything else is done for you!

Aside: This release includes support for multiple flavors of the following transitions: turnstile, slide, rotate, swivel, and roll. It's also possible to implement custom transitions using the same framework!


AutoCompleteBox

AutoCompleteBox sample
<toolkit:AutoCompleteBox
    ItemsSource="{StaticResource words}"/>

AutoCompleteBox first appeared in the Silverlight 2 Toolkit, then later graduated to the Silverlight 3 SDK. Now it's back in the Toolkit - this time for Windows Phone 7! Because phones are about being small and quick to use, simplifying tedious tasks like text input is an important goal. Toward that end, a number of the core applications (like Bing search) make use of auto-completion to predict what the user is typing and save time by allowing them to click on the completed word instead. AutoCompleteBox makes it easy to bring the same convenience to your own applications by taking advantage of a phone-friendly implementation of this popular Silverlight control. By providing a suitable completion list (in any of a variety of ways), users are automatically prompted with the relevant matches as they start typing!


API Documentation

CHM file example

The source code for the Windows Phone Toolkit has included full XML Documentation Comments from the beginning, but now we've begun generating a separate CHM file with all the property/method/event comments in a single, easy-to-browse location. The documentation file is automatically installed by the Windows Phone Toolkit installer and a handy link is added to the "Silverlight for Windows Phone Toolkit" folder in the Start Menu. Because we don't have dedicated documentation writers on the Toolkit team, our documentation is a bit on the terse side - but the CHM file is still a great way to survey the Toolkit classes and get a feel for what's available. And because the sample syntax is available in both C# and VB, everyone should be comfortable with the examples!


Bug fixes for existing controls

The previous Toolkit release wasn't all that long ago and we've been quite busy since then, but we've still managed to squeeze in fixes for some of the more annoying bugs customers reported. That's not to say that we fixed them all or that we had a chance to squash your favorite bug, but we were fortunate to be able to fix a good number of customer-impacting issues and I hope everyone finds the new controls even more pleasant to use! :)


[Click here to download the Silverlight for Windows Phone Toolkit November 2010 release.]


The screen shots and XAML shown above are all from the sample application you can download along with the Toolkit. I encourage people to play around with the sample if they want to experiment with any of these controls (in the emulator or on the device) or if they want to learn more about how these controls work. I anticipate more in-depth coverage will show up in the coming weeks (I will be posting a detailed ListPicker overview tomorrow!), but for now the sample application is a great springboard to get folks started!


In closing, I'm really glad we've been able to get this second round of controls out to the community in such a short time! While there are probably still some "nice to have" controls that could be added to further round-out the Windows Phone 7 control offering, I think that what we've included in the Windows Phone Toolkit represents nearly all the critical ones needed to unblock important scenarios. I hope people continue to enjoy their Windows Phone development experience and that the new Windows Phone Toolkit makes application development even easier! :)

"Silence is the virtue of fools." [Why the Windows Phone 7 Emulator can sometimes take forever to access the network - and how to fix it!]

If you've used the Windows Phone 7 emulator to access the network, you might have noticed that in some environments it takes an absurdly long time for network activity to complete. For example, a single HTTP request with Internet Explorer or an HttpWebRequest from a custom Silverlight application can take upwards of 20-30 seconds to complete - even when the remote server responds immediately.

Now, a lot of you probably haven't experienced this problem and have no idea what I'm talking about - but I bet those of you who have are eager for a solution! I had to deal with this myself, and I know it makes developing a network-oriented application exceedingly frustrating...

Fortunately, there's a fix! :)


The Cause

I got so tired of the delays one evening, I decided to install Microsoft's Network Monitor (AKA NetMon) so I could look at what was happening at the network level. (Aside: Network Monitor is a fantastic tool for sniffing packets. Another great program (which works cross-platform) is Wireshark.) So I ran a new instance of the emulator, started the trace, and opened IE (which navigated to its default page). The problem was immediately evident from the timestamps (the left-most column below) and the nature of the traffic:

15.2837914  DNS:QueryId = 0xE7D1, QUERY (Standard query), Query  for go.microsoft.com of type Host Addr on class Internet
15.2838039  DNS:QueryId = 0xD4AE, QUERY (Standard query), Query  for go.microsoft.com of type AAAA on class Internet
15.3120594  DNS:QueryId = 0xE7D1, QUERY (Standard query), Response - Success, 64.4.11.160, 96.6.112.198
16.2787382  DNS:QueryId = 0xD4AE, QUERY (Standard query), Query  for go.microsoft.com of type AAAA on class Internet
17.2787318  DNS:QueryId = 0xD4AE, QUERY (Standard query), Query  for go.microsoft.com of type AAAA on class Internet
19.2787138  DNS:QueryId = 0xD4AE, QUERY (Standard query), Query  for go.microsoft.com of type AAAA on class Internet
23.2788677  DNS:QueryId = 0xD4AE, QUERY (Standard query), Query  for go.microsoft.com of type AAAA on class Internet
27.2923071  DNS:QueryId = 0x91B, QUERY (Standard query), Query  for go.microsoft.com of type AAAA on class Internet
28.2888689  DNS:QueryId = 0x91B, QUERY (Standard query), Query  for go.microsoft.com of type AAAA on class Internet
29.2888390  DNS:QueryId = 0x91B, QUERY (Standard query), Query  for go.microsoft.com of type AAAA on class Internet
31.2889078  DNS:QueryId = 0x91B, QUERY (Standard query), Query  for go.microsoft.com of type AAAA on class Internet
35.2889120  DNS:QueryId = 0x91B, QUERY (Standard query), Query  for go.microsoft.com of type AAAA on class Internet
39.3462453  HTTP:Request, GET /fwlink/, Query:LinkID=192163

The trace above is just a snippet; the total time taken from when IE began its navigation until the (very basic) page had completely loaded was 182 seconds, or just over three minutes!


Looking a little closer, we see that Windows Phone 7 (and/or the emulator) sends out two DNS queries for the IP address of the go.microsoft.com server corresponding to the IE home page URL. The IPv4 query returns immediately, but there's no response to the IPv6 query. At this point, two things are going wrong:

  1. Windows Phone 7 has received a valid IPv4 response to its DNS query and could proceed with the HTTP request. But it doesn't... Instead, it delays everything waiting for an IPv6 reply to its query - and eventually times out (presumably) after about 25 seconds. While I'm not aware of a specification that covers this scenario, it just plain seems wrong. If the network stack prefers to have an IPv6 address "on file", that's fine - but there seems to be no need to delay everything waiting for it. A better approach might be to proceed with the current transaction using the valid IPv4 address that's already been returned - then switch to the IPv6 address later on if/when it becomes available.

  2. The DNS server should reply to the IPv6 query with either a valid response or an error code - and not ignore it as though nothing happened. In this case, the DNS server happens to be my DSL modem, which I suspect knows nothing about IPv6 and is therefore unable to return a valid IPv6 address. However, that's no excuse for ignoring the IPv6 queries - according to my reading of RFC1035, it should respond to these queries with a "Format error" response code (or similar). If it did, Windows Phone 7 would presumably process the failure and move on with its life instead of hanging around waiting for a reply that never shows up...


This trace also explains why some people experience the slowness and others don't - if the IPv6 query gets a reply (instead of timing out), the network transaction proceeds immediately. So if you're fortunate enough to have a well-mannered DNS server (as I am at work), you'll be fine. But if you're unfortunate enough to have a poorly-mannered DNS server (as I am at home), you'll be spending a lot of time twiddling your thumbs waiting for the network...


The Fix

Fortunately, there's an easy fix: get a better DNS server! :) Either reconfigure your (or your company's) DNS server, upgrade its firmware, or flat-out replace the darn thing and you'll be set. Unfortunately, most people don't have a lot of control over the networking hardware/configuration they're using - or maybe they're just not eager to mess with this stuff. No problem - there's another fix: swap out the DNS server your computer is using for one that works better!

But where can you find a better DNS server? As it happens, there are a number of free DNS options already out there, just waiting to be utilized! The most well-known might be OpenDNS, but there are others like Google Public DNS, etc.. In my experience, OpenDNS and Google Public DNS both handle the IPV6 DNS request immediately - just like we want. So all you need to do is point your computer to one of these DNS servers, and things should work better!


The Details

By default, most home computers get their DNS server address via DHCP from their router or modem. So you could change the DNS server address in the router/modem configuration and that ought to work fine. However, you might not have access/permission for that - and besides it would affect everything else on the network. Unless you're a network administrator, this path may be more trouble than it's worth...

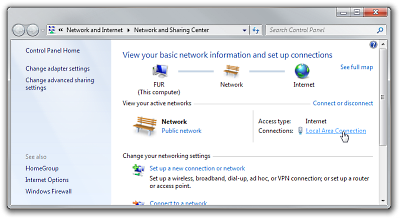
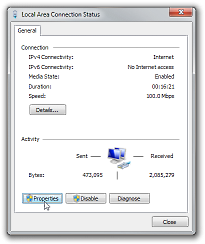
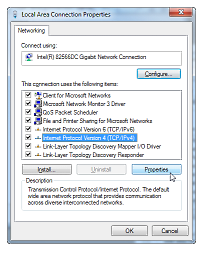
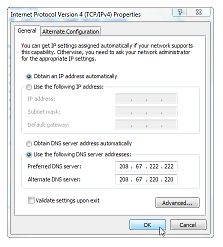
The good news is there's an easy way to change the DNS settings for a computer's network connection within Windows - and it's even easier to automate! To make this change in the UI, open the Network and Sharing Center (either via the Start Menu or the Control Panel or right-clicking the network icon in the system tray), click on the active network adapter (typically "Local Area Connection" or "Wireless Network Connection", click the Properties button in the lower left of the dialog, click the "Internet Protocol Version 4 (TCP/IPv4)" item, click the Properties button below it, select the "Use the following DNS server addresses", type the IP addresses of the "Preferred DNS server" and "Alternate DNS server", and hit OK/Close a bunch of times. To undo the change, repeat those steps, but choose "Obtain DNS server automatically" instead at the last step.

Step 0 Step 1 Step 2 Step 3


Okay, the UI approach may be pretty, but it's hardly efficient. :) If you're going to do this more than a couple of times, you may want use (or customize) one of one of the following scripts I've written based on the Windows netsh utility and the IP addresses from the corresponding Wikipedia entries (please don't forget to change the adapter name if you're using a wireless connection):

D:\T>type DNS-OpenDNS.cmd
@echo off
netsh interface ipv4 add dnsservers "Local Area Connection" 208.67.222.222 index=1
netsh interface ipv4 add dnsservers "Local Area Connection" 208.67.220.220 index=2
netsh interface ipv4 show dnsservers

D:\T>type DNS-GooglePublicDNS.cmd
@echo off
netsh interface ipv4 add dnsservers "Local Area Connection" 8.8.8.8 index=1
netsh interface ipv4 add dnsservers "Local Area Connection" 8.8.4.4 index=2
netsh interface ipv4 show dnsservers

D:\T>type DNS-Default.cmd
@echo off
netsh interface ipv4 delete dnsservers "Local Area Connection" all
netsh interface ipv4 show dnsservers

D:\T>

To run one of these scripts, open a Command Prompt with administrative privileges (right-click "Command Prompt" on the Start Menu and pick "Run as administrator") and run the appropriate script. It'll tell you a bit about what it has done and the changes will take effect immediately (i.e., there's no need to reboot). (For what it's worth, the underlying configuration changes made by the two methods I've discussed should be exactly the same, so you could even use the command-line to enable a custom DNS and then use the UI to disable it!)

Personally, I tend to make this switch just before I start working with the Windows Phone emulator - and then switch back to the default configuration when I'm done. Theoretically, I could run my development machine with a custom DNS all the time, but then it wouldn't be configured the same as the rest of the household and I worry that could trip me up some day long after I've forgotten about any of this. But personal issues aside, I encourage people to switch as often or rarely as they'd like. :)


The Benefits

Returning to the IE home page example from earlier, let's take a new trace after configuring a custom DNS:

2.7696164  DNS:QueryId = 0x4E64, QUERY (Standard query), Query  for go.microsoft.com of type AAAA on class Internet
2.8465201  DNS:QueryId = 0x4E64, QUERY (Standard query), Response - Success,
2.8590985  DNS:QueryId = 0xE75, QUERY (Standard query), Query  for go.microsoft.com of type Host Addr on class Internet
2.8678965  DNS:QueryId = 0x64D2, QUERY (Standard query), Query  for go.microsoft.com of type AAAA on class Internet
2.9341095  DNS:QueryId = 0xE75, QUERY (Standard query), Response - Success, 54, 0
2.9441158  DNS:QueryId = 0x64D2, QUERY (Standard query), Response - Success,
3.0086106  HTTP:Request, GET /fwlink/, Query:LinkID=192163

Yup, that's looking much better! To be fair, it's not clear to me why there's a duplicate query for the IPv6 address, but even with three queries (vs. two), it still manages to get the initial HTTP request sent in less than a quarter of a second. Stepping back and looking at the time taken by the entire transaction, it now completes in just under 5 seconds - less than 3% of the original time!


With a custom DNS in place, my frustration developing network applications for Windows Phone 7 went away and I was able to spend my time coding instead of waiting. I'm guessing the underlying DNS server problem that causes these long delays isn't super pervasive (or else they would have fixed the Windows Phone 7 emulator and/or Windows Phone OS by now), but I've also got to imagine I'm not the only one who's affected by this problem. So if you've ever wondered what in the world is taking so long, maybe your DNS server is the problem - and now you know how to fix it! :)

Is that a BLOB in your pocket, or are you just happy to see me? [Silverlight REST-based Azure/S3 BLOB API updated to run on Windows Phone 7!]

It was about five months ago that I blogged about BlobStore, a simple Silverlight 4 REST-based cloud-oriented file management app for Azure and S3. I pitched it like this:

It's a small, lightweight Silverlight 4 application that acts as a basic front-end for the Windows Azure Simple Data Storage and the Amazon Simple Storage Service (S3)! Just run the BlobStore app, point it at a properly provisioned Azure or S3 account (see below for details on provisioning), and all of a sudden sharing files with yourself and others becomes as simple as dragging and dropping them!

...

Included with every code download is a free REST wrapper for basic Azure and S3 blob access that handles all the tricky Authorization header details for you. It's almost guaranteed to make your next Azure/S3 application a snap to develop and a wild success in the marketplace.

BlobStore with silly sample data

Disclaimer: None of the file names above is accurate. :)


I know people have incorporated my REST API wrapper code (BlobStoreApi.cs) into their Silverlight projects, so it wasn't too surprising when I heard that some of you want the same functionality for your Windows Phone 7 applications. While you might expect the existing code to work as-is, there's a catch: Windows Phone 7's version of the Silverlight framework doesn't support the HttpWebRequest.AllowWriteStreamBuffering or WebRequest.ContentLength properties - and both are used by the original BlobStoreApi.cs implementation...

Fortunately, the lack of AllowWriteStreamBuffering isn't a big deal because it's used in only one place and can be commented-out with no loss of functionality (assuming the default behavior of buffering the entire upload doesn't bother you). However, the lack of ContentLength is a little more problematic because its use is more tightly integrated with the rest of code. So it seemed worthwhile for me to update BlobStoreApi.cs for Windows Phone 7 - and it turned out to be fairly simple to remove ContentLength for Windows Phone 7 without changing the existing behavior for Silverlight 4 and desktop .NET.

Because the original file management sample application didn't translate very well to the phone, I dashed off a quick "note taking" sample instead:

BlobStoreOnWindowsPhone sample

The way the new sample works is that the user can type short notes in a text box and then hit the "add" button to upload them to their pre-configured Azure/S3 account as BLOBs with the blob name being the current DateTime.Now.Ticks value and its content being the text of the note. All available notes are listed by date of creation; their text contents are downloaded on demand and shown to the user when selected. Any note can be deleted by tapping it and hitting the "delete" button.

It's a simple application, but it shows off the list/get/put/delete functionality that BlobStoreApi implements for Azure, S3, and IsolatedStorage (the last existing mainly for test purposes). During calls to the BLOB service, the sample application shows a simple progress screen informing the user of the ongoing transaction. (Of course, IsolatedStorage is very fast, so the progress screen is little more than a flicker by default - it's more meaningful for Azure/S3 web access.)

The complete implementation can be found in BlobStore\BlobStoreApi.cs and compiles/runs on the .NET, Silverlight, and Windows Phone 7 platforms. I encourage readers to use this code to create way more compelling applications than my samples! :)


[Click here to download the complete BlobStore source code and sample applications for both Silverlight 4 and Windows Phone 7.]


Note: By default, the Windows Phone sample uses IsolatedStorage because I don't want to publish the keys to my Azure/S3 accounts. :) If you want to try it with your own account(s), just open MainPage.xaml.cs, uncomment the relevant line below, and add the missing information:
// TODO: Switch to AzureBlobStoreClient or S3BlobStoreClient after entering your connection information
private readonly BlobStoreClient _client = new IsolatedStorageBlobStoreClient();
//private readonly BlobStoreClient _client = new AzureBlobStoreClient("Account Name", "Access Key");
//private readonly BlobStoreClient _client = new S3BlobStoreClient("Access Key ID", "Secret Access Key", "Bucket Name");
Aside: Don't forget to provision your account first; see the notes here for more information!

There's no substitute for customer feedback! [Improving Windows Phone 7 application performance now a bit easier with LowProfileImageLoader and DeferredLoadListBox updates]

PhonePerformance List Scrolling sample 
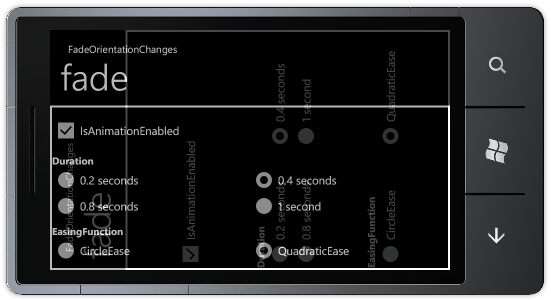
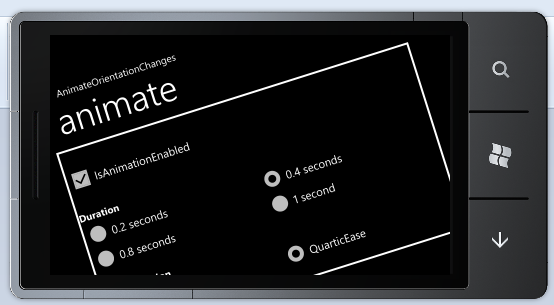
Windows Phone 7 applications run on hardware that's considerably less powerful than what drives typical desktop and laptop machines. Therefore, tuning phone applications for optimum performance is an important task - and a challenging one! To help other developers, I previously coded and blogged about two classes:
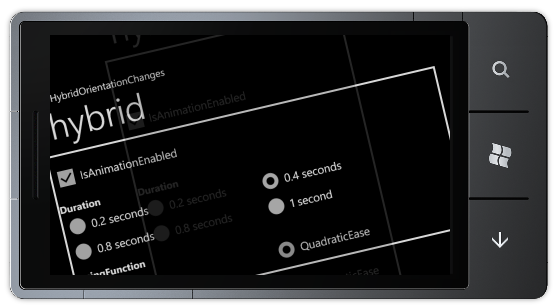
 LowProfileImageLoader (pushes much of the cost of loading images off the UI thread) and DeferredLoadListBox (improves the scrolling experience for long lists). These two classes can be used individually or together and have become a regular part of the recommendations for developers experiencing performance issues.


I've heard from lots of people who've benefitted from LowProfileImageLoader and DeferredLoadListBox - thank you! I've also received some great suggestions; I recently implemented some of them and wanted to share the new code/bits:

  • The first issue was reported to me by Corrado Cavalli via email. Whereas my sample applications loaded data after they'd initialized, Corrado's DeferredLoadListBox scenario populated its data during initialization. This led to code running in OnApplyTemplate which made the (wrong) assumption that the ListBox's ListBoxItem containers would already have been created. That's not the case during OnApplyTemplate, so DeferredLoadListBox got confused and threw an exception. The simple fix for this problem is to allow for missing containers during OnApplyTemplate - which I've done. Fortunately, subsequent activity (container creation during PrepareContainerForItemOverride) already ensures the right things happen after the containers are created.

  • The second issue was reported to me by Pat Long in the comments to my first blog post. The problem he encountered was that Blend would crash when working with an application using LowProfileImageLoader in certain cases (presumably because of the background worker thread it creates). There's an easy fix here as well - simply short-circuit the worker thread at design-time because the performance implications of LowProfileImageLoader aren't relevant then anyway. I reproduced the problem myself with Visual Studio and fixed it there - then I checked Pat's blog and found he'd done almost exactly the same thing for his Blend-based scenario! [It's nice when separate efforts arrive at the same place. :) ]

  • The third suggestion also came from comments to that blog post - David Burela wanted to use LowProfileImageLoader for images that were part of his application. I'd only been considering the cost of downloading images when I wrote this class, but David pointed out that much of the same "UI thread-friendly" logic should apply to local images as well. Fortunately, it was a simple matter to add support for relative Uris (ex: "/Images/Picture.jpg") - and now LowProfileImageLoader works well with both kinds of images!

    Note: For this new functionality to work, the project's images must have their "Build Action" set to "Content" (not "Resource"). (Here's what that setting looks like in Visual Studio.)
  • The fourth suggestion came from the comments to my second blog post where Johnny Westlake pointed out that LowProfileImageLoader could be counterproductive once it had already worked its magic. In other words, though it's great for lowering the cost of initial image load, the throttling behavior might be undesirable during subsequent loads (ex: during Back button navigation) because by that time the image has been cached by the web stack and the download cost is much lower. At first, I wasn't sure how LowProfileImageLoader could tell which situation a particular image was in - then I realized I didn't have to! :)

    What I've done instead is add a static LowProfileImageLoader.IsEnabled property (true by default) that the developer can toggle whenever he/she wants to (ex: on Back navigation to a page that has already used LowProfileImageLoader). When this property is set to false, LowProfileImageLoader doesn't perform its UI thread sleight-of-hand so the image load behavior is the same as it would have been if LowProfileImageLoader weren't present at all. While this might seem like a bit of a pass the buck move on my part, the practical truth is that the application's author has way more context than LowProfileImageLoader does. So in lieu of a reliable way to detect the cache state of individual images (I'm open to suggestions, by the way!), the new IsEnabled property seems like a reasonable "next best thing".


[Click here to download the compiled PhonePerformance assembly, sample applications, and full source code for everything.]


My thanks go out to the people who have shared their experience and suggestions with/for LowProfileImageLoader and DeferredLoadListBox! While these two classes are not appropriate in every situation, they seem to be useful in enough situations that it's worth giving them a quick try if you're experiencing relevant performance problems. Both classes are easy to hook up, so trying them out takes no more than a couple of minutes - which will be time well spent if the problem goes away!

I wish everyone good luck with their Windows Phone 7 applications - and please don't forget the value of great performance! :)

This one's for you, Gregor Mendel [Code to animate and fade Windows Phone orientation changes now supports a new mode: hybrid!]

This isn't my first time discussing animating device orientation changes, so I won't spend a lot of time explaining the motivation. Here's where things left off last time:

For "in your face" transitions, there's AnimateOrientationChangesFrame which animates the rotation interactively (but might get bogged down by complex layouts). For more subtle transitions that perform smoothly regardless of how complex the page layout is, there's FadeOrientationChangesFrame which fades between the before/after layouts. Both classes have the same API and both are used in the same manner - it's just a matter of choosing the right one for your scenario.


The purpose of this post is to announce a new class, HybridOrientationChangesFrame, which is meant to combine the best parts of the two existing classes!

HybridOrientationChanges sample

By coincidence, René Schulte and Steve Starck independently contacted me last week to ask about implementing something that unified AnimateOrientationChangesFrame and FadeOrientationChangesFrame: code that animated the rotation between the "before" and "after" states - but faded between them instead of morphing from one shape into the other. The idea behind their request is to get some of the same "Ooh, the application is turning!" visual appeal of AnimateOrientationChangesFrame without the undesirable performance implications for complex layouts. Because the "before" and "after" states don't change size in the proposed scenario, the entire animation can be done on the composition (render) thread! This same visual effect is implemented by some of the core Windows Phone 7 applications - so now it's easy to match that effect in your own applications with HybridOrientationChangesFrame!

While all three of my classes continue to share the same API, the implementation of HybridOrientationChangesFrame is much closer to FadeOrientationChangesFrame than AnimateOrientationChangesFrame. The main difference is that HybridOrientationChangesFrame runs four simultaneous Timelines instead of just one. However, that's not a cause for concern because they're all part of the same Storyboard and the right kind to run on the composition thread (specifically: DoubleAnimations of UIElement.Opacity and RotateTransform.Angle). So although there's a little more activity going on here, there's no need to run expensive (UI thread-bound) layout passes or anything like that. Consequently, HybridOrientationChangesFrame (just like FadeOrientationChangesFrame) should run smoothly even for applications with complex page layouts.

It's good to have choices in life - and now you have 50% more choice when it comes to handling Windows Phone 7 orientation changes! :)


[Click here to download the DynamicOrientationChanges sample and pre-compiled assembly for the Windows Phone 7 platform.]


FadeOrientationChanges sample


The steps for adding a rotation/fade/hybrid animation to a new application remain the same:

  1. Enable support for orientation changes by making the following change to the XAML for the relevant PhoneApplicationPages (note that rotation is not enabled by default for new pages):
    SupportedOrientations="Portrait"
    SupportedOrientations="PortraitOrLandscape"
  2. Verify (by running in the emulator or on the device) the pages you expect to support rotation really do - if things aren't rotating at this point, trying to animate the rotations won't help. :)
  3. Add the AnimateOrientationChangesFrame.cs or FadeOrientationChangesFrame.cs or HybridOrientationChangesFrame.cs source code file from the sample to your project/solution.

    -OR-

    Add a reference to the pre-compiled DynamicOrientationChanges.dll assembly from the sample download to your project/solution.

  4. Open App.xaml.cs and change the RootFrame initialization in the InitializePhoneApplication method (you may need to expand the Phone application initialization region at the bottom):
    RootFrame = new PhoneApplicationFrame();
    RootFrame = new Delay.AnimateOrientationChangesFrame();

    -OR-

    RootFrame = new Delay.FadeOrientationChangesFrame();

    -OR-

    RootFrame = new Delay.HybridOrientationChangesFrame();
  5. Done; rotations will now be animated! To customize the animation, use the Duration, EasingFunction, and IsAnimationEnabled properties which are all present and continue to work as outlined in the original post.


AnimateOrientationChanges sample

Teaching an old dog new tricks [Updated HtmlTextBlock implementation uses RichTextBox to support images and hyperlinks]

HtmlTextBlock is a control I wrote way back in 2007 to enable the display of simple HTML markup by the Silverlight (1.1 Alpha!) platform without needing to translate it to XAML first. HtmlTextBlock was intended more as a proof-of-concept than anything else, but it seems to have satisfied a fairly common customer need and I've heard from lots of customers who are using it! But my last update was in 2008 and I'd kind of forgotten about this project since then...

Until - out of the blue - Morten Nielsen (@SharpGIS) contacted me a few days ago to let me know about an update he'd done to HtmlTextBlock to use Silverlight 4's RichTextBox to address some of the limitations HtmlTextBlock had by virtue of its very simple beginnings. I don't want to steal his thunder, so please have a look at Morten's post for the details and the new download!

Thanks a lot, Morten! :)

There are lots of ways to ask for a date [Creating custom DatePicker/TimePicker experiences is easy with the Windows Phone Toolkit]

DatePicker and TimePicker sample picker

In my previous post announcing the release of the Windows Phone Toolkit, I explained the motivation for the PhoneApplicationPage-based design of the DatePicker and TimePicker controls. Though justified, the current implementation is fairly unusual and has the potential to trip people up if they're not ready for it. So I highly recommend reading the details at the end of that post if you're using DatePicker or TimePicker.

[Waits patiently...]

Okay, if you read the notes, then you understand what we've done and why. And while I'm happy to discuss the pros and cons of the current implementation, that's what we've got for now and I'm going to spend a little time highlighting its extensibility!


As with the rest of the Phone Toolkit, our primary goal was to make it easy for developers to match the core Windows Phone 7 experience in their own applications. Toward that end, adding an instance of DatePicker or TimePicker to a page gives the same "small button expands to full-page date/time picker with infinite scrolly thingies" experience that's found in the core Settings, Calendar, and Alarms applications. But sometimes you want to do things a little differently, and maybe you've got a date/time picking interface in mind that's more relevant to your scenario...


Aside: If what you want to do is change the format used to display the date/time on the face of the initial "button", then all you need to do is set the ValueStringFormat property to the standard date and time format string or custom date and time format string of your choice!

But because format strings include "{" and "}", they're a little tricky to code in XAML; you need to escape the special characters. here's an example of what this looks like in its simplest form: ValueStringFormat="{}{0:d}"

And here are a few practical examples (using the culture settings for USA):

Description XAML Sample
Short date format (DatePicker default) "{}{0:d}" 9/20/2010
Short time format (TimePicker default) "{}{0:t}" 4:00 PM
Long date format "{}{0:D}" Monday, September 20, 2010
Long time format "{}{0:T}" 4:00:00 PM
Explicit month/day/year format "{}{0:MM-dd-yyyy}" 09-20-2010
Explicit 24-hour time format with text "{}The 24-hour time is {0:HH:mm}." The 24-hour time is 16:00.


Customizing the full-screen picker page is as simple as setting the DatePicker.PickerPageUri or TimePicker.PickerPageUri property to point to a PhoneApplicationPage that implements the IDateTimePickerPage interface. The PickerPageUri property uses the standard assembly-relative syntax ("/assemblyShortName;component/resourceLocation"), so it should be familiar to most folks. The IDateTimePickerPage interface is a new interface, but I think you'll agree it's pretty basic:

namespace Microsoft.Phone.Controls.Primitives
{
    /// <summary>
    /// Represents an interface for DatePicker/TimePicker to use for communicating with a picker page.
    /// </summary>
    public interface IDateTimePickerPage
    {
        /// <summary>
        /// Gets or sets the DateTime to show in the picker page and to set when the user makes a selection.
        /// </summary>
        DateTime? Value { get; set; }
    }
}


When it's time to display the picker page, DatePicker and TimePicker navigate to the page specified by PickerPageUri via the NavigationService.Navigate("...") method, wait for the page to load, get a reference to its IDateTimePickerPage interface, and set its Value property to the starting DateTime. After that, the custom picker page is in complete control and can display any UI it wants. When the custom picker is done (either because the user picked a date/time or because the user cancelled the operation), the picker should set its Value property to the selected date/time (or null if cancelled) and then call NavigationService.GoBack to return to the previous page. DatePicker and TimePicker automatically detect this, update their own Value property (which automatically updates their UI), and fire their ValueChanged event.

In some ways, it's actually kind of elegant! :) And the fact that the picker is entirely implemented by its own PhoneApplicationPage makes it really easy to work with at design-time in Visual Studio and Blend.


To help illustrate the process, I created a sample application that uses custom pickers for DatePicker and TimePicker which let the user pick times relative to the current time:

CustomDateTimePickerPage sample application Custom DatePickerPage example Custom TimePickerPage example

The sample application shows the current date and time because what the emulator reports isn't always the same as what the host operating system reports! In my experience, it's often an hour or more off - so please keep in mind that the times used by the sample are relative to emulator time!


Here's the XAML for the main page that hosts the DatePicker and TimePicker controls:

<toolkit:DatePicker
    Value="10/10/2010"
    Header="Custom Date Picker Page"
    PickerPageUri="/CustomDateTimePickerPage;component/CustomDatePickerPage.xaml"/>

<toolkit:TimePicker
    Value="{x:Null}"
    Header="Custom Time Picker Page"
    PickerPageUri="/CustomDateTimePickerPage;component/CustomTimePickerPage.xaml"/>
Aside: Just for fun, I've explicitly set the Value properties here. Although the controls' default behavior of using the current date/time is likely to be what you want most of the time, applications are free to override the initial date/time (as DatePicker does above) or to provide a blank starting value (as TimePicker does with the x:Null markup extension).


The implementation of the custom PhoneApplicationPage implementation is so basic, I'm going to show the complete date picker here! (The custom time picker implementation is nearly identical.) I've highlighted the particularly interesting bits, but by now they should be familiar.

First the XAML, then the code:

<phone:PhoneApplicationPage
    x:Class="CustomDateTimePickerPage.CustomDatePickerPage"
    xmlns="http://schemas.microsoft.com/winfx/2006/xaml/presentation"
    xmlns:x="http://schemas.microsoft.com/winfx/2006/xaml"
    xmlns:phone="clr-namespace:Microsoft.Phone.Controls;assembly=Microsoft.Phone"
    xmlns:d="http://schemas.microsoft.com/expression/blend/2008"
    xmlns:mc="http://schemas.openxmlformats.org/markup-compatibility/2006"
    FontFamily="{StaticResource PhoneFontFamilyNormal}"
    FontSize="{StaticResource PhoneFontSizeNormal}"
    Foreground="{StaticResource PhoneForegroundBrush}"
    SupportedOrientations="PortraitOrLandscape" Orientation="Portrait"
    mc:Ignorable="d" d:DesignHeight="800" d:DesignWidth="480">

    <Grid>
        <Grid.RowDefinitions>
            <RowDefinition Height="Auto"/>
            <RowDefinition Height="*"/>
        </Grid.RowDefinitions>

        <TextBlock
            Text="CHOOSE CUSTOM DATE"
            Margin="12"
            FontWeight="Bold"/>

        <StackPanel
            Grid.Row="1"
            VerticalAlignment="Center">
            <Button Content="Tomorrow" Click="TomorrowButtonClick"/>
            <Button Content="Next Week" Click="NextWeekButtonClick"/>
            <Button Content="Next Month" Click="NextMonthButtonClick"/>
            <Button Content="[Cancel]" Click="CancelButtonClick"/>
        </StackPanel>
    </Grid>

</phone:PhoneApplicationPage>
public partial class CustomDatePickerPage : PhoneApplicationPage, IDateTimePickerPage
{
    /// <summary>
    /// Gets or sets the DateTime value for the IDateTimePickerPage interface.
    /// </summary>
    public DateTime? Value { get; set; }

    public CustomDatePickerPage()
    {
        InitializeComponent();
    }

    private void TomorrowButtonClick(object sender, RoutedEventArgs e)
    {
        ChooseDate(DateTime.Now.AddDays(1));
    }

    private void NextWeekButtonClick(object sender, RoutedEventArgs e)
    {
        ChooseDate(DateTime.Now.AddDays(7));
    }

    private void NextMonthButtonClick(object sender, RoutedEventArgs e)
    {
        ChooseDate(DateTime.Now.AddMonths(1));
    }

    private void ChooseDate(DateTime date)
    {
        // Commit date and close picker
        Value = date;
        NavigationService.GoBack();
    }

    private void CancelButtonClick(object sender, RoutedEventArgs e)
    {
        // Cancel selection and close picker
        Value = null;
        NavigationService.GoBack();
    }
}


As you can see, creating a custom picker page for DatePicker and TimePicker is really easy! As long as you play by a few basic rules, you have complete freedom to style the entire picker experience in a self-contained, interactive, designer-friendly way. It's kind of like re-Templating - but easier and more flexible - in a weird kind of way!


[Click here to download the complete source code for the CustomDateTimePickerPage sample application.]


Now get to it - I'm looking forward to seeing the kinds of custom picker experiences you all come up with! :)