The blog of dlaa.me

New phone bits, same pretty charts [Upgraded my Windows Phone 7 Charting example for the Windows Phone Developer Tools Beta]

The recent release of the Windows Phone Developer Tools Beta introduces a variety of notable changes to the Windows Phone platform and I've been meaning to update my Data Visualization on Windows Phone sample so I could continue to refer people to it for educational purposes. (Just like I did when the April Tools Refresh came out.) I finally got some time and have updated the sample so it targets the Beta Tools and works "out of the box".


Sample in portrait orientation Sample in landscape orientation


[Click here to download the updated Windows Phone 7 Data Visualization sample application.]


Rather than relying on an automated project upgrade, I simply diff-ed the existing project against a new project I created width the Beta Tools and made the necessary changes myself in Notepad. It was all pretty straightforward - here are the things that stood out for me:

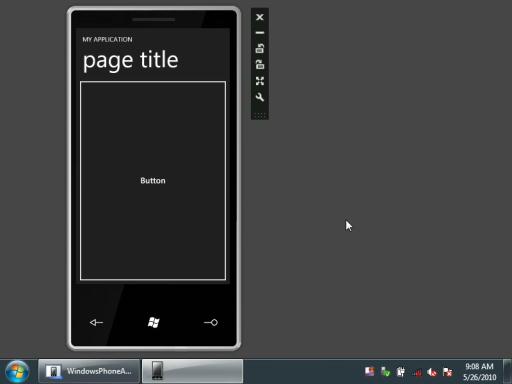
  • App.xaml.cs: There's a lot more initialization code by default.
  • App.xaml: There's no longer a need to bake all those phone-specific styles into every application, so the default App.xaml is nearly empty (like it should be)! Also, the new PhoneApplicationService events are hooked up by default.
  • SplashScreenImage.jpg: An appropriately-named splash screen is now created and used automatically.
  • MainPage.xaml: The platform-specific Phone* assemblies and default namespaces have shifted around a bit. SupportedOrientations is now set in XAML instead of code.
  • DataVisualizationOnWindowsPhone.csproj: The WINDOWS_PHONE symbol is now #define-ed by default, giving shared code now a standard way of detecting the Windows Phone platform. The phone assembly references are slightly different and the splash screen is included by default.
  • WMAppManifest.xml: The property PlaceHolderString on the DefaultTask element has been renamed.

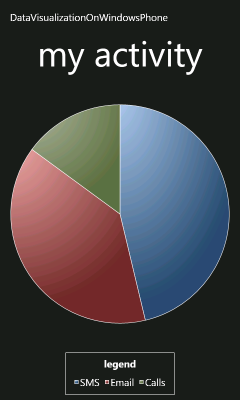
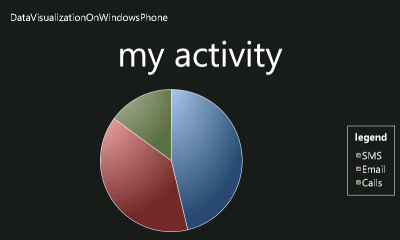
While I was at it, I also tweaked the way the data source is created (by making it a class and moving it to the Resources section) so now the charts show up at design-time, too. I'm using the exact same System.Windows.Controls.DataVisualization.Toolkit.dll and System.Windows.Controls.dll assemblies as before (see notes 4 and 5 of the previous post for more context) - though there should no longer be a need to "un-sign" the Silverlight Toolkit assembly to use it on Windows Phone.


This was all pretty basic stuff and it's important to note that none of the application code was affected. Changes like this are a natural part of the platform and project templates maturing - and it's great to see improvements like the default styles moving into the platform!

Hopping outside the box [How to: Leapfrog Bindings (bridge DataContexts) in Silverlight and WPF]

The data binding infrastructure for Silverlight and WPF is extremely powerful and makes it easy to write powerful, dynamic applications without worrying about synchronizing the UI with every change to the underlying data. By leveraging this power, developers can think entirely in terms of the data model and be confident that any changes they make will be reflected by the interface automatically.

The way this works is that every element has a DataContext property, and the value of that property is inherited. DataContext can be assigned any object and acts as the default source for all Bindings applied to the element's properties. The object acting as DataContext can be as simple or complex as an application needs and is free to "shape" the data however is most convenient for the UI and Bindings. Collection-based controls like ItemsControl (and its subclasses ListBox, TreeView, etc.) automatically set the DataContext of their containers to the specific item they represent. This is what you'd expect and enables a great deal of flexibility when displaying collections. However, each element has a only one DataContext - so sometimes it's useful to "reach outside" that and bind to properties on some other object.

The good news is that there's an easy way to leapfrog the DataContext and "bridge" the two elements! The trick is to use an ElementName Binding to point to that other element - then to root the Binding's Path at that element's DataContext and "dot-down" to the property of interest. An example should make things clearer...


LeapFroggingDataContexts sample

The sample above has an application-wide DataContext model object ApplicationViewModel containing a bool property ShowHeight that's TwoWay-bound to the CheckBox control. For convenience, ShowHeight is also exposed as a Visibility value via HeightVisibility - which is much more convenient to bind the Visibility property to. There's also a Mountains property containing a collection of MountainViewModel model objects. Each mountain in the list is meant to show or hide its height according to the setting on ApplicationViewModel - but because the DataContext of the ListBoxItem containers is set to instances of MountainViewModel, they can't "see" the HeightVisibility property... The most direct option is probably to propagate this value "down" to the MountainViewModel instances by adding a property to the class for that purpose and keeping it in sync with the "real" property on ApplicationViewModel.

However, that feels like a bit of overkill for the current situation. Instead, if we just "leapfrog" the Binding in the item content, we can make use of the ApplicationViewModel directly and everything stays nice and simple!


[Click here to download the Silverlight 4 source code for the LeapFroggingDataContexts sample.]


Here's what it looks like in XAML:

<UserControl x:Class="LeapFroggingDataContexts.MainPage"
    xmlns="http://schemas.microsoft.com/winfx/2006/xaml/presentation"
    xmlns:x="http://schemas.microsoft.com/winfx/2006/xaml"
    xmlns:local="clr-namespace:LeapFroggingDataContexts">

    <UserControl.Resources>
        <local:ApplicationViewModel x:Key="ApplicationViewModel"/>
    </UserControl.Resources>

    <Grid
        x:Name="LayoutRoot"
        DataContext="{StaticResource ApplicationViewModel}"
        Width="150"
        HorizontalAlignment="Center"
        VerticalAlignment="Center">

        <Grid.RowDefinitions>
            <RowDefinition Height="Auto" />
            <RowDefinition/>
        </Grid.RowDefinitions>

        <CheckBox
            Grid.Row="0"
            Content="Show height"
            IsChecked="{Binding ShowHeight, Mode=TwoWay}"/>

        <ListBox
            Grid.Row="1"
            ItemsSource="{Binding Mountains}">
            <ListBox.ItemTemplate>
                <DataTemplate>
                    <StackPanel Orientation="Horizontal">
                        <TextBlock Text="{Binding Name}"/>
                        <TextBlock
                            Text="{Binding Height, StringFormat=' [{0:n0}m]'}"
                            Visibility="{Binding DataContext.HeightVisibility, ElementName=LayoutRoot}"/>
                    </StackPanel>
                </DataTemplate>
            </ListBox.ItemTemplate>
        </ListBox>
    </Grid>
</UserControl>

ElementName points the Binding at an element with the DataContext of interest, then the Path selects the DataContext as a starting point (an instance of the ApplicationViewModel class in this case), hooks up to that object's HeightVisibility property - and we're done!


While architectural purists might argue this technique is bad form, I've seen it come in handy for enough customer scenarios that it seems a worthwhile approach to keep in mind. Please don't abuse it - but feel free to use it! :)

Spin Spin Sugar [Updated code to easily animate orientation changes for any Windows Phone application]

A few weeks after the initial release of the Windows Phone Developer Tools in April, I blogged a sample showing how to easily animate device orientation changes for Windows Phone 7 applications. I noted at the time that the default behavior for application projects is no animation - the app immediately switches to the new orientation when the device is rotated (click here for a brief video of the default behavior). While this is clearly the simplest approach, I wanted to enable something a little fancier by smoothly animating the application's rotation from one orientation to another - just like the built-in applications do.

To show what I'm talking about, here's a video of my implementation running on the emulator:

Video of animated orientation change behavior

FYI: The buttons in the video rotate the device one quarter turn clockwise or counter-clockwise. I begin by rotating counter-clockwise once, then clockwise once back to the starting orientation, then clockwise three more times to loop all the way around. And then show off just a bit. :)

Note: I made that video back in April; the emulator looks a little different now, but the animation works just the same.


As of yesterday's release of the Windows Phone Developer Tools Beta, some of the platform changes have invalidated my original implementation. But that's okay, because I've updated the code to work with the latest release - and made a few improvements along the way! :)


[Click here to download the AnimateOrientationChanges sample for Windows Phone 7.]


Notes:

  • [Please review the "Notes" section of my previous blog post for additional information.]
  • The implementation is now based off PhoneApplicationFrame which simplifies things a bit by avoiding the need to track state across pages. Conveniently, this also makes the setup process a bit easier. What's more, I was able to get rid of the TranslateTransform based on a suggestion by Seema Ramchandani, one of the Silverlight performance experts. And I've added a bit of code to avoid unnecessary calls to InvalidateArrange which helps free up a few extra CPU cycles.
  • One of my earlier concerns was that I hadn't been able to run code on actual Windows Phone hardware, so I wasn't sure the snappy performance I saw under the emulator carried over to the device. Fortunately, I've gotten access to an actual prototype and have verified the sample application runs quite smoothly in the real world, thank you very much. :)
  • That said, my sample is pretty simple - Seema expressed concern about possible slowness for the more complex layouts real applications might use. And while I share her concerns, the options for improving the situation in such cases all seem like they'll degrade the visual quality of the rotation animation. The current implementation gives the best quality it can on any device for any layout (and automatically degrades as necessary to catch up if it falls behind); the alternatives create animations that just won't be as smooth. :( So I'm reluctant to start down that path until I know it's necessary. Please let me know what your experience is - whether good or bad - so I can make an informed decision!
  • Here are the complete directions for adding rotation animation to a new application (if you're upgrading an existing application, please undo all the previous install steps first!):
    1. Enable support for orientation changes by making the following change to the XAML for the relevant PhoneApplicationPages (note that rotation is no longer enabled by default for new pages):
      SupportedOrientations="Portrait"
      SupportedOrientations="PortraitOrLandscape"
    2. Verify (by running in the emulator) the pages you expect to support rotation really do - if things aren't rotating at this point, trying to animate the rotations won't help. :)
    3. Add the AnimateOrientationChangesFrame.cs code file from the sample to your project/solution.
    4. Open App.xaml.cs and change the RootFrame initialization in the InitializePhoneApplication method (you may need to expand the Phone application initialization region at the bottom):
      RootFrame = new PhoneApplicationFrame();
      RootFrame = new Delay.AnimateOrientationChangesFrame();
    5. Done; rotations will now be animated! To customize the animation, use the Duration, EasingFunction, and IsAnimationEnabled properties which are all still present and continue to work as outlined in the previous post.
  • The phone emulator has an annoying bug where it frequently fails to notify applications about an orientation change that just happened. This problem has nothing to do with my code (you can reproduce it by enabling rotation for any application), but shows up regularly when playing around with the sample app in the emulator. When the orientation gets "stuck" like that, just rotate a few more times and things sort themselves out. (Fortunately, this problem does not exist on actual phone hardware!)
  • The PageOrientation.PortraitDown value remains unsupported with this release because the platform still does not support it.


On the one hand, animating orientation changes is kind of a whimsical behavior to add to an application - but on the other hand, it helps to create the kind of pleasing, platform-consistent experience that users appreciate and enjoy. AnimateOrientationChangesFrame isn't going to turn a crummy application into a good one - but it just might add some polish to help turn a good application into a great one.

I've had fun creating this sample - I hope you enjoy using it!

Banana SplitButton [A WPF-specific fix for SplitButton and some code analysis improvements for the Silverlight version, too]

I've previously written that one of my ContextMenu test cases for the April '10 release of the Silverlight Toolkit was to implement a quick "split button" control for Silverlight using Button and ContextMenu. Though it wasn't my goal to build a general-purpose control for widespread use, there's been a lot of interest in SplitButton/MenuButton and I followed up with a few fixes for the Silverlight version and "official" support for WPF.


SplitButton and MenuButton


That might have been the end of the story - until Fabio Buscaroli contacted me to report an issue he was seeing with the WPF version (follow our exchange here). At first, I thought the problem was related to the DataContext not inheriting properly - and while that was true, it wasn't the whole story! When Fabio told me the tweak for DataContext I'd suggested didn't solve his RoutedCommand scenario, I had a look at a simple example he posted and realized the DataContext problem was a symptom of a larger issue: that the ContextMenu wasn't a logical child of the SplitButton. As soon as I solved that problem, it fixed Fabio's scenario and the related DataContext issue I'd discovered during my own investigation.

Aside: None of this applies to Silverlight because that platform doesn't expose the notion of a logical tree the way WPF does.


While I was working on this fix, I noticed full code analysis wasn't enabled for the SplitButton assemblies; I turned it on and addressed the handful of warnings it generated. Most of the changes won't matter to you, but one of them will: the namespace for SplitButton/MenuButton has changed. These classes now live in the Delay namespace - which is consistent with the rest of the sample code I post to my blog. Upgrading existing projects to the latest code will require a tweak of the XAML's "xmlns:" prefix and/or a tweak of the code's "using" statements. Otherwise, there have been no behavior changes to the functionality of SplitButton on Silverlight or WPF, so everything else should continue to work the same as before.


[Click here to download the complete Silverlight/WPF source code for SplitButton/MenuButton and the sample application shown above.]


It's been great to see the positive response SplitButton and MenuButton have generated. Thanks for everyone's help trying these controls out, finding issues, and reporting them!

Breaking up (lines) is (not) hard to do [Tip: Put XAML attributes and elements on multiple lines so the markup is easy to read and work with]

Tip

Put XAML attributes and elements on multiple lines so the markup is easy to read and work with

Explanation

The last few tips have dealt with DependencyProperty issues. Now it's time for something completely different: XAML. While it's nice to pretend XAML editing can all be done in a design tool like Visual Studio or Expression Blend, I've always felt that XAML should be pleasant for people to work with, too. Therefore, it's worthwhile to establish a common approach to XAML formatting. What I find works well is to put attributes and elements on separate lines with a single indent for continuations and nesting. (Aside: I make an exception for elements with a single attribute to keep simple things compact.) I also tend to order properties according to importance, starting with the most significant ones and ending with the least. I consider the x:Name of an element to be the most important, so it typically comes first. Attached properties also rank high in my book and are usually next. After that, I tend to list common properties (ex: ContentControl.Content and TextBlock.Text) first and formatting properties (FrameworkElement.HorizontalAlignment and .Margin) closer to the end. In addition to keeping lines short and easy to read, this approach is very revision control-friendly - by which I mean that edits, adds, and removes all show up unambiguously. Sometimes people forget that markup is code, too - please treat it with the same respect and discipline. :)

Good Example

<Button
    x:Name="TheButton"
    Grid.Row="0"
    Content="Click me"
    Click="TheButton_Click"
    HorizontalAlignment="Center"
    Margin="10">
    <Button.Background>
        <SolidColorBrush Color="Pink"/>
    </Button.Background>
</Button>

More information

Revisiting the Code Not Taken [Updated analysis of two ways to create a full-size Popup in Silverlight]

Earlier this year I wrote about two approaches for creating a Popup to overlay the entire Silverlight plug-in. I began by showing the technique most people start with and then demonstrated a rather surprising side-effect of that approach. Here's the relevant screen shot:

A quirk of handling the Resized event on Silverlight 3

Unless you've read the original post, the problem may not be obvious - here's what I said at the time:

But something is still wrong in the image above... If you look carefully, you can see that the browser zoom is set at 50% - yet somehow the image is sized correctly despite us not doing any work to handle the browser's zoom setting yet. How can that be? Hold on, Sherlock, there's another clue in the image: look at the size of the buttons. Yeah, those buttons are not the size they should be for the 50% zoom setting that's active (refer back to the previous image if you don't believe me). Those buttons are at the 100% size - wha??

Aside: Hey, don't feel bad, it weirded me out, too. :)

It turns out that when you attach an event handler to the Resized event, Silverlight 3 disables its support for browser zoom. The reason being that Silverlight 3 assumes the application has chosen to handle that event because it wants full control over the zoom experience (via ZoomFactor and Zoomed, perhaps). Now that's really kind of thoughtful of it and everything - but in this case it's not what we want. In fact, that behavior introduces a somewhat jarring experience because the graphics visibly snap between 50% and 100% as the Resized event handler is attached and detached.


Well, that was then and this is now: I'm pleased to report that Silverlight 4 does not have the troublesome "hooking Resized disables browser zoom" behavior! Consequently, projects targeting Silverlight 4 are free to hook the Resized event without worrying that their browser zoom behavior will be compromised. Yay!

Aside: Of course, projects targeting Silverlight 3 (or previously compiled for it) and running on Silverlight 4 will continue to see the same Silverlight 3 behavior. This is because Silverlight 4 maintains backward compatibility with previous versions to avoid "breaking the web" when a new version comes out. Specifically, applications written for version N of Silverlight are expected to run the same on version N+M - even when there have been changes to the relevant functionality after version N was released.


Now that it's possible, I've updated the sample to demonstrate the desired behavior on Silverlight 4 by making the following tweak to the Application.Current.Host.Content portions:

EventHandler rootResized = delegate
{
    child.Width = root.ActualWidth / root.ZoomFactor;
    child.Height = root.ActualHeight / root.ZoomFactor;
};

Everything else remains the same, and now the Application.Current.Host.Content approach works almost as well as the Application.Current.RootVisual approach I recommended previously (though the image still flickers when changing the browser zoom):

Correctly sizing the Popup to cover the plug-in


With both approaches nearly equivalent on Silverlight 4, you might wonder if I'd like to revise my earlier recommendation to prefer the RootVisual-based approach... Well, I would not! I still feel the RootVisual approach is simpler and easier to understand, so I'll continue to use it myself and recommend it to others. However, there's no longer a compelling reason not to use the Content-based approach, so I'm cool if that's your personal preference. :)


[Click here to download the complete source code for the original sample (a Visual Studio 2010 (Beta 2) project targeting Silverlight 3)]

[Click here to download the complete source code for the new sample (a Visual Studio 2010 project targeting Silverlight 4)]

SplitButtoning hairs [Two fixes for my Silverlight SplitButton/MenuButton implementation - and true WPF support]

One of my ContextMenu test cases for the April '10 release of the Silverlight Toolkit (click here for the full write-up) was to implement a quick "split button" control for Silverlight using Button and ContextMenu. In that post, I cautioned that my goal at the time was to do some scenario testing, not to build the best SplitButton control ever. However, what I came up with seemed to work pretty well in practice and I figured folks could probably use the code mostly as-is.

And it seems like they did - because I got two bug reports in that post's comments section! :)

SplitButton and MenuButton


Let me address them in reverse order:

The position of the ContextMenu was wrong when the browser is zoomed: True enough - though I'm going to ask for a bit of leniency here because the cause of the misalignment is actually a bug in Silverlight (which I've already reported). It seems the results of a call to element.TransformToVisual(Application.Current.RootVisual) or element.TransformToVisual(null) are not consistent for elements that are vs. are not inside a Popup control when the browser is zoomed (in or out). As a result, the SplitButton code to position the menu got inconsistent data and was unable to place the menu correctly. I've tweaked the code slightly to accommodate the underlying issue and now the menu is properly aligned at any zoom setting.

While I was at it, I figured it might be nice if the menu moved around with the SplitButton as the user resized the browser or changed the zoom while the menu was displayed. This is admittedly an edge case, but it's easy enough to handle by hooking the LayoutUpdated event while the menu is displayed (and only while it's displayed!), so I did that and now the menu sticks to the button and refuses to be shaken off. :)

The code didn't work on WPF: I had a footnote claiming my Silverlight implementation should work on WPF as well, though I hadn't tried it myself. It turns out that statement is mostly true - except for the positioning logic which bumps into an subtle API incompatibility with the TransformToVisual method. (Noticing a pattern here?) In the process of getting things working for WPF, I realized the code to position the menu could be simplified somewhat with the (WPF-only) TranslatePoint method. Therefore, the actual positioning logic is a tad different across the two platforms ("a tad" == 4 lines of code) while everything else stays the same. This time when I claim SplitButton and MenuButton work on WPF, it's because I've tried it. :)

In fact, I've added a new, WPF-specific assembly (SplitButtonWpf) and demo (SplitButtonWpfSample) to the sample code associated with this post. Which means there is a dedicated assembly containing SplitButton and MenuButton for both platforms as well as a separate sample application for each!


[Click here to download the complete Silverlight/WPF source code for SplitButton/MenuButton and the sample application shown above.]


With those changes in place (and an unrelated key handling tweak for WPF), I feel even better about the prospects of using SplitButton and MenuButton in a real application. Naturally, if something else comes up, please let me know. Otherwise, I hope you find it useful!

The source code IS the executable, RTM edition [Updated CSI, a C# interpreter (with source and tests) for .NET 4 RTM]

CSI is a simple C# interpreter and has been available for .NET 1.1, 2.0, 3.0, and 3.5 for a while now. Earlier this year, I updated CSI for .NET 4 Beta 2, and now I've (somewhat belatedly) updated it for the final, public .NET 4 Framework. Today's post is mainly about getting an official .NET 4 RTM-compiled build of CSI released, so there aren't any functional changes to the tool itself.

FYI: I have a TODO list and there are some interesting things on it - it's just that none of them seemed particularly urgent.

The links above explain what CSI is and how it works; the executive summary is that CSI offers an alternative to typical CMD-based batch files by enabling the use of the full .NET framework and stand-alone C# source code files for automating simple, repetitive tasks. It accomplishes that by compiling source code "on the fly" and executing the resulting assembly behind the scenes. The benefit is that it's easy to represent tasks with a simple, self-documenting code file that leaves no need to worry about compiling a binary, trying to keep it in sync with changes to the code, or tracking project files and remembering how to build everything.


[Click here to download CSI for .NET 4.0, 3.5, 3.0, 2.0, and 1.1 - along with the complete source code and test suite.]


Notes:

  • The copy of CSI.exe in the root of the download ZIP is now the .NET 4 version because that's the latest public .NET Framework. Previous versions of CSI can be found in the Previous Versions folder: CSI11.exe, CSI20.exe, CSI30.exe, and CSI35.exe.
  • As with the previous release, I have not re-compiled the .NET 1.1 version, CSI11.exe - largely because I don't have .NET 1.1 installed anywhere. :)


Here's the "read me" file for a slightly better idea of how CSI works:

====================================================
==  CSI: C# Interpreter                           ==
==  David Anson (http://blogs.msdn.com/b/delay/)  ==
====================================================


Summary
=======
CSI: C# Interpreter
     Version 2010-06-07 for .NET 4.0
     http://blogs.msdn.com/b/delay/

Enables the use of C# as a scripting language by executing source code files
directly. The source code IS the executable, so it is easy to make changes and
there is no need to maintain a separate EXE file.

CSI (CodeFile)+ (-d DEFINE)* (-r Reference)* (-R)? (-q)? (-c)? (-a Arguments)?
   (CodeFile)+      One or more C# source code files to execute (*.cs)
   (-d DEFINE)*     Zero or more symbols to #define
   (-r Reference)*  Zero or more assembly files to reference (*.dll)
   (-R)?            Optional 'references' switch to include common references
   (-q)?            Optional 'quiet' switch to suppress unnecessary output
   (-c)?            Optional 'colorless' switch to suppress output coloring
   (-a Arguments)?  Zero or more optional arguments for the executing program

The list of common references included by the -R switch is:
   System.dll
   System.Data.dll
   System.Drawing.dll
   System.Windows.Forms.dll
   System.Xml.dll
   PresentationCore.dll
   PresentationFramework.dll
   WindowsBase.dll
   System.Core.dll
   System.Xml.Linq.dll
   Microsoft.CSharp.dll
   System.Xaml.dll

CSI's return code is 2147483647 if it failed to execute the program or 0 (or
whatever value the executed program returned) if it executed successfully.

Examples:
   CSI Example.cs
   CSI Example.cs -r System.Xml.dll -a ArgA ArgB -Switch
   CSI ExampleA.cs ExampleB.cs -d DEBUG -d TESTING -R


Notes
=====
CSI was inspired by net2bat, an internal .NET 1.1 tool whose author had left
Microsoft. CSI initially added support for .NET 2.0 and has now been extended
to support .NET 3.0, 3.5, and 4.0. Separate executables are provided to
accommodate environments where the latest version of .NET is not available.


Version History
===============

Version 2010-06-07
Update .NET 4 (RTM) version
Make .NET 4 version primary

Version 2010-01-04
Add .NET 4 (Beta 2) version
Minor updates

Version 2009-01-06
Initial public release

Version 2005-12-15
Initial internal release

Please rate your dining experience [How to: Show text labels on a numeric axis with Silverlight/WPF Toolkit Charting]

A customer contacted me a few days ago asking how to display text labels on a NumericAxis. (Whereas CategoryAxis makes it easy to use text labels for the independent axis, this request was about text labels on the dependent axis.) It's a bit of an unusual request (I spent a minute just now and don't see how to accomplish this in Excel), but I knew it would be easy to do with the Charting controls in the Data Visualization assembly that's part of the Silverlight Toolkit and WPF Toolkit.

The underlying scenario is to provide labels for the results of one of those "How are we doing?" surveys restaurants and hotels like to give out. The chart should look like this:

Text labels on the dependent axis

Though I originally suggested a different approach, the act of coding it up myself suggested a trusty old IValueConverter would be most appropriate. (Aside: See more IValueConverter tricks here and here.) The basic approach is to explicitly specify the dependent axis and then use it to configure exactly the set of tick marks we want. Once that's done, a simple bit of IValueConverter magic converts the numeric values into their corresponding text labels - and the problem is solved! :)


I've added the sample shown here to my DataVisualizationDemos application which is collection of all the Data Visualization samples I've blogged. Like the core Data Visualization code itself, the demo app compiles for and runs on multiple platforms with the same code and XAML - it's an easy way to publish a sample and show it running on Silverlight 3, Silverlight 4, WPF 3.5, and WPF 4. Just for kicks, I've used the "Compatible" ColumnSeries for this example - but it works just as well with traditional ColumnSeries. Better yet, the basic idea can be generalized to solve a variety of similar problems as well!


[Click here to download the complete source code for the cross-platform DataVisualizationDemos sample application. ]


Here's the relevant XAML:

<!-- Chart of customer feedback -->
<charting:Chart Title="Customer Feedback">
    <compatible:ColumnSeries
        ItemsSource="{Binding}"
        IndependentValuePath="Topic"
        DependentValuePath="Rating">

        <!-- Custom Y axis for text labels -->
        <compatible:ColumnSeries.DependentRangeAxis>
            <charting:LinearAxis
                Orientation="Y"
                Minimum="0"
                Maximum="4"
                Interval="1"
                ShowGridLines="True">

                <!-- Custom style/template for text labels -->
                <charting:LinearAxis.AxisLabelStyle>
                    <Style TargetType="charting:AxisLabel">
                        <Setter Property="Template">
                            <Setter.Value>
                                <ControlTemplate TargetType="charting:AxisLabel">
                                    <TextBlock Text="{Binding Converter={StaticResource RatingToStringConverter}}"/>
                                </ControlTemplate>
                            </Setter.Value>
                        </Setter>
                    </Style>
                </charting:LinearAxis.AxisLabelStyle>
            </charting:LinearAxis>
        </compatible:ColumnSeries.DependentRangeAxis>

        <!-- Custom style for different background -->
        <compatible:ColumnSeries.DataPointStyle>
            <Style TargetType="charting:DataPoint">
                <Setter Property="Background" Value="#ff00a0e0"/>
            </Style>
        </compatible:ColumnSeries.DataPointStyle>
    </compatible:ColumnSeries>
</charting:Chart>

And code:

/// <summary>
/// Implements IValueConverter to convert from double rating values to friendly string names.
/// </summary>
public class RatingToStringConverter : IValueConverter
{
    public object Convert(object value, Type targetType, object parameter, CultureInfo culture)
    {
        // Validate parameters
        if (!(value is double))
        {
            throw new NotSupportedException("Unsupported value type in RatingToStringConverter.");
        }
        // Convert number to string
        double doubleValue = Math.Floor((double)value);
        if (0.0 == doubleValue)
        {
            return "Awful";
        }
        else if (1.0 == doubleValue)
        {
            return "Poor";
        }
        else if (2.0 == doubleValue)
        {
            return "Fair";
        }
        else if (3.0 == doubleValue)
        {
            return "Good";
        }
        else if (4.0 == doubleValue)
        {
            return "Great";
        }
        else
        {
            throw new ArgumentException("Unsupported value in RatingToStringConverter.");
        }
    }

    public object ConvertBack(object value, Type targetType, object parameter, CultureInfo culture)
    {
        throw new NotImplementedException();
    }
}

You Spin Me Round (Like a Record) [Easily animate orientation changes for any Windows Phone application with this handy source code]

As computing devices have become more powerful, the trend has been toward more "fluid" user interfaces - interaction models that flow smoothly from one state to another. This differs from earlier approaches where resources were more limited and interactions tended to be Spartan and isolated from each another. Some of the motivation behind an increased focus on fluid UI is almost certainly the "wow" factor; modern interfaces can be quite attractive and fun to use! But there's also scientific research to back this up: people tend to find smooth transitions less disruptive to their workflow than abrupt ones - and the animation itself can help tie the "before" and "after" states together by showing how one becomes the other.

With that in mind, one of the things I've wanted to do is apply this principle to enhance the user experience for Silverlight applications on the Windows Phone platform. Specifically, I wanted to make it easy for developers to animate the orientation change of an application that occurs when the phone is rotated from its default portrait orientation to landscape. This is one of those cases where a picture is worth a thousand words, so I've created a short video showing the default behavior of a Silverlight-based Windows Phone application when the device (in this case the emulator) is rotated.


Click the image below to view a brief H.264-encoded MP4 video of the default rotation behavior:

Video of default orientation change behavior

For people who have never used the emulator: those two buttons I click rotate the device one quarter turn clockwise or counter-clockwise. I begin by rotating counter-clockwise once, then clockwise once back to the starting orientation, then clockwise three more times to loop all the way around.


What I show above is what you get for free when you create a new application - and it's great the device and platform support dynamic orientation changes without any special effort! But I thought it would be cool if I could extend that just a bit in order to animate those orientation changes - again, without requiring the developer to change anything (beyond a couple of superficial name changes).

Click the image below to view a short video of the animated behavior I've created:

Video of animated orientation change behavior

As in the first video, I show the device rotating to landscape, then back, then all the way around. But this time I've included a little bit of fun at the end. :)


The custom rotation behavior is made possible by the AnimateOrientationChangesPage class I created which works by lying to the layout system (Now, where have I heard that before?). It's a small, self-contained class you insert into the default hierarchy and then never need to worry about again. AnimateOrientationChangesPage automatically gets involved with the necessary steps for rotation and even handles page-to-page navigation changes seamlessly.

My goal was to make it easy for Windows Phone applications to offer the kind of fluid rotation experience that's becoming common these days - and it seems like AnimateOrientationChangesPage does that. I hope you find it useful!


[Click here to download the AnimateOrientationChanges sample for the Windows Phone 7 platform.]


Notes:

  • If you download the sample, please be sure to open MainPage.xaml in the development environment before hitting F5 to run it - otherwise deployment to the emulator might fail with the message "Object reference not set to an instance of an object." because of a bug in the tools.
  • I created this sample using the public Windows Phone Developer Tools CTP - April Refresh bits, so anyone else with that toolset installed should be able to run it as-is. I also happened to have a chance to try things out on a more recent (internal) build of the tools - fortunately, things worked just as well there! However, due to a minor change to one of the platform APIs, please remove the following from the top of AnimateOrientationChangesPage.cs if you're trying to run on a more recent build:
    // Remove this #define when using more recent phone/tools builds
    #define APRIL_TOOLS
  • Unfortunately, I don't have actual phone hardware to run this code on, so I can't be sure it runs as smoothly there. While the performance under the Windows Phone emulator is great on my laptop, even a laptop has beefier hardware than something pocket-sized like a phone. That said, the implementation is relatively straightforward: the orientation change notification starts a Storyboard with a single DoubleAnimation of a custom DependencyProperty. The change handler for this property updates the values of a RotateTransform and TranslateTransform and triggers an arrange pass (via InvalidateArrange). Everything so far is part of the Silverlight Performance team's recommendations for good performance, so the bottleneck (if there is one) might turn out to be the arrange pass (note: not measure; just arrange) which is always a recursive operation. However, arrange is a fundamental operation for the Silverlight platform, so I expect it to be optimized and pretty efficient in practice. That said, if I manage to get my hands on a device for long enough to play around, I'll see how things really perform...
  • I wanted AnimateOrientationChangesPage to be as easy to use as possible. And while I couldn't go as far as enabling it with an attached property, I was able to do the next best thing: derive from PhoneApplicationPage. This means any existing Windows Phone application can be converted to use AnimateOrientationChangesPage simply by changing the base class of its pages to AnimateOrientationChangesPage. Specifically, here are the complete steps for converting the MainPage class of a newly created application:
    1. Verify the page supports multiple orientations by checking for the following code in the constructor (it's added by default, so it ought to be there):
      SupportedOrientations = SupportedPageOrientation.Portrait | SupportedPageOrientation.Landscape;
    2. Add the AnimateOrientationChangesPage.cs code file to the project/solution.
    3. Change the base class of MainPage to AnimateOrientationChangesPage in MainPage.cs:
      using System;
      // ...
      using Delay;
      
      namespace WindowsPhoneApplication1
      {
          public partial class MainPage : AnimateOrientationChangesPage
          {
              // ...
          }
      }
    4. Make the corresponding change to MainPage.cs.xaml:
      <delay:AnimateOrientationChangesPage
          x:Class="WindowsPhoneApplication1.MainPage"
          xmlns:delay="clr-namespace:Delay"
          ...>
      
          <!-- ... -->
      
      </delay:AnimateOrientationChangesPage>
    5. Run the application and enjoy the animations!
  • These directions enable the default animation behavior which I've configured to use a 0.4 second duration and a reasonable easing function. However, if you'd like to customize things further, you can set the Duration property to a different TimeSpan and/or change the EasingFunction to the IEasingFunction implementation of your choice. Just in case, there's also an IsAnimationEnabled property that can be set to false to disable orientation change animations entirely. These properties can be set at any time; the new values take effect at the next orientation change.
  • I reserve the right to change my mind and move some of this code up into a PhoneApplicationFrame subclass if it turns out that would be helpful. :) But for right now, the current implementation seems pretty effective - I've specifically tested it with navigation scenarios and it works well there, too.
  • If you watch the video of the default behavior closely, you'll see a brief period of time right after the rotation occurs where the emulator is rotated but the screen isn't. I think this is an artifact of how the emulator works and doesn't represent something users would see on a real device. As it happens, I don't see that same glitch in the video with AnimateOrientationChangesPage enabled - but I'd apply the same caveat there, too.
  • I've deliberately not supported the PageOrientation.PortraitDown enumeration value. This is not because it would be hard to do (it's quite trivial, actually), but rather because no device I've seen (including the Windows Phone Emulator) actually supports flipping completely upside down in portrait orientation. If this design decision is a problem for your scenario, full PortraitDown support requires only three trivial case statements to implement that will be obvious from looking at the code.