The blog of dlaa.me

Posts tagged "Technical"

Blogging code samples stays easy [Update to free ConvertClipboardRtfToHtmlText tool and source code for Visual Studio 2010!]

A big part of my blog is sharing code and so most of the posts I write include sample source. Therefore, it's pretty important to me that the code I share be easy for readers to understand and use. For me, that means I want it to be static, syntax-highlighted, and in text form so it's copy+paste-able and indexable by search engines.

I'm a big fan of keeping things simple and avoiding dependencies, so I ended up writing a very simple tool about two years ago called ConvertClipboardRtfToHtmlText. As you can see from the original ConvertClipboardRtfToHtmlText post and the subsequent follow-up, it's a very simple tool intended for a very specific scenario. That said, it works beautifully for my purposes and I've used it to blog every snippet of source code since then!

So I was surprised and a little disappointed when it stopped working recently... Why? Because I switched to Visual Studio 2010 (Beta 2) and they've changed the RTF clipboard format slightly with that release. Now, while I'm sure VS 2010's RTF is still 100% legal RTF, it's different enough from VS 2008's output that ConvertClipboardRtfToHtmlText chokes on it. Clearly, it was time to dust off the source code and make it work again! :)

Not surprisingly, the update process was quite painless - and by tweaking the code slightly, I've arrived at an implementation that works well for both versions of Visual Studio: 2008 and 2010! The source code download includes a VS 2010 solution and project, but takes advantage of the multi-targeting capabilities of Visual Studio to compile for the .NET 2.0 Framework, ensuring that the resulting executable runs pretty much everywhere.

As long as I was touching the code, I added the following simple banner text:

ConvertClipboardRtfToHtmlText
Version 2009-12-19 - http://blogs.msdn.com/delay/

Converts the Visual Studio 2008/2010 RTF clipboard format to HTML by replacing
the RTF clipboard contents with its HTML representation in text form.

Instructions for use:
1. Copy syntax-highlighted text to the clipboard in Visual Studio
2. Run ConvertClipboardRtfToHtmlText (which has no UI and exits immediately)
3. Paste HTML text into an editor, web page, blog post, etc.

So if you're in the market for a nice way to blog code and you're using Visual Studio 2008 or 2010, maybe ConvertClipboardRtfToHtmlText can help you out!


[Click here to download the ConvertClipboardRtfToHtmlText tool along with its complete source code.]


Here's the complete source code for ConvertClipboardRtfToHtmlText, provided by - you guessed it! - ConvertClipboardRtfToHtmlText:

using System;
using System.Collections.Generic;
using System.Drawing;
using System.Text;
using System.Windows.Forms;

// NOTE: This is NOT a general-purpose RTF-to-HTML converter! It works well
// enough on the input I've tried, but may break in other scenarios.
// TODO: Convert into a real application with a notify icon and hotkey.
namespace ConvertClipboardRtfToHtmlText
{
    static class ConvertClipboardRtfToHtmlText
    {
        private const string colorTbl = "\\colortbl;";
        private const string colorFieldTag = "cf";
        private const string tabExpansion = "    ";

        [STAThread]
        static void Main()
        {
            Console.WriteLine("ConvertClipboardRtfToHtmlText");
            Console.WriteLine("Version 2009-12-19 - http://blogs.msdn.com/delay/");
            Console.WriteLine();
            Console.WriteLine("Converts the Visual Studio 2008/2010 RTF clipboard format to HTML by replacing");
            Console.WriteLine("the RTF clipboard contents with its HTML representation in text form.");
            Console.WriteLine();
            Console.WriteLine("Instructions for use:");
            Console.WriteLine("1. Copy syntax-highlighted text to the clipboard in Visual Studio");
            Console.WriteLine("2. Run ConvertClipboardRtfToHtmlText (which has no UI and exits immediately)");
            Console.WriteLine("3. Paste HTML text into an editor, web page, blog post, etc.");
            if (Clipboard.ContainsText(TextDataFormat.Rtf))
            {
                // Create color table, populate with default color
                List<Color> colors = new List<Color>();
                Color defaultColor = Color.FromArgb(0, 0, 0);
                colors.Add(defaultColor);

                // Get RTF
                string rtf = Clipboard.GetText(TextDataFormat.Rtf);

                // Strip meaningless "\r\n" pairs (used by VS 2008)
                rtf = rtf.Replace("\r\n", "");

                // Parse color table
                int i = rtf.IndexOf(colorTbl);
                if (-1 != i)
                {
                    i += colorTbl.Length;
                    while ((i < rtf.Length) && ('}' != rtf[i]))
                    {
                        // Add color to color table
                        SkipExpectedText(rtf, ref i, "\\red");
                        byte red = (byte)ParseNumericField(rtf, ref i);
                        SkipExpectedText(rtf, ref i, "\\green");
                        byte green = (byte)ParseNumericField(rtf, ref i);
                        SkipExpectedText(rtf, ref i, "\\blue");
                        byte blue = (byte)ParseNumericField(rtf, ref i);
                        colors.Add(Color.FromArgb(red, green, blue));
                        SkipExpectedText(rtf, ref i, ";");
                    }
                }
                else
                {
                    throw new NotSupportedException("Missing/unknown colorTbl.");
                }

                // Find start of text and parse
                i = rtf.IndexOf("\\fs");
                if (-1 != i)
                {
                    // Skip font size tag
                    while ((i < rtf.Length) && (' ' != rtf[i]))
                    {
                        i++;
                    }
                    i++;

                    // Begin building HTML text
                    StringBuilder sb = new StringBuilder();
                    sb.AppendFormat("<pre><span style='color:#{0:x2}{1:x2}{2:x2}'>",
                        defaultColor.R, defaultColor.G, defaultColor.B);
                    while (i < rtf.Length)
                    {
                        if ('\\' == rtf[i])
                        {
                            // Parse escape code
                            i++;
                            if ((i < rtf.Length) &&
                                (('{' == rtf[i]) || ('}' == rtf[i]) || ('\\' == rtf[i])))
                            {
                                // Escaped '{' or '}' or '\'
                                sb.Append(rtf[i]);
                            }
                            else
                            {
                                // Parse tag
                                int tagEnd = rtf.IndexOf(' ', i);
                                if (-1 != tagEnd)
                                {
                                    if (rtf.Substring(i, tagEnd - i).StartsWith(colorFieldTag))
                                    {
                                        // Parse color field tag
                                        i += colorFieldTag.Length;
                                        int colorIndex = ParseNumericField(rtf, ref i);
                                        if ((colorIndex < 0) || (colors.Count <= colorIndex))
                                        {
                                            throw new NotSupportedException("Bad color index.");
                                        }

                                        // Change to new color
                                        sb.AppendFormat(
                                            "</span><span style='color:#{0:x2}{1:x2}{2:x2}'>",
                                            colors[colorIndex].R, colors[colorIndex].G,
                                            colors[colorIndex].B);
                                    }
                                    else if ("tab" == rtf.Substring(i, tagEnd - i))
                                    {
                                        sb.Append(tabExpansion);
                                    }
                                    else if ("par" == rtf.Substring(i, tagEnd - i))
                                    {
                                        sb.Append("\r\n");
                                    }

                                    // Skip tag
                                    i = tagEnd;
                                }
                                else
                                {
                                    throw new NotSupportedException("Malformed tag.");
                                }
                            }
                        }
                        else if ('}' == rtf[i])
                        {
                            // Terminal curly; done
                            break;
                        }
                        else
                        {
                            // Normal character; HTML-escape '<', '>', and '&'
                            switch (rtf[i])
                            {
                                case '<':
                                    sb.Append("&lt;");
                                    break;
                                case '>':
                                    sb.Append("&gt;");
                                    break;
                                case '&':
                                    sb.Append("&amp;");
                                    break;
                                default:
                                    sb.Append(rtf[i]);
                                    break;
                            }
                        }
                        i++;
                    }

                    // Trim any trailing empty lines
                    while ((2 <= sb.Length) && ('\r' == sb[sb.Length - 2]) && ('\n' == sb[sb.Length - 1]))
                    {
                        sb.Length -= 2;
                    }

                    // Finish building HTML text
                    sb.Append("</span></pre>");

                    // Update the clipboard text
                    Clipboard.SetText(sb.ToString());
                }
                else
                {
                    throw new NotSupportedException("Missing text section.");
                }
            }
        }

        // Skip the specified text
        private static void SkipExpectedText(string s, ref int i, string text)
        {
            foreach (char c in text)
            {
                if ((s.Length <= i) || (c != s[i]))
                {
                    throw new NotSupportedException("Expected text missing.");
                }
                i++;
            }
        }

        // Parse a numeric field
        private static int ParseNumericField(string s, ref int i)
        {
            int value = 0;
            while ((i < s.Length) && char.IsDigit(s[i]))
            {
                value *= 10;
                value += s[i] - '0';
                i++;
            }
            return value;
        }
    }
}
Normal booting is old school [Windows 7 tricks detailed: USB key install, VHD creation, and native VHD boot/dual-boot!]

Windows 7 can boot and run in some ways that are a little surprising when you first learn about them. One example is that it can seamlessly install from any sufficiently large USB key; another is that it can natively boot VHD files. Neither of these is hard to configure and both have already been discussed by other web sites. However, it has been my experience that some of the relevant information on the web is confusing, misleading, or incomplete. So in the interest of saving others - and myself! - some trouble, I explain a few interesting scenarios below with exact steps and brief notes on what each step does. (That way, if anything goes wrong, troubleshooting is a lot easier.)

If you already do this kind of thing and have a process that's working for you, there's probably little here that's new. But if you've been thinking of getting your feet wet with any of this, maybe I can help make things a little easier! :)


Notes:

  • The tasks described here are potentially dangerous and can result in the complete loss of your data if done improperly. Always back up your data first, think about what you're doing, check your work, and otherwise take sensible precautions! While I've done my best to ensure the steps below work as intended, I can offer no guarantee they'll work the same under all conditions. Caveat emptor.
  • Things you type look like this - things you do look like [this] - things you need to replace when you type them (like drive letters that vary by machine) look like this.
  • Unless otherwise noted, all tasks should be carried out on a machine running Windows 7.
  • Each task is self-contained and can be done independently of the others.
  • Although I refer to Windows 7 everywhere, Windows Server 2008 R2 supports these same scenarios as well.
  • While it's possible to apply BitLocker drive encryption to a natively-booted VHD, the host drive (i.e., the drive containing the VHD) can not be encrypted. (And if you're going to use BitLocker, you should be aware that the default location for pagefile.sys of a natively-booted VHD is on the host disk outside the VHD.)
  • Here are some good resources for more information:


Installing Windows 7 (or Vista) from a USB Key

Besides making it possible to install Windows on machines without a DVD drive, installing from a USB key has a big advantage: it's fast. All you need is a blank USB key that's big enough to hold everything on the DVD (typically about 3GB of data). Then follow these easy steps and - BAM! - install runs faster than ever!

  1. [Open a Command Prompt as administrator]

    Open the Start Menu, expand "All Programs", "Accessories", right-click on "Command Prompt", then "Run as administrator".

  2. [Insert the USB key]

    Give the system a moment to identify it.

  3. diskpart

    Run the interactive disk partitioning tool.

  4. list disk

    Display the available disks.

  5. select disk #

    Select the USB key; identify it using the "Size" column. USB keys will usually be near the bottom of the list, especially if they've just been plugged-in (when they're likely to be last).

  6. list disk

    Look for the '*' identifying the selected disk and be sure you've selected the right one because the next step will delete all data on that disk.

  7. clean

    Remove all partition/formatting information from the selected disk.

  8. create partition primary

    Create a primary partition on the selected disk.

  9. format quick

    Format the new partition of the selected disk with the default file system.

  10. active

    Mark the new partition on the selected disk active and bootable.

  11. assign

    Assign a drive letter to the new volume of the selected disk.

  12. list volume

    Display the available volumes. Look for the '*' identifying the newly created volume.

  13. exit

    Exit the interactive disk partitioning tool.

  14. robocopy W:\ U:\ /e

    Copy the entire contents of the Windows 7 (or Vista) DVD in drive W to the USB key at drive U.

  15. [Safely remove/unplug the USB key]

    This key can now be inserted in any machine that supports booting from USB (nearly all of them do these days). The experience will be just the same as if the original DVD were used - but it runs considerably faster!

    Note: You may need to hit a special key as the machine starts to tell it to boot from the USB key instead of the internal hard drive - it's usually one of F2/F12/DEL/ESC, but check the manual if you're not sure.


Create a VHD containing an up-to-date Windows 7 image

Installing from USB may be fast, but what's even faster is not having to install at all! If you'll be running Windows 7 in Windows Virtual PC, Hyper-V, or natively from a VHD, it's convenient to start out with an image that already has the bits in the right places and the latest security patches applied. What's cool is that there's a script to make creating one of these VHDs easy: WIM2VHD by Mike Kolitz. Start by going to that web site and following the directions to download WIM2VHD and its dependencies before carrying out the steps below.

  1. [Open a Command Prompt as administrator]

    Open the Start Menu, expand "All Programs", "Accessories", right-click on "Command Prompt", then "Run as administrator".

  2. [Change to the directory containing WIM2VHD.wsf]

    For convenience, this directory should also contain all the QFE patches that will be applied.

  3. cscript WIM2VHD.wsf
      /wim:W:\sources\install.wim
      /sku:ULTIMATE
      /disktype:fixed
      /size:10000
      /vhd:Windows7Ultimate.vhd
      /qfe:Windows6.1-KB973525-x86.msu,Windows6.1-KB974332-x86.msu,Windows6.1-KB974431-x86.msu,Windows6.1-KB974455-x86.msu,Windows6.1-KB974571-x86.msu,Windows6.1-KB975364-x86.msu,Windows6.1-KB975467-x86.msu,Windows6.1-KB976749-x86.msu
    

    Create a VHD named Windows7Ultimate.vhd from the original Windows 7 DVD in drive W using the Ultimate SKU, a fixed size disk of 10GB, and with the listed QFEs pre-applied.

    Note: I'm using the x86 DVD here, so I'm providing the x86 versions of the relevant security patches. This should all work the same for 64-bit, but I prefer 32-bit because it's smaller and works pretty much everywhere.

    Note: You can create a dynamic disk (which starts small and grows as necessary) by omitting the italic /disktype and /size options above. That's going to be faster and easier to deal with for Virtual PC and Hyper-V - but for native VHD boot a fixed size is easier and performs better. That's what I'm going to do in the next task, so I've specified a small, fixed disk above. (Please refer to the FAQ for more detail.)

    Note: Per the FAQ, "Native boot from VHD is only available with Windows 7 Enterprise, Windows 7 Ultimate and all versions of Windows Server 2008 R2."


Configure a clean machine for native VHD booting

Is it possible to boot a machine without a "real" operating system? Yes!

The steps below will clean a machine and configure it to boot into a VHD image from a nearly-empty hard drive. While there are some sensible reasons to do this (e.g., implementing poor-man's undo disks or making it easy to transfer a pre-configured Windows 7 install around), this is mainly just a cool way to show off. :) Rumor has it that these steps can even be used to create a USB key that hosts and boots a running copy of Windows 7, though I don't have a USB key large enough to try myself. (And besides, that would probably wear out the USB key's flash memory quite quickly.)

Note: If you already have Windows 7 installed on a machine, and want to add an additional boot option for VHD, please scroll down to the next task instead.

  1. [Boot the machine from the Windows 7 DVD or a Windows 7 USB key created by the steps above]

    Load a simple shell that can be used to make low-level changes to the disk.

  2. [Wait for the "Install Windows" dialog to display]

    Allow the system to boot completely.

  3. [Optional: Plug in an external USB drive containing the VHD image]

    If you're booting from the DVD or using a USB key that's too small to hold the 10GB VHD image, you can store the VHD file on a separate USB hard disk. Plug that disk in now, and give the system a moment to find it and assign it a drive letter.

  4. [Press Shift+F10]

    Open an interactive command prompt with administrator permissions

  5. diskpart

    Run the interactive disk partitioning tool.

  6. list disk

    Display the available disks.

  7. select disk #

    Select the primary hard disk; it will usually be at index 0.

  8. list disk

    Look for the '*' identifying the selected disk and be sure you've selected the right one because the next step will delete all data on that disk.

  9. clean

    Remove all partition/formatting information from the selected disk.

  10. create partition primary

    Create a primary partition on the selected disk.

  11. format quick

    Format the new partition of the selected disk with the default file system.

  12. active

    Mark the new partition on the selected disk active and bootable.

  13. assign

    Assign a drive letter to the new volume of the selected disk.

  14. list volume

    Display the available volumes. Look for the '*' identifying the newly created volume.

  15. exit

    Exit the interactive disk partitioning tool.

  16. copy E:\Windows7Ultimate.vhd C:\

    Copy the VHD file Windows7Ultimate.vhd from (external) drive E to the now-empty primary hard drive C. This may take a little while...

  17. diskpart

    Run the interactive disk partitioning tool.

  18. select vdisk file=C:\Windows7Ultimate.vhd

    Select the VHD file Windows7Ultimate.vhd just copied to the primary hard drive C. Make sure not to reference the VHD file on the removable disk because that disk won't be available in the future.

  19. attach vdisk

    Attach the selected virtual disk to the system.

  20. list volume

    Display the available volumes. Look for the new virtual disk volume; identify it using the "Size" column (it will probably be the last one listed).

  21. exit

    Exit the interactive disk partitioning tool.

  22. bcdboot V:\Windows /s C:

    Configure primary hard disk drive C to boot into the copy of Windows installed on virtual drive V (the newly attached virtual disk volume).

  23. exit

    Close the Command Prompt window.

  24. [Close the "Install Windows" dialog by clicking the 'X' in the upper-right corner]

    Cancel the install process.

  25. [Confirm you want to cancel the install process]

    Yes, really cancel the install process.

  26. [Wait while the machine automatically reboots]

    Allow the machine to boot into the new VHD image. (Note: This may require unplugging the USB key and/or external USB drive.) After booting into the VHD image, Windows will run through the last stages of setup (e.g., user name, time zone, etc.) and finalize the install.

    Enjoy your new VHD-based Windows!


Add native VHD booting to a machine with Windows 7

If you already have a machine with Windows 7 installed (perhaps via the previous set of steps), you can modify it to boot a separate instance of Windows 7 from VHD.

  1. [Open a Command Prompt as administrator]

    Open the Start Menu, expand "All Programs", "Accessories", right-click on "Command Prompt", then "Run as administrator".

  2. copy E:\Windows7Ultimate.vhd C:\

    Copy the VHD file Windows7Ultimate2.vhd from (any) drive E to drive C which should be the machine's primary hard disk. (It will already contain a VHD file if you're continuing along from the previous task.) Make sure drive C does not correspond to a VHD-based disk.

  3. bcdedit /copy {default} /d "Windows 7 VHD"

    Creates a copy of the default boot configuration with the name Windows 7 VHD. Note the GUID that is returned by this command; use it in place of GUID in the following commands.

  4. bcdedit /set GUID device vhd=[C:]\Windows7Ultimate2.vhd

    Set the device for the new boot configuration to the Windows7Ultimate2.vhd file on drive C. (Note: Use the "[C:]\..." syntax exactly as shown above with the square brackets.)

  5. bcdedit /set GUID osdevice vhd=[C:]\Windows7Ultimate2.vhd

    Set the OS device for the new configuration to the Windows7Ultimate2.vhd file on drive C. (Note: Use the "[C:]\..." syntax exactly as shown above with the square brackets.)

  6. [Reboot and choose the new ""Windows 7 VHD" option]

    Boot into the new VHD.

    Note: If that doesn't work, please have a look at the end of this document and try the "detecthal on" step. I haven't found this to be necessary, so I haven't listed it - but if others find that it's helpful, I'll call that out.

Tags: Technical

Creating something from nothing - and knowing it [Developer-friendly virtual file implementation for .NET refined!]

A couple of weeks ago I wrote about VirtualFileDataObject, my developer-friendly virtual file implementation for .NET and WPF. I followed that up by adding support for asynchronous behavior to improve the user experience during long-running operations. Last week, these posts got a shout-out from blogging legend Raymond Chen, whose work provided the inspiration for the project. [Best week ever! :) ] Now it's time for one last tweak to wrap things up!


Recall that the Windows APIs for drag-and-drop and clipboard operations deal with objects that implement the IDataObject COM interface. And while the native DoDragDrop function tries to provide a mechanism for the source and target to communicate (via the pdwEffect parameter and the function's return value), there's nothing similar available for the SetClipboardData function. And once you enable asynchronous drag-and-drop, it's clear that the return value of DoDragDrop isn't going to work, either, because the call returns immediately (before the operation has completed). So it seems like there must be some other way for the source and target to share information...

Sure enough, there are some shell clipboard formats specifically for enabling communication between the source and target! For the purposes of this sample, we're interested in using two of them:

And here's another which is relevant enough that I wrote code to support it, though I'll only mention it once more here:

  • CFSTR_PASTESUCCEEDED - Indication that a paste succeeded and what kind of operation (copy/move/link) it did


Armed with that knowledge, let's tweak the sample application so one of the scenarios does a move/cut instead of a copy:

VirtualFileDataObjectDemo sample application

The first tweak to the code modifies our helper function to accept a DragDropEffects parameter so the caller can indicate its copy/move preference with the new PreferredDropEffect property in the clipboard scenario:

private static void DoDragDropOrClipboardSetDataObject(MouseButton button, DependencyObject dragSource,
    VirtualFileDataObject virtualFileDataObject, DragDropEffects allowedEffects)
{
    try
    {
        if (button == MouseButton.Left)
        {
            // Left button is used to start a drag/drop operation
            VirtualFileDataObject.DoDragDrop(dragSource, virtualFileDataObject, allowedEffects);
        }
        else if (button == MouseButton.Right)
        {
            // Right button is used to copy to the clipboard
            // Communicate the preferred behavior to the destination
            virtualFileDataObject.PreferredDropEffect = allowedEffects;
            Clipboard.SetDataObject(virtualFileDataObject);
        }
    }
    catch (COMException)
    {
        // Failure; no way to recover
    }
}

Then we can tweak the VirtualFileDataObject constructor to pass a custom "end" action that uses the new PerformedDropEffect property to find out what action took place. If the target performed a move (or a cut with the clipboard), then we'll hide the corresponding "button" to reflect that fact:

private void VirtualFile_MouseButtonDown(object sender, MouseButtonEventArgs e)
{
    var virtualFileDataObject = new VirtualFileDataObject(
        null,
        (vfdo) =>
        {
            if (DragDropEffects.Move == vfdo.PerformedDropEffect)
            {
                // Hide the element that was moved (or cut)
                // BeginInvoke ensures UI operations happen on the right thread
                Dispatcher.BeginInvoke((Action)(() => VirtualFile.Visibility = Visibility.Hidden));
            }
        });

    // Provide a virtual file (generated on demand) containing the letters 'a'-'z'
    ...

    DoDragDropOrClipboardSetDataObject(e.ChangedButton, TextUrl, virtualFileDataObject, DragDropEffects.Move);
}

Please note that the begin/end actions are now of type Action<VirtualFileDataObject>. The new parameter is always a reference to the active VirtualFileDataObject instance and is provided to make it easy to use anonymous methods like you see above.

Aside: Otherwise you'd need to capture the VirtualFileDataObject instance so you could pass it to the action being provided to that same instance's constructor! (Catch-22 much?) While there may be a clever way to do this without making the begin/end actions properties of the class (which I didn't want to do because that wouldn't ensure they're invariant), passing the VirtualFileDataObject in this manner is both easy and obvious.
Further aside: As a consequence of the changes to support these new properties, VirtualFileDataObject now implements the IDataObject::SetData method for HGLOBAL-style data. So if there's some other CFSTR_ property that's relevant to your scenario, you can query it off the VirtualFileDataObject instance in much the same manner!


[Click here to download the complete code for VirtualFileDataObject and the sample application.]


And that's pretty much all there is to it! With the addition of PreferredDropEffect and PerformedDropEffect (and PasteSucceeded, though it's not demonstrated above), VirtualFileDataObject makes it easy for your application to provide a seamless virtual file drag/drop experience with all the sophisticated nuances users expect from a polished Windows application.

Enjoy!

Creating something from nothing, asynchronously [Developer-friendly virtual file implementation for .NET improved!]

Last week I posted the code for VirtualFileDataObject, an easy-to-use implementation of virtual files for .NET and WPF. This code implements the standard IDataObject COM interface for drag-and-drop and clipboard operations and is specifically targeted at scenarios where an application wants to allow the user to drag an element to a folder and create a file (or files) dynamically on the drop/paste. The standard .NET APIs for drag-and-drop don't support this scenario, so VirtualFileDataObject ended up being a custom implementation of the System.Runtime.InteropServices.ComTypes.IDataObject interface. Fortunately, the specifics aren't too difficult, and a series of posts by Raymond Chen paved the way (in native code).

VirtualFileDataObjectDemo sample application


If you read my previous post, you may recall there was an issue with the last scenario of the sample: the application became unresponsive while data for the virtual file was downloading from the web. While this unresponsiveness won't be a noticeable for scenarios involving local data, scenarios that create large files or hit the network are at risk. Well, it's time to find a solution!

And we don't have to look far: the answer is found in the MSDN documentation for Transferring Shell Objects with Drag-and-Drop and the Clipboard under the heading Using IAsyncOperation. As you might expect, we're not the first to notice this behavior; the IAsyncOperation interface exists to solve this very problem. So it seems like things ought to be easy - let's just define the interface, implement its five methods (none of which are very complicated), and watch as the sample application stays responsive during the time-consuming download...

FAIL.


Okay, so that didn't work out quite how we wanted it to. Maybe we defined the interface incorrectly? Maybe we implemented it incorrectly? Or maybe Windows just doesn't support this scenario??

No, no, and no. We've done everything right - it's the platform that has betrayed us. :( Specifically, the DragDrop.DoDragDrop method does something sneaky under the covers: it wraps our respectable System.Runtime.InteropServices.ComTypes.IDataObject instance in a System.Windows.DataObject wrapper. Because this wrapper object doesn't implement or forward IAsyncOperation, it's as if the interface doesn't exist!

Aside: I have the fortune of working with some of the people who wrote this code in the first place, and I asked why this extra level of indirection was necessary. The answer is that it probably isn't - or at least nobody remembers why it's there or why it couldn't be removed now. So the good news is they'll be looking at changing this behavior in a future release of WPF. The bad news is that the change probably won't happen in time for the upcoming WPF 4 release.

Be that as it may, it looks like we're going to need to call the COM DoDragDrop function directly. Fortunately, there's not much that happens between WPF's DragDrop.DoDragDrop and COM's DoDragDrop, so there's not much we have to duplicate. That said, we do need to define the IDropSource interface and write a custom DropSource implementation of its two methods. The nice thing is that both methods are pretty simple and straightforward, so our custom implementation can be private. (And for simplicity's sake, we're not going to bother raising DragDrop's (Preview)GiveFeedbackEvent or (Preview)QueryContinueDragEvent events.)

Because we've been careful to define the VirtualFileDataObject.DoDragDrop replacement method with the same signature as the DoDragDrop method it's replacing, updating the sample to use it is trivial. So run the sample again, and - BAM - no more unresponsive window during the transfer! (For real, this time.) You can switch to the window, resize it, drag it, etc. all during the creation of the virtual file.


But now we've got a bit of a dilemma: if things are happening asynchronously, how can we tell when they're done? The answer lies with the StartOperation and EndOperation methods of the IAsyncOperation interface. Per the interface contact, these methods are called at the beginning/end of the asynchronous operation. So if we just add another constructor to the VirtualFileDataObject class, we can wire things up in the obvious manner:

 /// <summary>
 /// Initializes a new instance of the VirtualFileDataObject class.
 /// </summary>
 /// <param name="startAction">Optional action to run at the start of the data transfer.</param>
 /// <param name="endAction">Optional action to run at the end of the data transfer.</param>
 public VirtualFileDataObject(Action startAction, Action endAction)

Well, almost... The catch is that while VirtualFileDataObject now supports asynchronous mode, there's no guarantee that the drop target will use it. Additionally, the developer may have specifically set the VirtualFileDataObject.IsAsynchronous property to false to disable asynchronous mode. And when you're in synchronous mode, there aren't any handy begin/end notifications to rely on...

So I've added support to VirtualFileDataObject for calling the begin/end actions in synchronous mode based on some semi-educated guesses. In my testing, the notifications during synchronous mode behave as identically as possible to those in asynchronous mode. Granted, in some scenarios startAction may run a little earlier in synchronous mode than it would have for asynchronous mode - but as far as the typical developer is concerned, VirtualFileDataObject offers the same handy behavior for both modes!


Let's celebrate by updating the sample to show a simple busy indicator during the download:

VirtualFileDataObjectDemo sample application

Code-wise, once we've updated the call to DoDragDrop:

VirtualFileDataObject.DoDragDrop(dragSource, virtualFileDataObject, DragDropEffects.Copy);

Everything else stays the same except for the constructor:

var virtualFileDataObject = new VirtualFileDataObject(
    // BeginInvoke ensures UI operations happen on the right thread
    () => Dispatcher.BeginInvoke((Action)(() => BusyScreen.Visibility = Visibility.Visible)),
    () => Dispatcher.BeginInvoke((Action)(() => BusyScreen.Visibility = Visibility.Collapsed)));

The BusyScreen variable above corresponds to a new element in the sample application that provides the simple "Busy..." UI shown above. In real life, we'd probably use MVVM and a bool IsBusy property on our data model to trigger this, but for a sample application, toggling Visibility works fine. Because all the hard work is done by the VirtualFileDataObject class [you're welcome! :) ], the application remains unencumbered by complex logic for anything related to the management of virtual files.

Which is the way it should be!


[Click here to download the complete code for VirtualFileDataObject and the sample application.]


PS - I have one more post planned on this topic demonstrating something I haven't touched on yet to help applications coordinate better with the shell. Stay tuned...

Creating something from nothing [Developer-friendly virtual file implementation for .NET!]

Have you ever used one of those programs that lets you drag a UI widget, drop it in a folder, and - poof - a file that didn't exist magically appears? Me, too - it's cool! But how does it work? Are they really deferring the work of creating that file until it's needed and then creating the file during the drag-and-drop operation? Yes they are - and now you can, too!

If I have seen a little further it is by standing on the shoulders of Giants.- Sir Isaac Newton

Everything you ever needed to know about drag-and-drop in Windows can probably be found in the MSDN documentation for Transferring Shell Objects with Drag-and-Drop and the Clipboard. That documentation is a great resource for specific questions, but because it covers so many topics, it's not necessarily the best way to get an overview. For that, we turn to Raymond Chen's blog - specifically, a series he did called "What a drag" in March of last year. Raymond's example uses native code exclusively, but don't let that scare you away - his presentation and explanations are always engaging! Please take a moment to read (or at least skim) the following articles, or else the rest of this post might not make much sense:

Okay, so we know what we want to do and now we know how it's supposed to work! The first thing to consider is whether the WPF platform supports the virtual file scenario. And unfortunately, it doesn't seem to. :( Specifically, the DataObject class is where we'd expect to find such support, but the closest it has is SetFileDropList. And while that sounds promising, it's really just a list of strings with paths to existing files. Recall that the DragDrop.DoDragDrop method is synchronous (i.e., does not return until the drag-and-drop operation is complete), and the obvious consequence is that creating a virtual file on the fly isn't practical with this API. Specifically, the bits already need to exist on disk by the time the user starts the drag operation - but you don't know what data they're going to drag until they start! It's a classic Catch-22...

The natural next step is to consider whether subclassing DataObject would help - but it's sealed, so that's a pretty quick dead end.

Move on to consider whether the System.Windows.IDataObject interface used by DataObject would be useful. But it seems not; it's pretty much the same API as DataObject which we've already dismissed.

So that leaves us looking at the System.Runtime.InteropServices.ComTypes.IDataObject interface which is a simple managed representation of the actual IDataObject COM interface that the shell uses directly. Clearly, anything is possible at this point, so if we can just channel our inner Raymond, we ought to be in business!


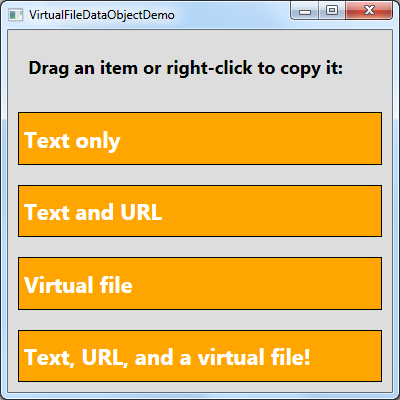
The good news is that I've already done this for you. I've even written a simple WPF application to show how everything fits together:

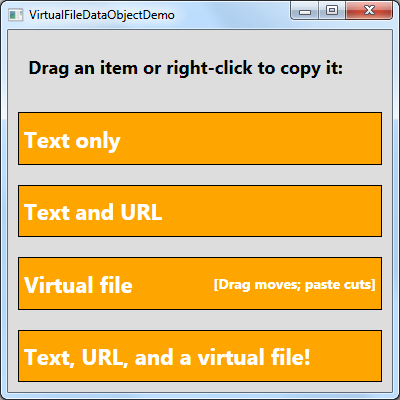
VirtualFileDataObjectDemo sample application


[Click here to download the complete code for VirtualFileDataObject and the sample application.]


What I've done is write a custom IDataObject class called VirtualFileDataObject that does all the hard work for you. All you need to do is provide the relevant data, and your users will be dragging-and-dropping virtual files in no time. And what's really neat is that writing the code to support drag-and-drop automatically gives complete support for the clipboard because the Clipboard.SetDataObject method uses the same IDataObject interface!

Let's look at the sample scenarios to understand how VirtualFileDataObject is used:


Text only

var virtualFileDataObject = new VirtualFileDataObject();

// Provide simple text (in the form of a NULL-terminated ANSI string)
virtualFileDataObject.SetData(
    (short)(DataFormats.GetDataFormat(DataFormats.Text).Id),
    Encoding.Default.GetBytes("This is some sample text\0"));

DoDragDropOrClipboardSetDataObject(e.ChangedButton, Text, virtualFileDataObject);

This is the simplest possible scenario - just to show off that simple things stay simple with VirtualFileDataObject. Here's the signature for the SetData method used above:

/// <summary>
/// Provides data for the specified data format (HGLOBAL).
/// </summary>
/// <param name="dataFormat">Data format.</param>
/// <param name="data">Sequence of data.</param>
public void SetData(short dataFormat, IEnumerable<byte> data)

Note that it operates in "HGLOBAL mode" where all the data is provided at the time of the call. Note also that it doesn't know anything about what the data is, so it's up to the caller to make sure it's in the right format. Specifically, the right format for DataFormats.Text is a NULL-terminated ANSI string, so that's what the sample passes in.

Aside: The DoDragDropOrClipboardSetDataObject method used above is a simple helper method for the test application - it calls DragDrop.DoDragDrop or Clipboard.SetDataObject depending on what the user did. It's not very exciting, so I won't be showing it (or the VirtualFileDataObject constructor) in the following examples.


Text and URL

// Provide simple text and a URL in priority order
// (both in the form of a NULL-terminated ANSI string)
virtualFileDataObject.SetData(
    (short)(DataFormats.GetDataFormat(CFSTR_INETURLA).Id),
    Encoding.Default.GetBytes("http://blogs.msdn.com/delay/\0"));
virtualFileDataObject.SetData(
    (short)(DataFormats.GetDataFormat(DataFormats.Text).Id),
    Encoding.Default.GetBytes("http://blogs.msdn.com/delay/\0"));

Another simple example based on Raymond's discussion of drag-and-drop into Internet Explorer. For our purposes, this example demonstrates that you can set multiple data formats and that formats other than those exposed by WPF's DataFormats enumeration are easy to deal with. Per the guidelines, supported formats are provided in order by priority, with higher priority formats coming first.


Virtual file

// Provide a virtual file (generated on demand) containing the letters 'a'-'z'
virtualFileDataObject.SetData(new VirtualFileDataObject.FileDescriptor[]
{
    new VirtualFileDataObject.FileDescriptor
    {
        Name = "Alphabet.txt",
        Length = 26,
        ChangeTimeUtc = DateTime.Now.AddDays(-1),
        StreamContents = stream =>
            {
                var contents = Enumerable.Range('a', 26).Select(i => (byte)i).ToArray();
                stream.Write(contents, 0, contents.Length);
            }
    },
});

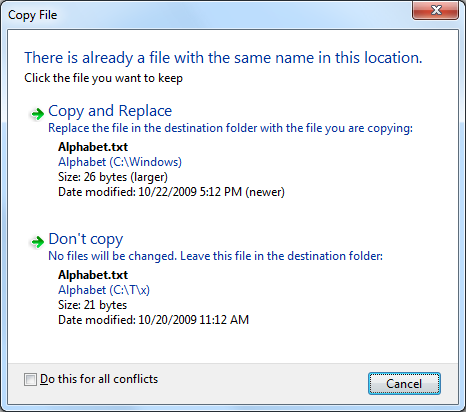
At last, something juicy! This example creates a virtual file named Alphabet.txt that's 26 bytes long and appears to have been written exactly one day ago. The contents of this file aren't generated until they're actually required by the drop target, so there's no wasted effort if the user doesn't start the drag, aborts it, or whatever. When the file's contents are eventually needed, VirtualFileDataObject calls the user-provided Action (not necessarily a lambda expression, though I've used one here for conciseness) and passes it a write-only Stream instance for writing the data. The user code writes to this stream as much or as little as necessary, then returns control to VirtualFileDataObject in order to complete the operation.

The file that gets created when you drop/paste this item into a folder looks just like you'd expect. And because VirtualFileDataObject supports the length and change time fields, Windows has all the information it needs to help the user resolve possible conflicts:

Windows conflict dialog

Here's the relevant SetData method (note that you can provide an arbitrary number of FileDescriptor instances, so you can create as many virtual files as you want):

/// <summary>
/// Provides data for the specified data format (FILEGROUPDESCRIPTOR/FILEDESCRIPTOR)
/// </summary>
/// <param name="fileDescriptors">Collection of virtual files.</param>
public void SetData(IEnumerable<FileDescriptor> fileDescriptors)

It makes use of another SetData method that's handy for dealing with "ISTREAM mode":

/// <summary>
/// Provides data for the specified data format and index (ISTREAM).
/// </summary>
/// <param name="dataFormat">Data format.</param>
/// <param name="index">Index of data.</param>
/// <param name="streamData">Action generating the data.</param>
/// <remarks>
/// Uses Stream instead of IEnumerable(T) because Stream is more likely
/// to be natural for the expected scenarios.
/// </remarks>
public void SetData(short dataFormat, int index, Action<Stream> streamData)

And accepts data in the following form:

/// <summary>
/// Class representing a virtual file for use by drag/drop or the clipboard.
/// </summary>
public class FileDescriptor
{
    /// <summary>
    /// Gets or sets the name of the file.
    /// </summary>
    public string Name { get; set; }

    /// <summary>
    /// Gets or sets the (optional) length of the file.
    /// </summary>
    public UInt64? Length { get; set; }

    /// <summary>
    /// Gets or sets the (optional) change time of the file.
    /// </summary>
    public DateTime? ChangeTimeUtc { get; set; }

    /// <summary>
    /// Gets or sets an Action that returns the contents of the file.
    /// </summary>
    public Action<Stream> StreamContents { get; set; }
}


Text, URL, and a virtual file!

// Provide a virtual file (downloaded on demand), its URL, and descriptive text
virtualFileDataObject.SetData(new VirtualFileDataObject.FileDescriptor[]
{
    new VirtualFileDataObject.FileDescriptor
    {
        Name = "DelaysBlog.xml",
        StreamContents = stream =>
            {
                using(var webClient = new WebClient())
                {
                    var data = webClient.DownloadData("http://blogs.msdn.com/delay/rss.xml");
                    stream.Write(data, 0, data.Length);
                }
            }
    },
});
virtualFileDataObject.SetData(
    (short)(DataFormats.GetDataFormat(CFSTR_INETURLA).Id),
    Encoding.Default.GetBytes("http://blogs.msdn.com/delay/rss.xml\0"));
virtualFileDataObject.SetData(
    (short)(DataFormats.GetDataFormat(DataFormats.Text).Id),
    Encoding.Default.GetBytes("[The RSS feed for Delay's Blog]\0"));

Finally, here's a sample that pulls everything together in a nice, fancy package with a bow on top. The text is an informative snippet, the URL is a link to an RSS feed, and the virtual file is the dynamically downloaded content of that RSS feed! Way cool - it's like there's this big file sitting around that the user can drop anywhere they want - except that it only really exists on the web and it's always up to date whenever you drop it somewhere!

As you can see, the VirtualFileDataObject class makes the whole scenario really easy and approachable - even if you're not an expert on shell interoperability. It's pretty snazzy, I'd say. :)


There's just one small problem...

If you tried the drag-and-drop version of the last sample above on a machine with a slow network connection, you probably noticed that the sample application became unresponsive as soon as you dropped the virtual file and didn't recover until the download completed. This is a natural consequence of the DoDragDrop method being synchronous and getting called from the UI thread (like it should be). In most scenarios, you probably won't notice this problem because generating the file's data is practically instantaneous. But when there's a delay, unresponsiveness is a possibility. The good news is that there's an official technique for solving this problem. The bad news is that it doesn't work for WPF apps. The good news is that I can show you how to make it work anyway.

But that's a topic for another blog post - one that I'll write in a week or so... :)


Updated 2017-04-20: The sample behavior is slightly different on Windows 10. The cause was hard to track down, but feedback and investigation have determined that this code and sample work correctly as-is on Windows 10 (just like on previous versions of Windows). What's different is how Windows 10 renders the mouse pointer during a drag of a virtual file when only DragDropEffects.Move is specified. Although previous versions of Windows would show the "move" icon whether or not the Shift key was down to force a "move" operation, Windows 10 shows the "no smoking" icon by default and only shows the "move" icon when Shift is held down. The lack of fallback from "copy" to "move" on Windows 10 makes it seem like the virtual file drag part of the sample is broken, though it works fine when the modifier key is used. The workaround is to use the modifier key or pass DragDropEffects.Copy.

Brevity is the soul of wit [A free, easy, custom URL shortening solution for ASP.NET!]

I tend to write pretty long blog post titles.

There, I said it.

That's the first step, right? Admitting the problem? Except I don't usually think it's a problem... :) Nobody's going to type post URLs, anyway - long ones are really only an issue in one scenario: Twitter. And there are already plenty of solutions for URL shortening, so why does the world need another one?

It probably doesn't. But I wanted one anyway. In particular, I wanted something ridiculously simple to manage that I had complete control over and that didn't depend on how my web site host configured their server. I wanted to be sure I could use human-readable aliases and never need to worry about namespace collisions (a problem with existing services because all the good names have been taken). Besides, I don't see the point in relying on someone else (or some other web site) to do something I can do for myself pretty easily.


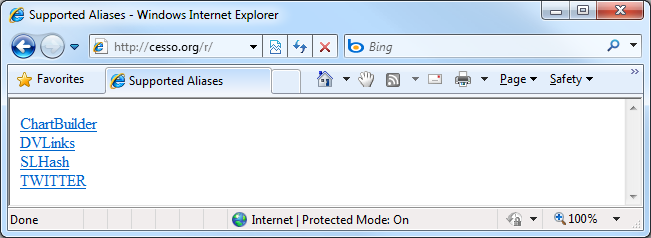
So as long as I'm writing my own URL shortener, I might as well give it a special power or something, right? Well, one thing that seemed pretty useful (to me and you) was an easy way to list all the supported aliases. Therefore, when you navigate to the root of the redirect namespace on my web site, that's just what you'll get:

Custom URL shortener in action


Now, when I want to point to a blog or sample of mine, instead of linking to it like this:

http://blogs.msdn.com/delay/archive/2009/07/19/my-new-home-page-enhanced-updated-collection-of-great-silverlight-wpf-data-visualization-resources.aspx

I can link to it like this:

http://cesso.org/r/DVLinks

What's more, because these redirects are of the 302/Found variety, I can update where they go when new content becomes available without having to change any existing content. This is something I've wanted for my links post(s) ever since I posted the first version! Problem solved: from now on, the DVLinks alias will always take you to my most recent post of Data Visualization links.

Some of the aliases above use MixedCase and some use ALLCAPS - there's actually meaning behind that. When I create an alias I intend to be widely useful and expect to use more than once, I'll use mixed case like I did with DVLinks. But when I'm creating an alias just so I can post it to Twitter, I'll use all caps like I did for TWITTER. This way, it's easy to browse my list of aliases and pick out the particularly interesting ones.


Here's the complete code for the IHttpModule-based URL shortener I wrote last night. It's standard ASP.NET and doesn't use any .NET 3.5 features, so it should work fine on pretty much any ASP.NET server.

public class UrlShortener : IHttpModule
{
    /// <summary>
    /// The prefix (directory/namespace) for all redirect requests.
    /// </summary>
    private const string RedirectPrefix = "~/r/";

    /// <summary>
    /// Maintains a mapping from alias to Uri for all redirect entries.
    /// </summary>
    private IDictionary<string, Uri> _aliases =
         new SortedDictionary<string, Uri>(StringComparer.OrdinalIgnoreCase);

    /// <summary>
    /// Initializes the IHttpModule instance.
    /// </summary>
    /// <param name="context">HttpApplication instance.</param>
    public void Init(HttpApplication context)
    {
        // Populate the alias mappings
        AddAlias("ChartBuilder", "https://dlaa.me/Samples/ChartBuilder/");
        AddAlias("DVLinks",      "http://blogs.msdn.com/delay/archive/2009/07/19/my-new-home-page-enhanced-updated-collection-of-great-silverlight-wpf-data-visualization-resources.aspx");
        AddAlias("SLHash",       "https://dlaa.me/Samples/ComputeFileHashes/");
        AddAlias("TWITTER",      "http://blogs.msdn.com/delay/archive/2009/10/13/if-all-my-friends-jumped-off-a-bridge-apparently-i-would-too-just-created-a-twitter-account-davidans.aspx");

        context.BeginRequest += new EventHandler(HttpApplication_BeginRequest);
    }

    /// <summary>
    /// Adds an alias/Uri pair and validates it.
    /// </summary>
    /// <param name="alias">Alias to add.</param>
    /// <param name="uri">Uri to associate with the alias.</param>
    private void AddAlias(string alias, string uri)
    {
        // Validate the URI when adding it
        _aliases.Add(alias, new Uri(uri, UriKind.Absolute));
    }

    /// <summary>
    /// Handles the HttpApplication's BeginRequest event.
    /// </summary>
    /// <param name="source">HttpApplication source.</param>
    /// <param name="e">Event arguments.</param>
    private void HttpApplication_BeginRequest(object source, EventArgs e)
    {
        // Check if the request is a redirect attempt
        HttpApplication context = (HttpApplication)source;
        string requestPath = context.Request.AppRelativeCurrentExecutionFilePath;
        if (requestPath.StartsWith(RedirectPrefix, StringComparison.OrdinalIgnoreCase))
        {
            // Extract the alias
            string alias = requestPath.Substring(RedirectPrefix.Length);
            if (_aliases.ContainsKey(alias))
            {
                // Known alias; redirect the user there
                context.Response.Redirect(_aliases[alias].ToString());
            }
            else
            {
                // Invalid alias; write a simple list of all known aliases
                using (HtmlTextWriter writer = new HtmlTextWriter(context.Response.Output, ""))
                {
                    writer.RenderBeginTag(HtmlTextWriterTag.Html);
                    writer.RenderBeginTag(HtmlTextWriterTag.Head);
                    writer.RenderBeginTag(HtmlTextWriterTag.Title);
                    writer.Write("Supported Aliases");
                    writer.RenderEndTag();
                    writer.RenderEndTag();
                    writer.RenderBeginTag(HtmlTextWriterTag.Body);
                    foreach (string key in _aliases.Keys)
                    {
                        writer.AddAttribute(HtmlTextWriterAttribute.Href, _aliases[key].ToString());
                        writer.RenderBeginTag(HtmlTextWriterTag.A);
                        writer.Write(key);
                        writer.RenderEndTag();
                        writer.WriteBreak();
                        writer.WriteLine();
                    }
                    writer.RenderEndTag();
                    writer.RenderEndTag();
                }
                context.Response.End();
            }
        }
    }

    /// <summary>
    /// Disposes of resources.
    /// </summary>
    public void Dispose()
    {
    }
}

To enable this URL shortener for IIS 7, just save the code above to a .CS file, put that file in the App_Code directory at the root of your web site, and register it in web.config with something like the following:

<?xml version="1.0"?>
<configuration>
    <system.webServer>
        <modules>
            <add name="UrlShortener" type="UrlShortener"/>
        </modules>
    </system.webServer>
</configuration>

(For IIS 6, you'll need to change system.webServer to system.web and modules to httpModules - otherwise it's just the same.)

Tags: Technical

Give your computer insomnia [Free tool and source code to temporarily prevent a machine from going to sleep!]

The default power settings for Windows are set up so a computer will go to sleep after 15 to 30 minutes of inactivity (i.e., no mouse or keyboard input). This is great because a computer that's not being used doesn't need to be running at full power. By letting an idle machine enter sleep mode, the user benefits from a significant reduction in electricity use, heat generation, component wear, etc.. And because sleep mode preserves the state of everything in memory, it's quick to enter, quick to exit, and doesn't affect the user's work-flow. All the same applications continue running, windows stay open and where they were, etc.. So sleep mode is a Good Thing and I'm a fan.

However, sometimes a computer is busy even though someone isn't actively using the mouse and keyboard; common examples include playing a movie, burning a DVD, streaming music, etc.. In these cases, you don't want the machine to go to sleep because you're using it - even though you're not actually using it! So most media players and disc burners tell Windows not to go to sleep while they're running. In fact, there's a dedicated API for exactly this purpose: the SetThreadExecutionState Win32 Function.

But what about those times when the computer is busy doing something and the relevant program doesn't suppress the default sleep behavior? For example, it might be downloading a large file, re-encoding a music collection, backing up the hard drive, or hashing the entire contents of the disk. You don't want the machine to go to sleep for now, but are otherwise happy with the default sleep behavior. Unfortunately, the easiest way I know of to temporarily suppress sleeping is to go to Control Panel, open the Power Options page, change the power plan settings, commit them - and then remember to undo everything once the task is finished. It's not hard; but it's kind of annoying...


So here's a better way:

Insomnia application

Insomnia is a simple WPF application that calls the SetThreadExecutionState API to disable sleep mode for as long as it's running. (Note that the display can still power off during this time - it's just sleep for the computer that's blocked.) Closing the Insomnia window immediately restores whatever sleep mode was in effect before it was run. It couldn't be easier!


[Click here to download the Insomnia application along with its complete source code.]


Notes:

  • Insomnia basically boils down to a single function call - but to a function that's a Win32 API and is not part of the .NET Framework. This is where a very powerful feature saves the day: Platform Invoke. For those who aren't familiar with it, P/Invoke (as it's called) lets a managed application call into the APIs exposed by a native DLL. All it takes is a dash of the DllImport attribute and a little bit of translation from the Win32 types to their managed counterparts. The MSDN documentation goes into lots of detail here, and I encourage interested parties to go there.
  • One popular resource for P/Invoke assistance is PInvoke.net, where you can find managed definitions for hundreds of native APIs. But I usually just end up creating my own - if nothing else, it's a good learning exercise. :)
  • The Insomnia window has its Topmost property set to True so it's always visible and people will be less likely to accidentally leave their computers sleep-less. Other than taking up a small bit of screen space and memory, Insomnia consumes no system resources, so it won't get in the way of whatever else is running.
  • It is considered polite to leave things the way you found them, so Insomnia makes an extra call to SetThreadExecutionState when it's closed in order to restore things to how they were. However, this is really more for show than anything else, because the execution state is clearly per-thread and Insomnia's thread is about to die anyway.
  • I did a quick web search for similar tools before I wrote Insomnia and there are a few out there. Most of what I found was for Linux and Mac for some reason, but I'm sure Insomnia isn't the first of its kind for Windows. However, that doesn't stop it from being a nice introduction to P/Invoke - and besides, I'm always happier running my own code! :)


Finally, here's the implementation:

public partial class Window1 : Window
{
    private uint m_previousExecutionState;

    public Window1()
    {
        InitializeComponent();

        // Set new state to prevent system sleep (note: still allows screen saver)
        m_previousExecutionState = NativeMethods.SetThreadExecutionState(
            NativeMethods.ES_CONTINUOUS | NativeMethods.ES_SYSTEM_REQUIRED);
        if (0 == m_previousExecutionState)
        {
            MessageBox.Show("Call to SetThreadExecutionState failed unexpectedly.",
                Title, MessageBoxButton.OK, MessageBoxImage.Error);
            // No way to recover; fail gracefully
            Close();
        }
    }

    protected override void OnClosed(System.EventArgs e)
    {
        base.OnClosed(e);

        // Restore previous state
        if (0 == NativeMethods.SetThreadExecutionState(m_previousExecutionState))
        {
            // No way to recover; already exiting
        }
    }

    private void Hyperlink_RequestNavigate(object sender, RequestNavigateEventArgs e)
    {
        // Start an instance of the NavigateUri (in a browser window)
        Process.Start(((Hyperlink)sender).NavigateUri.ToString());
    }
}

internal static class NativeMethods
{
    // Import SetThreadExecutionState Win32 API and necessary flags
    [DllImport("kernel32.dll")]
    public static extern uint SetThreadExecutionState(uint esFlags);
    public const uint ES_CONTINUOUS = 0x80000000;
    public const uint ES_SYSTEM_REQUIRED = 0x00000001;
}

When framework designers outsmart themselves [How to: Perform streaming HTTP uploads with .NET]

As part of a personal project, I had a scenario where I expected to be doing large HTTP uploads (ex: PUT) over a slow network connection. The typical user experience here is to show a progress bar, and that's exactly what I wanted to do. So I wrote some code to start the upload and then write to the resulting NetworkStream in small chunks, updating the progress bar UI after each chunk was sent. In theory (and my test harness), this approach worked perfectly; in practice, it did not...

What I saw instead was that the progress bar would quickly go from 0% to 100% - then the application would stall for a long time before completing the upload. Which is not a good user experience, I'm afraid. I'll show what I did wrong in a bit, but first let's take a step back to look at the sample application I've written for this post.


The core of the sample app is a simple HttpListener that logs a message whenever it begins an operation, reads an uploaded byte, and finishes reading a request:

// Create a simple HTTP listener
using (var listener = new HttpListener())
{
    listener.Prefixes.Add(_uri);
    listener.Start();

    // ...

    // Trivially handle each action's incoming request
    for (int i = 0; i < actions.Length; i++)
    {
        var context = listener.GetContext();
        var request = context.Request;
        Log('S', "Got " + request.HttpMethod + " request");
        using (var stream = request.InputStream)
        {
            while (-1 != stream.ReadByte())
            {
                Log('S', "Read request byte");
            }
            Log('S', "Request complete");
        }
        context.Response.Close();
    }
}
Aside: The code is straightforward, but it's important to note that HttpListener is only able to start listening when run with Administrator privileges (otherwise it throws "HttpListenerException: Access is denied"). So if you're going to try the sample yourself, please remember to run it from an elevated Visual Studio or Command Prompt instance.


With our test harness in place, let's start with the simplest possible code to upload some data:

/// <summary>
/// Test action that uses WebClient's UploadData to do the PUT.
/// </summary>
private static void PutWithWebClient()
{
    using (var client = new WebClient())
    {
        Log('C', "Start WebClient.UploadData");
        client.UploadData(_uri, "PUT", _data);
        Log('C', "End WebClient.UploadData");
    }
}

Here's the resulting output from the Client and Server pieces):

09:27:07.72 <C> Start WebClient.UploadData
09:27:07.76 <S> Got PUT request
09:27:07.76 <S> Read request byte
09:27:07.76 <S> Request complete
09:27:07.76 <C> End WebClient.UploadData

The WebClient's UploadData method offers a super-simple way of performing an upload that's a great choice when it works for your scenario. However, all the upload data must be passed as a parameter to the method call, and that's not always desirable (especially for large amounts of data like I was dealing with). Furthermore, it's all sent to the server in arbitrarily large chunks, so our attempt at frequent progress updates isn't likely to work out very well. And while there's the OnUploadProgressChanged event for getting status information about an upload, WebClient doesn't offer the granular level of control that's often nice to have.


So WebClient is a great entry-level API for uploading - but if you're looking for more control, you probably want to upgrade to HttpWebRequest:

/// <summary>
/// Test action that uses a normal HttpWebRequest to do the PUT.
/// </summary>
private static void PutWithNormalHttpWebRequest()
{
    var request = (HttpWebRequest)(WebRequest.Create(_uri));
    request.Method = "PUT";
    Log('C', "Start normal HttpWebRequest");
    using (var stream = request.GetRequestStream())
    {
        foreach (var b in _data)
        {
            Thread.Sleep(1000);
            Log('C', "Writing byte");
            stream.WriteByte(b);
        }
    }
    Log('C', "End normal HttpWebRequest");
    ((IDisposable)(request.GetResponse())).Dispose();
}

Aside from the Sleep call I've added to simulate client-side processing delays, this is quite similar to the code I wrote for my original scenario. Here's the output:

09:27:08.78 <C> Start normal HttpWebRequest
09:27:09.79 <C> Writing byte
09:27:10.81 <C> Writing byte
09:27:11.82 <C> Writing byte
09:27:12.83 <C> Writing byte
09:27:13.85 <C> Writing byte
09:27:13.85 <C> End normal HttpWebRequest
09:27:13.85 <S> Got PUT request
09:27:13.85 <S> Read request byte
09:27:13.85 <S> Request complete

Although I've foreshadowed this unsatisfactory result, maybe you can try to act a little surprised that it didn't work the way we wanted... :) The data bytes got written at 1 second intervals over the span of 5 seconds to simulate a gradual upload from the client - but on the server side it all arrived at the same time after the client was completely finished making its request. This is exactly the behavior I was seeing in my application, so it's nice that we've managed to reproduce the problem.

But what in the world is going on here? Why is that data sitting around on the client for so long?


The answer lies in the documentation for the AllowWriteStreamBuffering property (default value: True):

Remarks
When AllowWriteStreamBuffering is true, the data is buffered in memory so it is ready to be resent in the event of redirections or authentication requests.

Notes to Implementers:
Setting AllowWriteStreamBuffering to true might cause performance problems when uploading large datasets because the data buffer could use all available memory.

In trying to save me from the hassle of redirects and authentication requests, HttpWebRequest has broken my cool streaming scenario. :( Fortunately, it's easy to fix - just set the property to False, right?

Wrong; that'll get you one of these:

ProtocolViolationException: When performing a write operation with AllowWriteStreamBuffering set to false, you must either set ContentLength to a non-negative number or set SendChunked to true.

Okay, so we need to set one more property before we're done. Fortunately, the choice was easy for me - my target server didn't support chunked transfer encoding, so choosing to set ContentLength was a no-brainer. The only catch is that you need to know how much data you're going to upload before you start - but that's probably true most of the time anyway! And I think ContentLength is a better choice in general, because the average web server is more likely to support it than chunked encoding.


Making the highlighted changes below gives the streaming upload behavior we've been working toward:

/// <summary>
/// Test action that uses an unbuffered HttpWebRequest to do the PUT.
/// </summary>
private static void PutWithUnbufferedHttpWebRequest()
{
    var request = (HttpWebRequest)(WebRequest.Create(_uri));
    request.Method = "PUT";
    // Disable AllowWriteStreamBuffering allows the request bytes to send immediately
    request.AllowWriteStreamBuffering = false;
    // Doing nothing else will result in "ProtocolViolationException: When performing
    // a write operation with AllowWriteStreamBuffering set to false, you must either
    // set ContentLength to a non-negative number or set SendChunked to true.
    // The most widely supported approach is to set the ContentLength property
    request.ContentLength = _data.Length;
    Log('C', "Start unbuffered HttpWebRequest");
    using (var stream = request.GetRequestStream())
    {
        foreach (var b in _data)
        {
            Thread.Sleep(1000);
            Log('C', "Writing byte");
            stream.WriteByte(b);
        }
    }
    Log('C', "End unbuffered HttpWebRequest");
    ((IDisposable)(request.GetResponse())).Dispose();
}

Here's the proof - note how each byte gets uploaded to the server as soon as it's written:

09:27:14.86 <C> Start unbuffered HttpWebRequest
09:27:14.86 <S> Got PUT request
09:27:15.88 <C> Writing byte
09:27:15.88 <S> Read request byte
09:27:16.89 <C> Writing byte
09:27:16.89 <S> Read request byte
09:27:17.90 <C> Writing byte
09:27:17.90 <S> Read request byte
09:27:18.92 <C> Writing byte
09:27:18.92 <S> Read request byte
09:27:19.93 <C> Writing byte
09:27:19.93 <C> End unbuffered HttpWebRequest
09:27:19.93 <S> Read request byte
09:27:19.93 <S> Request complete


Like many things in life, it's easy once you know the answer! :) So if you find yourself wondering why your streaming uploads aren't so streaming, have a look at the AllowWriteStreamBuffering property and see if maybe that's the cause of your problems.


[Please click here to download a sample application demonstrating everything shown here.]

Tags: Technical

Following up on some of the attention [Live sample posted and a *very* small tweak to the Html5Canvas source code!]

I posted the source code for a Silverlight implementation of the HTML 5 <canvas> API yesterday and some readers have been pretty interested in the concept/implementation. Thanks for all your comments and feedback!

Earlier today, kind user Fabien Ménager left a comment reporting an unhandled exception in the sample app and was generous enough to follow up by sending me the text of the exception. And as soon as I saw it, I knew the problem - both because of what it said and because of the language it was in!

Here, you give it a try:

System.FormatException: Le format de la chaîne d'entrée est incorrect.

Here's a hint: the operating system's culture settings for France (and many other countries) use a ',' for the decimal separator instead of '.' (as is used in the United States). For example, while Pi would be written as "3.14" with the US culture settings, it would be written as "3,14" with French culture settings. And while Html5Canvas doesn't accept any user input, it does parse some of the JavaScript input that makes up the script... Specifically, my sample application includes the following line:

context.fillStyle = "rgba(255, 127, 39, 0.8)";

The <canvas> specification allows for strings to be assigned to the fillStyle property, so it's necessary for Html5Canvas to parse that string. And it was the "0.8" alpha value that was the problem here. Attempting to parse that value with the user's culture settings will fail for a culture that uses ',' as the decimal separator. This is actually a common problem for text formats that are meant to be used in multiple cultures - and the typical solution is to require that the text always be written for some form of invariant culture (which typically adheres to the US's conventions). Therefore, the trivial fix was to parse that value according to the invariant culture (i.e., always use '.' as the decimal separator) instead of using the default parsing behavior which honors the user's settings.

Aside: The default behavior is nearly always what you want... except for very rarely when it's not... like this time! :)

Of course, if I'd reviewed the project's code analysis warnings a few days ago, I would have found this issue earlier. And while I usually do that for all my sample code, I skipped it this time because it was proof-of-concept code and because I knew the "Naming" analysis rules threw lots of warnings for the official <canvas> API (mainly because JavaScript tends to follow different conventions than .NET). So as punishment for my misdeed, I went ahead and fixed (or suppressed) all of the non-"Naming" code analysis warnings in the project!

To be clear, there is no functional change because of this - but now the code is just a little bit cleaner. :)


[Please click here to download the updated source code to Html5Canvas and its sample application.]


And while I was at it, I decided to post the sample application in runnable form just in case there were some people who wanted to watch the Hypotrochoid draw itself, but didn't want to compile the sample themselves.


[Click here or on the image below to run the sample application in your browser.]

Sample application in IE


It has been great to see all the interest in this project over the past couple of days - thanks very much for everyone's support, feedback, and kind words!!

Using one platform to build another [HTML 5's canvas tag implemented using Silverlight!]

Background

There's been some buzz about the upcoming HTML 5 standard over the past few months. In particular, there are a couple of new features that people are looking forward to. One of them is the new <canvas> element which introduces a 2D drawing API offering a pretty rich set of functionality. If you've worked with HTML much, you can probably imagine some of the things that become possible with this. In fact, those are probably some of the same things that Flash and Silverlight are being used for today! So some people have gone as far as to suggest HTML 5 could eliminate the need for Flash and Silverlight...

I didn't know much about the <canvas> element and I wanted to understand the situation better, so I did some research. The specification for <canvas> is available from two sources: the W3C and the WHATWG. (The two groups are working together, so the spec is the same on both sites.) The API is comprised of something close to 100 interfaces, properties, and methods and offers an immediate mode programming model that's superficially similar to the Windows GDI API. At a very high level, the following concepts are defined (though Philip Taylor did some investigation a while back which suggested that no browser offered complete support):

  • Paths and shapes (move/line/curve/arc/clipping/etc.)
  • Strokes and fills (using solid colors/gradients/images/etc.)
  • Images
  • Context save/restore
  • Transformations (scale/rotate/translate/etc.)
  • Compositing (alpha/blending/etc.)
  • Text (font/alignment/measure/etc.)
  • Pixel-level manipulation
  • Shadows

There's a variety of stuff there - and as I read through the list, I was struck by how much of it is natively supported by Silverlight. Pretty much all of it, in fact! :) So I thought it might be a fun and interesting learning experience to try implementing the HTML 5 <canvas> specification in Silverlight! What better way to understand the capabilities of <canvas> than to implement them, right?

So I went off and started coding... I didn't set out to support everything and I didn't set out to write the most efficient code (in fact, some of what's there is decidedly inefficient!) - I just set out to implement enough of the specification to run some sample apps and see how hard it was.

And it turns out to have been pretty easy! Thanks to Silverlight's HTML Bridge, I had no trouble creating a Silverlight object that looks just like a <canvas> to JavaScript code running on a web page. So similar, in fact, that I'm able to run some pretty cool sample applications on my own <canvas> simply by tweaking the HTML to instantiate a Silverlight <canvas> instead of the browser's <canvas>. And as a nice side effect, Internet Explorer "magically" gains support for the <canvas> tag!

Aside: Yes, I know I'm not the first person to add <canvas> support to IE. :)


Samples

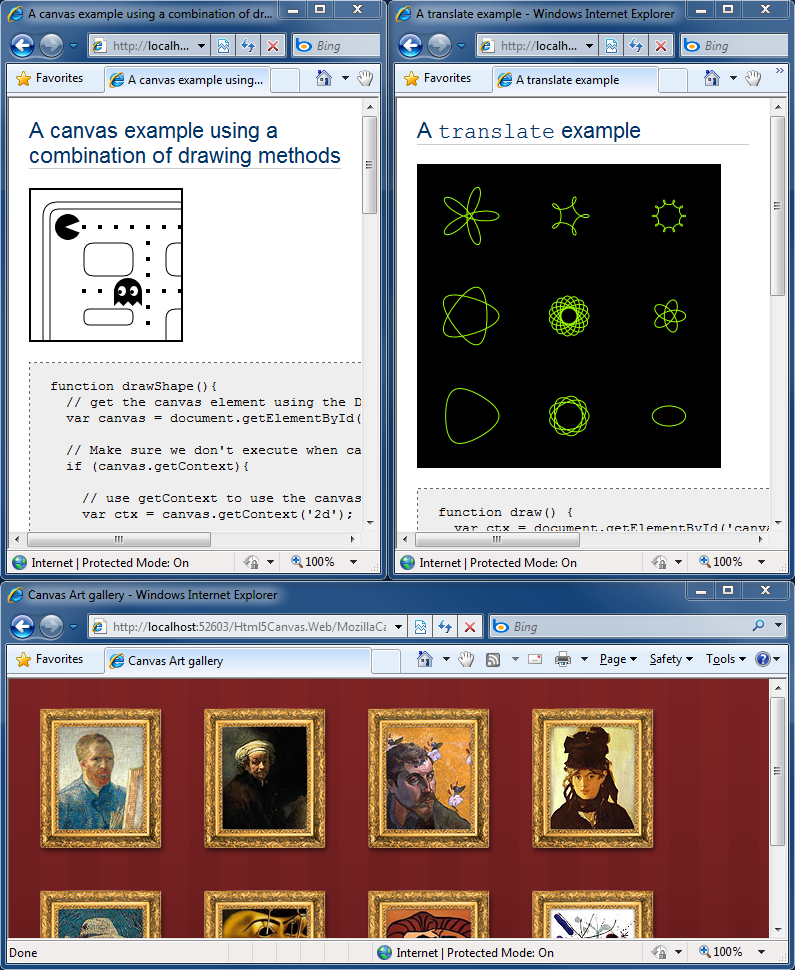
I started off easy by working my way through the Mozilla Developer Center's Canvas tutorial and implementing missing features until each of the samples loaded and rendered successfully. Here are three of my favorite samples as rendered by Html5Canvas, my custom <canvas> implementation:

Mozilla samples


Aside: It's important to note that I did NOT change the JavaScript of these (or any other) samples - I just tweaked the HTML host page to load my <canvas> implementation. My goal was API- and feature-level parity; a Silverlight implementation of <canvas> that was "plug-compatible" with the existing offerings.


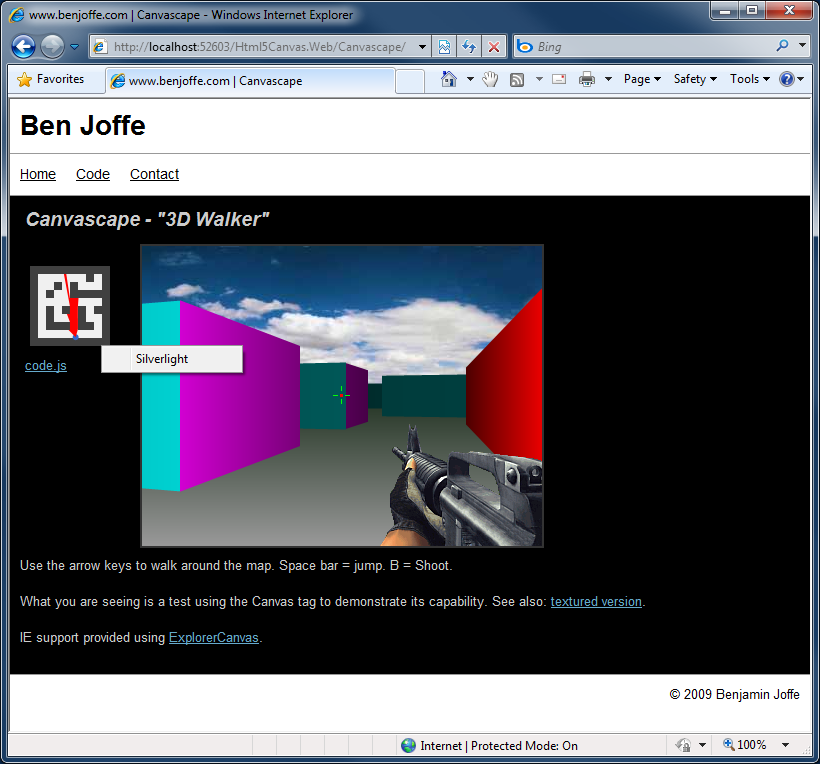
After that, I knew I just had to run Ben Joffe's Canvascape "3D Walker" because it bears a striking resemblance to one of the games I played when I was younger:

Canvascape


Aside: Be sure to look for the "Silverlight" context menu item I've included in the image above and in the next few screen shots to prove there's no trickery going on. :)


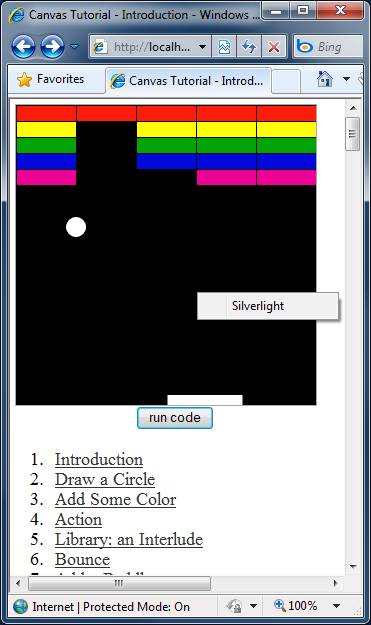
Next up was Bill Mill's Canvas Tutorial - and another shout-out to hours of misspent youth:

Canvas Tutorial


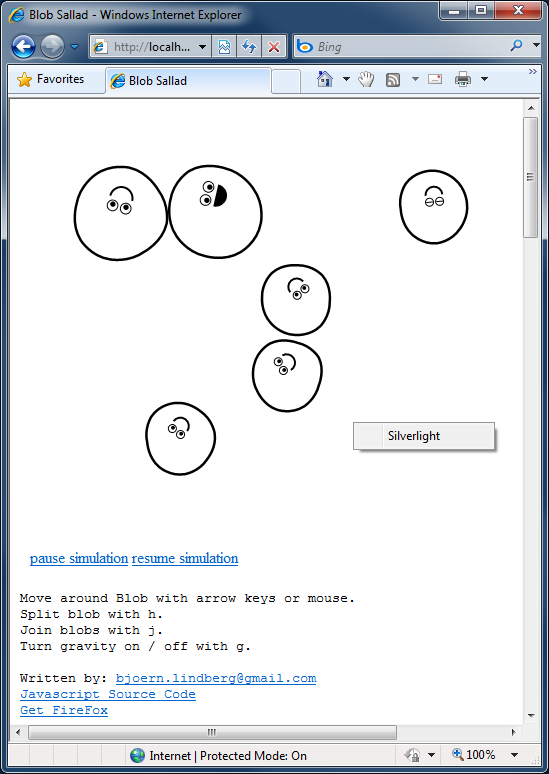
For something completely different, I got Bjoern Lindberg's Blob Sallad running:

Blob Sallad


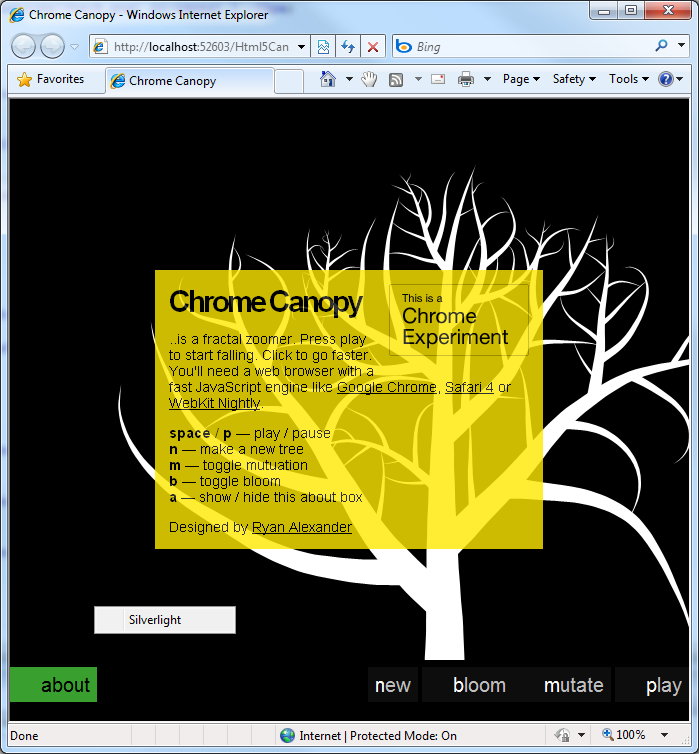
Then it was on to Ryan Alexander's Chrome Canopy fractal zoomer (despite the note, it runs okay-ish in IE8 with my Silverlight <canvas>):

Chrome Canopy


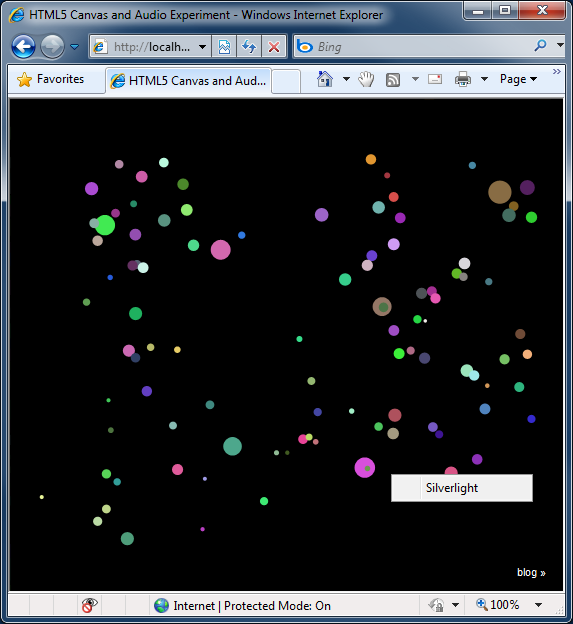
Finally, I wanted to see how the 9elements HTML5 Canvas Experiment ran:

Canvas Experiment


Whew, What a rush - those apps are really cool! :)


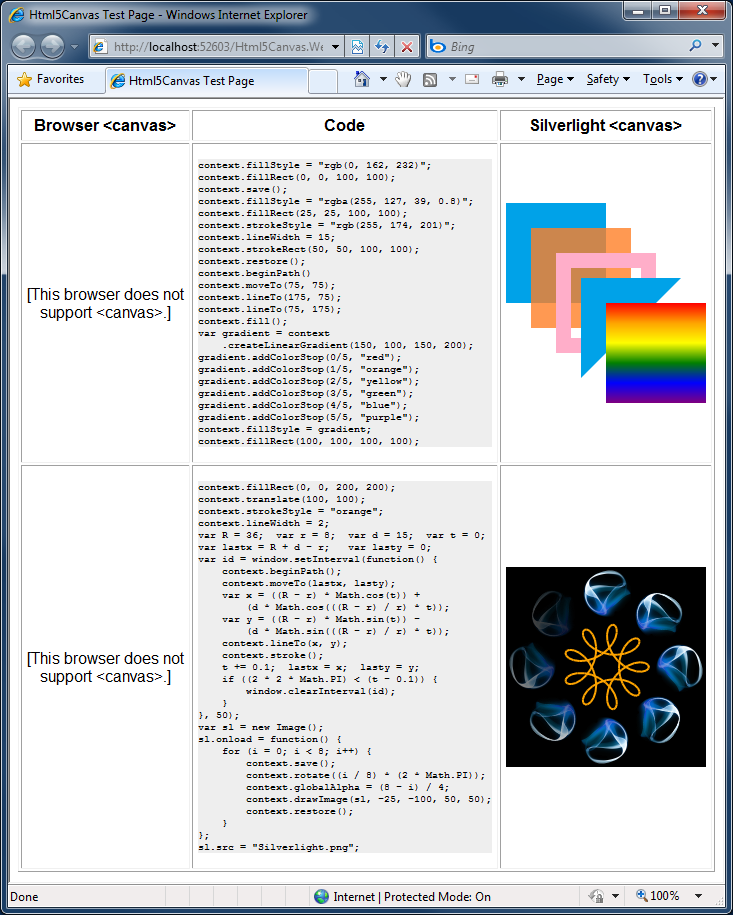
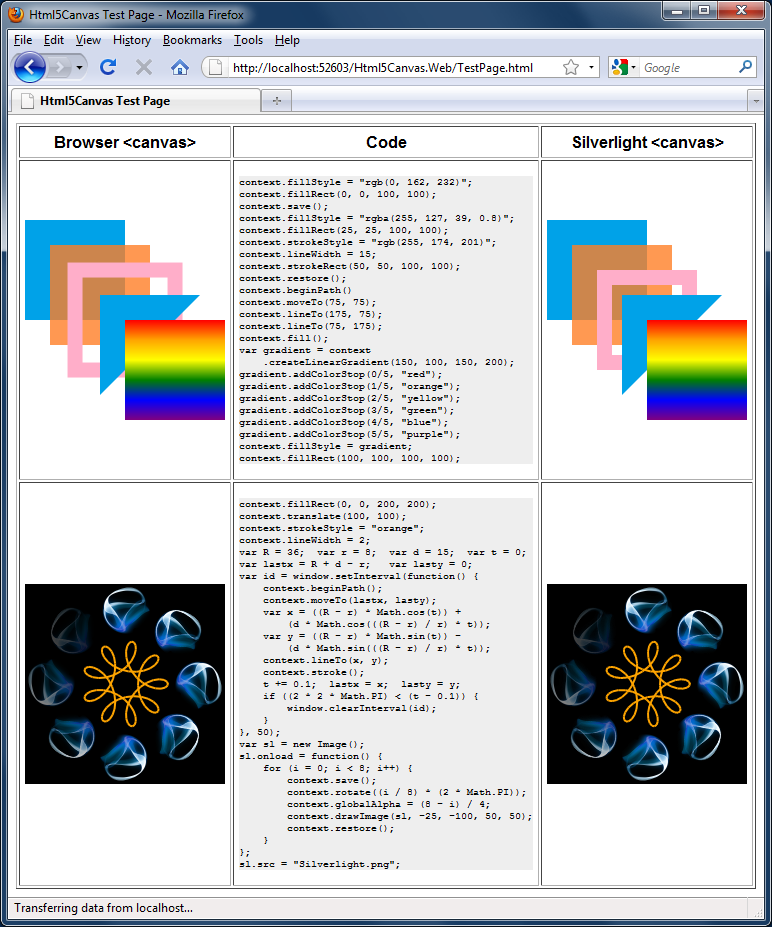
But I still wanted a sample I could include with the source code download, so I also wrote a little app to exercise most of the APIs supported by Html5Canvas (thanks to Mozilla for the Hypotrochoid animation inspiration and Wikipedia for the equation). Here it is on IE:

Sample application in IE


And wouldn't it be nice to see how Html5Canvas compares to a "real" <canvas> implementation? Sure, here's my sample running on Firefox:

Sample application in Firefox


Details

So how does it actually work? Well, I'm obviously not modifying the browser itself, so redefining the actual <canvas> tag isn't an option. Instead, I've written a simple Html5Canvas.js file which gets referenced at the top of the HTML page:

<script type="text/javascript" src="Html5Canvas.js"></script>

Among other things, it defines the handy function InsertCanvasObject(id, width, height, action) function which can be used to insert a Silverlight <canvas> thusly:

<script type="text/javascript">
    InsertCanvasObject("mycanvas", 200, 200, onCanvasLoad);
</script>

That code inserts a Silverlight object running Html5Canvas.xap that looks just like the <canvas> tag would have. Yep, it's that easy!

And it brings up an important difference between Html5Canvas and a real <canvas>: Html5Canvas can be used only after the Silverlight object has loaded - whereas <canvas> is usable as soon as the body/window has loaded (which happens sooner). This distinction is important to keep in mind if you're converting an existing page, because it requires moving the initialization call from onload to the action parameter of InsertCanvasObject. Believe it or not, that's really the only big "gotcha"!

Aside: While I could think of a few ways to avoid exposing this difference to the developer, none of them were general enough to apply universally.

Other minor differences between Html5Canvas and <canvas> are that Silverlight doesn't natively support the relevant repeat modes used by createPattern to tile images (though I could implement them without much difficulty), Silverlight doesn't support the GIF image format for use with drawImage (also easily worked around), and the conventional technique of JavaScript feature-detection by writing if (canvas.toDataURL) { ... } doesn't work because Silverlight's HTML Bridge doesn't allow a method to be treated like a property (I could work around this, too, but the extra level of indirection was unnecessarily confusing for a sample app).

Finally, let me reiterate that I did not attempt to implement the complete <canvas> specification. Instead, I implemented just enough to support the first 5 (of 6 total) Mozilla sample pages as well as the handful of applications shown above. Specifically, I've implemented everything that's not in italics in the feature list at the beginning of this post. Thinking about what it would take to add the stuff that's not implemented: text and pixel-level manipulation are both directly supported by Silverlight and should be pretty easy. Shadows seem like a natural fit for Silverlight's pixel shader support (though I haven't played around with it yet). All that's left is layer compositing, which does worry me just a little... I haven't thought about it much, but this seems like another job for WriteableBitmap, perhaps.


[Please click here to download the complete source code to Html5Canvas and the sample application shown above.]

Be sure to set the Html5Canvas.Web project as the active project and run the TestPage.html within it to see the sample application.


Summary

Html5Canvas was a fun project that definitely accomplished its goal of bringing me up to speed on HTML 5's <canvas> element! The implementation proved to be fairly straightforward, though there were a couple of challenging bits that ended up being good learning opportunities. :) The code I'm sharing here is intended to be a proof-of-concept and is not optimized for performance. However, if there's interest in making broader use of Html5Canvas, I have some ideas that should really improve things...

I hope folks find this all as interesting as I did - and maybe next time you want to add browser features, you'll use Silverlight, too! ;)